AURATON Libra U Wireless Digital Room Thermostat User Manual


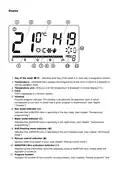


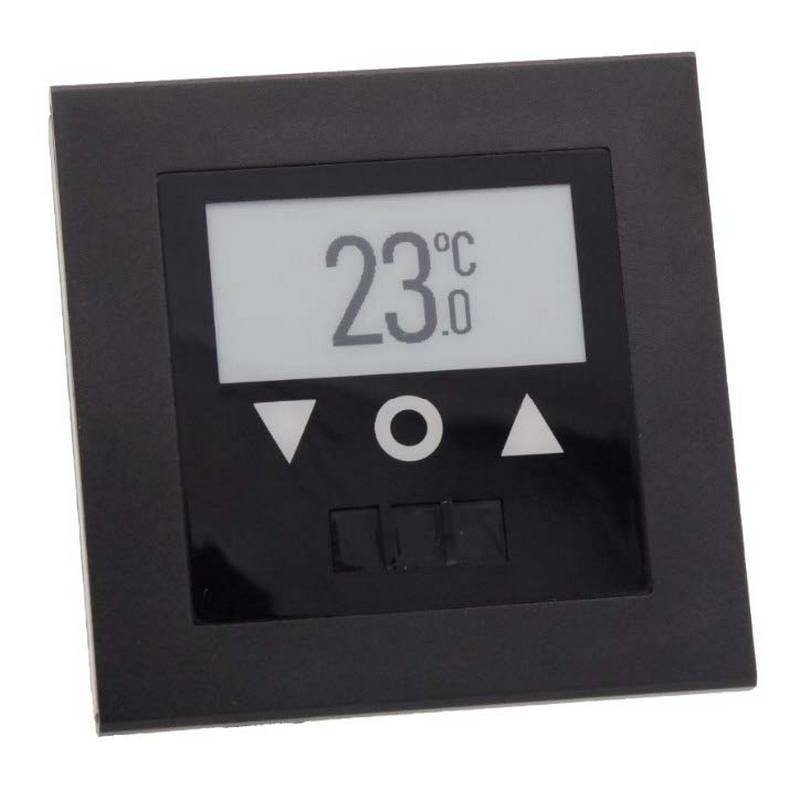
Press the
r
key to select day (rectangle on) or night temperature (no rectangle). Then, select
the time interval for the temperature selected with the knob.
| General | Details |
|---|---|
| Name | AURATON Libra U Wireless Digital Room Thermostat User Manual |
| Make | AURATON |
| Language | English |
| Filetype | PDF (Download) |
| File size | 0.3 MB |


AURATON Libra Room Thermostat User Manual

AURATON Cetus P Wired Thermostat User Manual

19810-102 Digital Room Thermostat Libra Auraton Weekly User Manual

AURATON Apus Set Wireless Thermostat with Electronic Radiator Head User Manual

AuVerte SC801 SpiritCatcher Thermostat Owner’s Manual

terneo BeeRT Digital Thermostat Instruction Manual

GENERAL LIFE ARUNA HT300S Smart Room Thermostat User Manual

Honeywell DT4 Room Thermostat User Manual

VIMAR 02912 Wi-Fi Thermostat Instruction Manual

GENERAL LIFE MITRA 250S RF Digital Room Thermostat User Manual

Schneider Electric CFMT02ZB Flush-Mounted Thermostat Instruction Manual

Moes ZigBee 002 Series Thermostat User Manual

OJ ELECTRONICS MCD5 Touch Thermostat Instructions

GENERAL Life SOLARA 330S RF Wireless Room Thermostat User Guide