
Home > CLIMATE MASTER > CLIMATE MASTER CXM2 Communicating Awc Thermostat Installation Guide
CLIMATE MASTER CXM2 Communicating Awc Thermostat Installation Guide
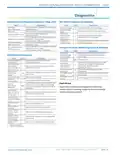
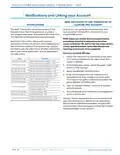


iGATE 2 COMMUNICATING (AWC) THERMOSTAT – IOM
Installation
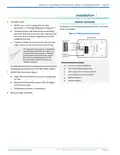
2. Remove the faceplate of the current thermostat.
Most face plates snap off or feature small screws
that will need to be removed.
INSTALLATION CONSIDERATIONS
The thermostat requires no batteries. The thermostat
is not a power stealing device and MUST have both R
and C terminals connected. See Diagram 1.
TIP: Before disconnecting any wires, take a
photo of the current wire configuration with
your mobile device.
INSTALLATION
Thermostat Location
Mercury Notice: This product does not contain
mercury. If you are replacing a product that
does contain mercury, contact your local waste–
management authority for disposal instructions.
Do not discard the old product in the regular trash.
Thermostat should be mounted:
z Approximately 5 ft. (1.5 m) above floor.
z Close to or in a frequently used room, preferably
on an inside partitioning wall.
z On a section of wall without pipes or duct work.
3. Label and Disconnect Wires.
One by one, apply a label designated to each
wire connected to the backplate of the current
thermostat then disconnect the wire from the
current thermostat backplate.
Thermostat should NOT be mounted:
z Close to a window, on an outside wall, or next to a
door leading to the outside.
z Exposed to direct light and heat from a lamp, sun,
fireplace, or other temperature-radiating object
which may cause a false reading.
TIP: Wrap the wires around a pen or
pencil to keep them from falling
inside the wall.
z Close to or in direct airflow from supply registers
z In areas with poor air circulation, such as behind
4. Remove the current backplate.
5. Mount the new base.
a door or in an alcove.
Thermostat Installation
a. Gently separate the display from the base
of the new thermostat by pulling thermostat
straight away from the base.
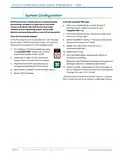
1. Turn System Power Off.
a. Go to the relevant circuit breaker panel and
switch the equipment breakers off.
b. Position the base against the wall and
determine if wall anchors from current
thermostat align with screw locations of new
base.
b. To confirm power is off, check voltage with
voltmeter to ensure that the power has been
successfully shut off before proceeding to
next step.
c. If base does not align with existing anchor
holes, mark new screw locations with a pencil.
CAUTION
Disconnect electric power to the HVAC system before installing this
product. Failure to do so could result in electric shock and/or equipment
damage. All wiring must conform to you local electrical code.
z
z
Drywall: Drill 3/16-inch hole for the anchor.
Plaster: Drill 7/32-inch hole for the anchor.
If you are replacing a current communicating
thermostat continue with the next step, if you are
installing a new system skip to step 5.
d. Pull wires through opening in base and
secure to the wall using provided screws.
TIP: Use a level to ensure
thermostat is properly aligned.
PAG E : 4
Part#: 97B0132N01 | Revised: Februar y 06, 2025
w w w. c l i m a te m a s te r. c o m

| General | Details |
|---|---|
| Name | CLIMATE MASTER CXM2 Communicating Awc Thermostat Installation Guide |
| Make | CLIMATE MASTER |
| Language | English |
| Filetype | PDF (Download) |
| File size | 1.03 MB |
 (1 votes, average: 5.00 out of 5)
 Loading...


Price Industries Disio Display Thermostat User Guide

FOLODA ME83 Heating Thermostat User Manual

EUROTRONIC Spirit ZigBee Energy Saving Radiator Thermostat User Guide

vaillant VR 92f/3 Wireless Additional Room Thermostat Instructions

Beca BAC-8000 Series Thermostat User Guide
MClimate MC-LW-FCT-01 LoRaWAN Fan Coil Thermostat User Manual

AuVerte 003001.C508 Thermostat Installation Guide

OUELLET OTL221 Single Pole Mechanical Thermostat Instructions

Honeywell TH1100DH Non Programmable Thermostat Instruction Manual

tuya MTS700N Wireless Thermostat User Manual