
Micro-Air 359 Touchscreen Thermostat Instruction Manual








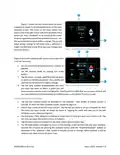


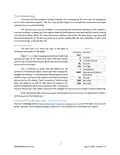
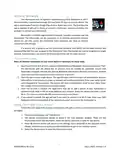


The EasyTouch 359 model 12-volt thermostats were designed to directly replace Dometic™ model
3106995 single zone DC 7.5-volt thermostats. The thermostats can be used in other applications with
certain electrical limitations as explained later in this document.
Safety First
Turn off power to the air conditioner breaker and to the 12-volt circuit powering the thermostat.
There is always a risk of shock in any system that is connected to high voltage utility power so removing
power greatly reduces that risk.
There is a risk of creating a short circuit with some of the thermostat wires during installation that
can cause a failure or undesired operation. Removing power reduces the risk you will damage something
or open a hard-to-find fuse during installation.
Installing the thermostat
There are four steps to installing the thermostat. Removing the thermostat, wiring the new
thermostat, installing the new thermostat, and finally, updating the control box wiring. Please read each
section entirely before proceeding with that section. Please perform these steps in order otherwise you
may damage your original thermostat.
Removing the old thermostat
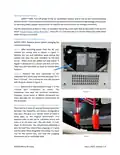
IMPORTANT: Take a picture of the wires and labeling so if there are any questions about the original
configuration later, you can see how it was connected.
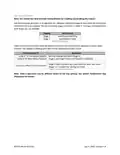
colors may be different from the normal factory suggested wire colors and not all wires may be used.
Label any that are not there with “Not used”.
3
©2023 Micro-Air Corp
July 3, 2023, revision 1.4

| General | Details |
|---|---|
| Name | Micro-Air 359 Touchscreen Thermostat Instruction Manual |
| Make | Micro-Air |
| Language | English |
| Filetype | PDF (Download) |
| File size | 0.5 MB |
 (1 votes, average: 5.00 out of 5)
 Loading...

micro-air EasyTouch 357 Multi Zone Replacement Thermostat Instruction Manual

Micro-Air EasyTouch RV 353 Touch Screen Thermostat Instruction Manual

Micro-Air EasyTouch RV 353 Thermostat Instruction Manual

micro-Air EasyTouch RV 351 Thermostat User Manual

Micro Air ETRV EasyTouch RV Thermostat Instruction Manual

micro-air EasyTouch RV 356 True Air RV Thermostat User Manual

micro-Air ASY-357-X02 EasyTouch 357 Touchscreen Thermostat User Manual

micro-Air EasyTouch 352 Thermostat User Manual

Micro-Air EasyTouch 355 Touch Screen Thermostat User Manual

Micro-Air 351 Air Conditioner Digital Thermostat User Guide


KETOTEK LL0269 WiFi Digital Heating Thermostat User Manual

Roth Minishunt Plus Thermostat and Capillary Sensor Installation Guide

Honeywell TH6100AF2004 T6 Hydronic Programmable Thermostat User Manual

Beca BHP-8000 C Room Thermostat User Guide

HIVE Thermostat for Heating Owner’s Manual

Honeywell Home RCHT8610WF T5 Smart Thermostat Installation Guide

Regulus TZT 63 Electronic Plug-In Thermostat User Guide

Drayton RF710 Digital Wireless Room Thermostat Installation Guide

GENERAL MITRA 250S Digital Room Thermostat User Manual

celect T30 Simple Plug In Thermostat Installation Guide