Micro-Air EasyTouch 355 Touch Screen Thermostat User Manual


EasyTouch
355
Operating Manual
Revision 1.12

| General | Details |
|---|---|
| Name | Micro-Air EasyTouch 355 Touch Screen Thermostat User Manual |
| Make | Micro-Air |
| Language | English |
| Filetype | PDF (Download) |
| File size | 0.33 MB |


micro-air EasyTouch 357 Multi Zone Replacement Thermostat Instruction Manual

Micro-Air EasyTouch RV 353 Touch Screen Thermostat Instruction Manual

Micro-Air 359 Touchscreen Thermostat Instruction Manual

Micro-Air EasyTouch RV 353 Thermostat Instruction Manual

micro-Air EasyTouch RV 351 Thermostat User Manual

Micro Air ETRV EasyTouch RV Thermostat Instruction Manual

micro-air EasyTouch RV 356 True Air RV Thermostat User Manual

micro-Air ASY-357-X02 EasyTouch 357 Touchscreen Thermostat User Manual

micro-Air EasyTouch 352 Thermostat User Manual

Micro-Air 351 Air Conditioner Digital Thermostat User Guide

Micro-Air EasyTouch 355 Touch Screen Thermostat User Manual Overview
Summary of Contents
- Page 1: EasyTouch operating manual. Revision 1.12.
- Page 2: Did I buy the right thermostat? Installing the thermostat Removing the old thermostat Wiring the thermostat Mounting the thermostat Setup Operating the thermostat Main screen Schedule screen Settings screens
- Page 3: Wiring the thermostat Original thermostats can have a plug-in connector or be direct wired to the RV manufacturer's wiring. Thermostats wired with a plug can simply unplug the original plug and plug in the EasyTouch thermostat. Wired thermostats require the optional connector which can be ordered with the thermostat or ordered separately. To wire the connector models, match the original thermostat wiring colors to the connector colors. Manufacture wiring from the wall may not match the colors until it joins with the wiring stub from the original thermostat. See Table 1 for details on the colors used with the thermostat and the function of the wires. Note: See Appendix C: 9430-334 wiring for a different wiring table when replacing model number 9430-334. Table 1 outlines the original thermostat wire color, factory harness color, Micro-Air harness color, and function. Signal and heat functions are indicated by specific wire colors. Do not connect certain wires as specified in the table.
- Page 4: Mounting the thermostat involves several steps. Locate the mounting buttons horizontally across the hole with the smaller diameter against the wall. Remove the mounting tab before mounting on the wall. Screw in one screw and level the buttons so the display will be straight when installed. Align the buttons with the holes in the back of the display. Press the display against the wall and gently slide the display down to lock it in place. Screw in the second screw making sure the two buttons remain level.
- Page 5: Setup It is necessary to set up the available modes prior to operating your thermostat. Select the available modes: gas heat or electric heat. Available modes must match your original thermostat’s available modes. There is text in the available modes screen that reads “Normal” as shipped from Micro-Air. Option 1 must be selected when replacing a thermostat with a model number of 9330-333. Option 2 must be selected when replacing a thermostat with model number 9430-334. This thermostat may be operated remotely using either Bluetooth or WIFI. Apps may be loaded from the Google Play store or Apple App store. Create your account and follow the prompts to connect your thermostat. Each thermostat can only be assigned to a single account.
- Page 6: Operating the thermostat Inside temperature shows the ambient temperature of the room. WIFI indicator shows the state of the WIFI connection. Raise and lower the temperature set point using the red and blue arrows. Use the power button to turn the system on or off. Pressing the mode icon changes from cooling or heating modes. Pressing the fan icon selects between manual and automatic fan speeds.
- Page 7: Auto fan settings include low and high modes for electric and gas heat. The fan operates in low speed within one degree of the set point and switches to high speed when more than one degree from the set point. Home mode uses a single set point for temperature control, while schedule mode allows for programmatic changes throughout the day. Away mode sets heating and cooling points and automatically transitions between them. The zone selection button indicates the status of the zone with color coding: green for on, gray for unavailable, and red for faults. Pressing the gear icon accesses additional setup functions. The set point button toggles between Fahrenheit and Celsius and indicates system operation status. A red set point shows a heating cycle, a blue set point indicates a cooling cycle, and a white icon means no cycle is active.
- Page 8: Away operation allows setting upper and lower limits for temperature with a non-operating area or “dead band” in the middle. This can be useful when setting a higher daytime cooling temperature and lower nighttime heating temperature. The mode selected must be an automatic mode to allow both heating and cooling operation. Press the set points area to toggle between the selected values. A blue square will show around the value you are changing. Weather data is returned from a weather service for your location when the thermostat is connected to the internet. Weather information is updated whenever you touch the thermostat or connect on Bluetooth or WIFI. The thermostat must have the green WIFI logo to receive weather data. Location is set whenever you connect on Bluetooth only. Location can be checked by pressing the weather icon and viewing the location on the bottom of the screen. Reconnect to the thermostat using your smart device and the EasyTouch RV to update to your current location.
- Page 9: Schedule screen Set points may be changed on a time-based schedule. Events will show --:-- when the event is disabled. Press the hour’s position to set the hours. Use the adjustment selectors to change the hours. Press the minutes to move the flashing bar under the minutes. Press the temperature to change the desired temperature set point. Press the time in the upper right to change 12 and 24-hour time formats. Time zone is set and saved whenever the thermostat connects using Bluetooth. Press the enabled/disabled button to enable the schedule. The schedule will be active and make set point changes anytime the schedule is selected on the main screen.
- Page 10: Settings screens provide access to various options. Each icon has a description indicating its function. Some options may vary based on the selected thermostat. The back option returns to the main screen. Next and last options allow navigation through settings. System help displays a QR code for thermostat operation and troubleshooting information. Day mode dims the display after 30 seconds, while night mode turns off the backlight. The schedule icon enables or disables schedule operation and allows editing of schedule settings. WIFI information shows settings, MAC address, and signal strength. Bluetooth reset is used to reset the Bluetooth password linked to your account. Brightness settings adjust the main screen and screen saver brightness.
- Page 11: Temperature reading adjustment allows changing the internal thermostat sensor calibration. This function works only when “R” is not displayed after the inside temperature on the main screen. Temperature gap sets the difference in temperature before an action will occur. This is helpful in preventing short cycling of the heating or cooling systems. Measurement units are labeled Celsius and Fahrenheit for simplicity. Set for Celsius to use metric units. Touchscreen calibrate forces a calibrate screen to appear to allow the user to set the touch points on the screen. Restart allows restarting the thermostat as if you powered it off and on again. This option can help recover from certain problems like a lost WIFI connection. Reset all resets certain settings in the thermostat. Some thermostats offer options to reset different parts of the memory to factory settings. Switches vary by thermostat and may display settings provided by remote dip switches on the control board. Generator start is an option found on some thermostats to turn on the generator when a cooling or heating cycle is needed.
- Page 12: Users who have a water heated system instead of a furnace can change the furnace icon to an Aqua icon. This makes it easier to determine the mode for some users.
- Page 13: Gas heat override feature activates the gas furnace when the set point is five degrees away from the ambient temperature. This feature is available only on systems with both gas and electric heating. The furnace will operate alongside the electric heater until the set point is reached. If this occurs more than twice in a row, gas heat will be used for the next two hours without electric heating. A furnace symbol appears on the thermostat screen when the gas heat is active. The smart device application includes features such as resetting the device, which mimics power removal. Calibration of the touchscreen is typically unnecessary but can be prompted through the application. Users can check for updates if the thermostat is connected to Wi-Fi and the application has internet access.
- Page 14: Appendix A: Installation Troubleshooting The most common problem is not knowing the thermostat operation. If the system is running a heating or cooling cycle, the set point will turn red for heating and blue for cooling. When the thermostat turns white, the heat pump, heat strip and furnace should all be off. WIFI Troubleshooting SSID (Network name) and password are both case sensitive. Be sure you are connecting to a 2.4 GHz network and not a 5GHz or 6GHz network. Set the security to WPA2 and TKIP+AES if you are having trouble. The thermostat has a limit of 31 characters for the SSID and 50 for the password. The WIFI source is not out of range or metal partitions blocking the signal. If using MAC filtering, add the thermostat to the allowed devices list. The router must have an internet connection.

Honeywell TC300 Commercial Thermostat Instruction Manual

Honeywell TH5000 Series FocusPRO Non-Programmable Digital Thermostat Installation Guide
Stelpro STE362RNP Electronic Thermostat User Guide

Roth Basicline 230T Programmable Clock Thermostat Instruction Manual

BOSCH II 230V Room Thermostat Instruction Manual

GENERAL Life MITRA 250S RF Wireless Room Thermostat User Guide

vtech T961 Wired Thermostat Owner’s Manual
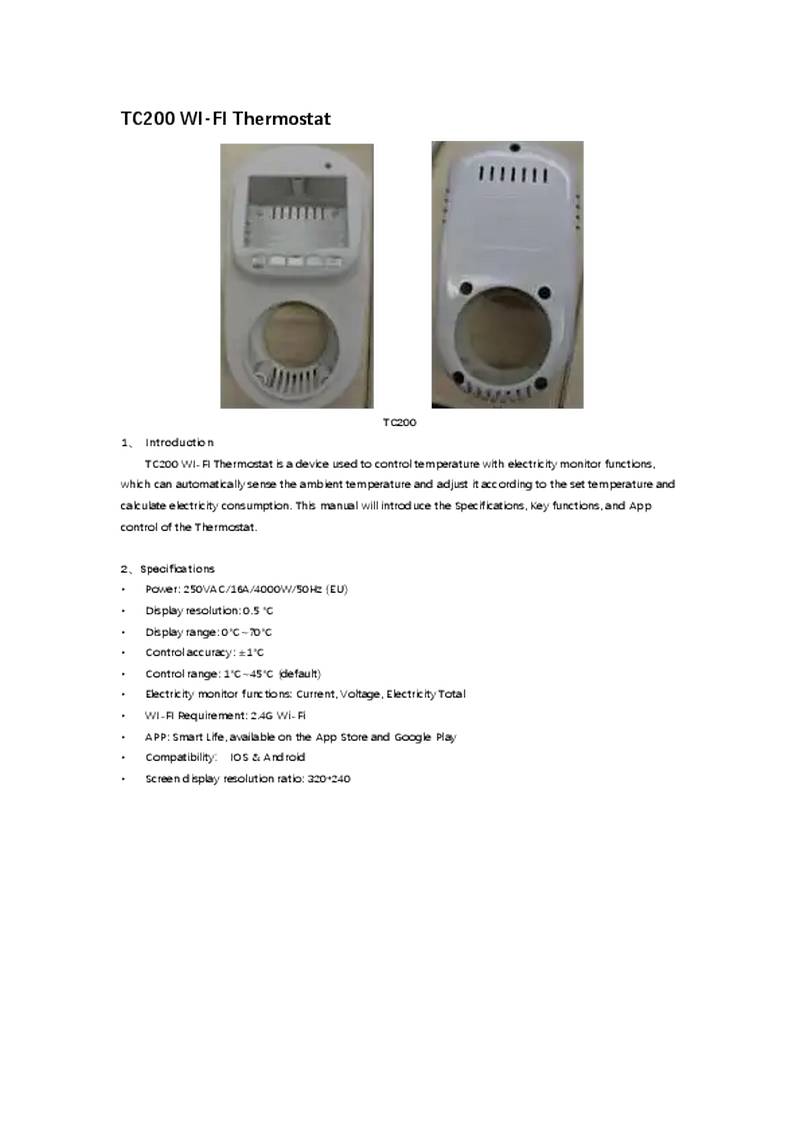
NINGBO TC200 Smart WI-FI Thermostat Owner’s Manual

TRANE BAYECON089A Programmable Touch Screen Thermostat Instruction Manual

Honeywell Home DT4M Wired Room Thermostat User Manual