
Home > Homematic IP > homematic IP HmIP-WTH-B-2 Wall Thermostat Installation Guide
homematic IP HmIP-WTH-B-2 Wall Thermostat Installation Guide












Start-up
You can cancel the pairing proce-
• Select the required channel of the
floor heating actuator and activate
the pairing mode using a long but-
ton press. The device LED starts to
flash orange. For further informati-
on, please refer to the user manual
of the floor heating actuator.
dure by briefly pressing the sys-
tem button (C) again. This will be
indicated by the device LED (C)
lighting up red.
The device LED (C) lights up green
to indicate that pairing has been
successful. If pairing failed, the
device LED lights up red. Please
try again.
• Open the battery compartment (G)
using a slotted screwdriver to loo-
sen the wall mouting plate.
If no pairing operations are carried
out, pairing mode is exited auto-
matically after 3 minutes.
If you want to add another device
to an existing device group, first
activate the pairing mode of the
existing device in the group and
afterwards the pairing mode of
the new device.
1
2
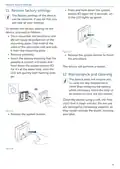
Figure 3
• Remove the insulation strip from
the battery compartment of the
wall thermostat.
If you want to add a wall thermos-
tat to an existing device group
including a radiator thermostat
and a window contact, you first
need to pair the wall thermostat
to the radiator thermostat. After-
wards, you can pair the wall ther-
mostat with the window and door
contact.
• Press and hold down the system
button (C) of the wall thermostat
for at least 4 seconds to activate
the pairing mode. The device LED
(C) flashes orange
4 s
If you are using several devices in
one room, you should pair all
devices with each other.
6.1.1 Pairing with a Homematic IP
Floor Heating Actuator
Figure 4
• If pairing was successful, the LED
lights up green.
If you want to pair the wall thermos-
tat with a Homematic IP Floor Heating
Actuator, the pairing mode of both
devices has to be activated first. To do
this, proceed as follows:
27

| General | Details |
|---|---|
| Name | homematic IP HmIP-WTH-B-2 Wall Thermostat Installation Guide |
| Make | Homematic IP |
| Language | English |
| Filetype | PDF (Download) |
| File size | 3.71 MB |
 (1 votes, average: 5.00 out of 5)
 Loading...

homematic IP HmIP-eTRV-2 Radiator Thermostat Instruction Manual

homematic IP HmIP-BWTH-A Wall Thermostat Installation Guide

homematic IP TRV-E-A Monday Radiator Thermostat Instruction Manual

homematic IP HAP Radiator Thermostat Instruction Manual

homematic IP HmIP-eTRV-F Radiator Thermostat Instruction Manual

Homematic IP HmIP-WTH-B Wireless Wall Thermostat Instruction Manual

homematic IP HmIP-eTRV-E Series Radiator Thermostat Evo Installation Guide

Homematic IP BMOAONSUT Radiator Thermostat User Manual

homematic IP C-2 Radiator Thermostat Instruction Manual

homematic IP IP HmIP-eTRV-CL Radiator Thermostat Instruction Manual


Tio 230v Thermostat User Manual
DAIKIN TRC-11 One Lite Connected Thermostat Instruction Manual

Honeywell TH8321U Touch Screen Programmable Thermostat Installation Guide

SITERWELL GS368 Smart Programmable Thermostat User Manual

GE APPLIANCES THERMOSTAT Owner’s Manual

Provirtec TH-01 Smart Thermostat User Manual

Wengart TP808 Wi-Fi Low Voltage Thermostat User Guide

STELPRO SAT402ZB Smart Thermostat User Guide

thermokon JOY SR 5DO Electronic Fancoil Thermostat User Guide

Wengart TP808-3 Heat Pump Thermostat User Guide