
Home > Pro1 Technologies > Pro1 Technologies T855iSH Wall Thermostat Instruction Manual
Pro1 Technologies T855iSH Wall Thermostat Instruction Manual
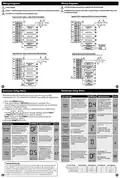


Programming
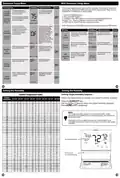
Setting the Humidity
Setting Target Humidity Setpoint
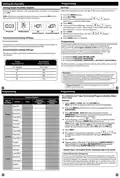
Set Time
Follow the steps below to set the day of the week and current time:
Ambient humidity will flash in the time field when Humidify or De-Humidify is
set to ON.
1. Press the MENU button.
2. Press SET TIME.
3. Day of the week is flashing. Use the
select the current day of the week.
4. Press NEXT.
HON will also flash when the Humidity terminal is energized. dON will also
flash when the De-Humidify terminal is energized.
or
key to
5. The current hour is flashing. Use the
or
key to
36
Humidity
%
10:03
DAY AND TIME
select the current hour. When using 12-hour time, make sure
the correct a.m. or p.m. choice is selected.
6. Press NEXT.
7. Minutes are now flashing. Use the
select current minutes.
8. Press DONE when completed.
AMBIENT HUMIDITY
HON dON
(Humidity Energized) (De-Humidity Energized)
or
key to
Recommended Heating Settings:
Increasing Humidity
Programming
All our programmable thermostats are shipped with an energy saving default
program. You can customize this default program by following the
instructions in the set program schedule section starting on page 24.
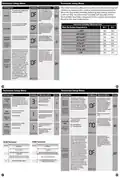
The table below shows recommended indoor humidity levels in relation to
outdoor temperatures during heating (adding humidity).
Recommended Cooling Settings:
Your thermostat can be programmed to have each day of the week
programmed uniquely (7 days) or non-programmable. For the 7-day
programming modes, there are three time period options.
Consult your professional HVAC technician for recommended settings for
your climate.
1.“4”Residential (WAKE, LEAVE, RETURN, SLEEP)
2.“2C”Commercial (OCCUPIED, UNOCCUPIED)
3.“4C”Commercial (OCCUPIED 1, UNOCCUPIED 1, OCCUPIED 2, UNOCCUPIED 2)
Outside
Temperature (0˚F)
Recommended
Relative Humidity
This thermostat has a programmable fan feature, which allows you to run the
fan continually during any time period.
+20˚ and above
35% to 40%
30%
+10˚
0˚
Reminders
25%
Once a reminder has been turned on and set, the elapsed time can be checked
by navigating to its tech setup step. The elapsed time will then appear in the
text field. It can also be reset at that time by holding down the set time/run
sched button for 3 seconds. Resetting an expired reminder can be done without
entering tech setup, by holding down the set time/run sched button for 3
seconds from the home screen.
-10˚
-20˚
20%
15%
Staging Delay Note: This step will not appear if using an outdoor
balance point temperature.
37
38
Programming
Programming
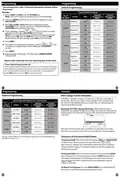
To customize your 7 day 4 time period Program schedule, follow
these steps:
Custom Program
Setpoint
Setpoint
Temperature
(COOL)
Monday:
Day of
the Week
Events
Time
Temperature
(HEAT)
1. Select HEAT or COOL with the SYSTEM key.
Note: You have to program heat and cool each separately.
Wake/OCC1
2. Press the MENU button (If menu does not appear first, press
RUN SCHED).
Leave/UNOCC1
Return/OCC2
Sleep/UNOCC2
Occupied
3. Press SET SCHED. Note: Monday is displayed and the
WAKE/OCC1 icon is shown. You are now programming the
WAKE/OCC1 time period for that day.
Weekday
4. Time is flashing. Use the
or
key to make your time
selection for that day’s WAKE/OCC1 time period.
Note: If you want the fan to run continuously during this time
period, select ON with the FAN key. If you want to use IAQ
mode during this time period, select IAQ with the FAN key.
Unoccupied
Wake/OCC1
5. Press NEXT.
Leave/UNOCC1
Return/OCC2
Sleep/UNOCC2
6. The setpoint temperature is flashing. Use the
to make your setpoint selection for that day’s WAKE/OCC1
or
key
period.
Saturday
7. Press NEXT.
Occupied
8. Repeat steps 4 through 7 for that day’s LEAVE/UNOCC1
time period, for that day’s RETURN/OCC2 time period,
and for that day’s SLEEP/UNOCC2 time period.
Unoccupied
Wake/OCC1
Repeat steps 4 through 8 for the remaining days of the week.
LeaveUNOCC1
Return/OCC2
A Note About Auto Changeover:
In Auto you have the ability to switch between Auto Heat or Auto Cool
by pressing the system key. This can be done once the current mode has
reached its setpoint. For example: if in Auto Heat, the heat setpoint must
be satisfied before the thermostat will allow you to switch to Auto Cool.
You can switch out of Auto by holding down the system key. To get back
into Auto, you must toggle the system key to Auto.
Sunday
Sleep/UNOCC2
Occupied
Unoccupied
39
40

| General | Details |
|---|---|
| Name | Pro1 Technologies T855iSH Wall Thermostat Instruction Manual |
| Make | Pro1 Technologies |
| Language | English |
| Filetype | PDF (Download) |
| File size | 0.59 MB |
 (1 votes, average: 5.00 out of 5)
 Loading...

Pro1 Technologies Pro1 T701i WiFi Thermostat Installation Guide

Pro1 Technologies T751 Non-Programmable Digital Thermostat Instruction Manual


SOGEDIS 1001 MODEL UP Refrigerator Thermostat Instruction Manual

Hive B011B3J6B8 Active Heating Thermostat Owner’s Manual

GENERAL FH260S Underfloor Heating Thermostat User Manual

EMERSON ST75W Sensi Touch Wi-Fi Smart Thermostat Installation Guide

WIFI Temp2 Battery Operated Thermostat Installation Guide

COPELAND 1F95G-1235GC Humidity Universal Thermostat Instruction Manual

SALUS CONTROLS 091FLv2 Digital Programmable Thermostat Instruction Manual

Honeywell RTHL2510 Series Programmable Thermostat Owner’s Manual

Honeywell CM921 Wireless Programmable Room Thermostat User Guide

aube Electronic Thermostat TH131 Owner’s Manual