
×
- 1. Wireless Thermostat (Bezdrátový Termostat → Bezdrôtový Termostat → Termostat Bezprzewodowy → Vezeték Nelküli Termosztát → Brezžični Termostat → Drathloser Thermostat)
- 2. Front Part (Rear Part)
- 3. Wireless Thermostat (Important → Specifications)
- 4. Temperature Measurement (Temperature Setting → Differential Setting → Operating Temperature → Storage Temperature → Unit Interconnection → Power Supply)
- 5. Led Indicators (Main Switch → Installation → Pairing The Control Unit With The Switching Unit → Testing Wireless Communication Between The Units)
- 6. Deleting The Memory (code) Of Paired Units (Replacing The Original Thermostat → Marking Wires → Thermostat Placement → Mounting The Switching Unit Onto The Wall)
- 7. Wiring Diagram (Pump/motorised Valve Wiring Diagram → Floor Heating Wiring Diagram)
- 8. Boiler Wiring Diagram (zero Voltage Switching) (Opentherm Connection Diagram → Mounting The Control Unit (if You Do Not Wish To Use The Units Portability) → Selecting Heating/air-conditioning System)
- 9. Selecting Temperature Differential (Installing Batteries)
- 10. Setting The Time/date (Screen Illumination → Setting Temperature → Setting A Programme → Selecting Week/day → Selecting A Pre-set Programme)
- 11. Programme Number (Programme Profile → Setting A Custom Programme)
- 12. Temporary Change Of A Set Programme (Temporary Change Of Temperature Setting → Calibrating Room Temperature → Anti-freeze Mode → Setting Opentherm Parameters)
- 13. Pressing The Button (Opentherm Error Indication → Changing Batteries)
- 14. Upkeep And Maintenance (Proper Operation Tips → Cleaning The Product → Repair And Warranty → Disposal Information → Safety Information)
- 15. Bezdrátový Termostat (Důležitá Upozornění → Specifikace → Ovládací (přenosná) Jednotka)
- 16. Nastavení Času (Zobrazení Aktuální Pokojové Teploty → Nastavení Programu → Indikace Námrazy → Indikace Stavu Baterií → Instalace → Spárování Ovládací Jednotky Se Spínací Jednotkou)
- 17. Testování Bezdrátové Komunikace Mezi Jednotkami (Vymazání Paměti (kódu) Spárovaných Jednotek → Výměna Původního Termostatu → Značení Drátů → Umístění Termostatu)
- 18. Montáž Spínací Jednotky Na Zeď (Schéma Zapojení → Schéma Připojení Čerpadla/motorizovaneho Ventilu)
- 19. Schéma Připojení Podlahového Vytápění (Schéma Připojení Kotle (beznapěťové Spínání) → Schéma Opentherm Připojení → Montáž Ovládací Jednotky (nechcete-li Využít Mobility Jednotky))
- 20. Volba Vytápěcího/klimatizačního Systému (Volba Rozptylu Teploty → Instalace Baterií)
- 21. Nastavení Hodin/dne (Podsvícení Displeje → Nastavení Požadované Teploty → Nastavení Programu → Výběr Týdne/dne)
- 22. Výběr Přednastaveného Programu (Uživatelské Nastavení Programu)
- 23. Dočasná Změna Nastaveného Programu (Dočasná Změna Nastavení Teploty → Kalibrace Pokojové Teploty → Protizámrazový Režim → Nastavení Parametrů Opentherm)
- 24. Stiskněte Tlačítko (Nastavení Spínání Požadované Hodnoty → Nastavení Maximální Hodnoty Mezního Ovládání → Nastavení Spínání Horké Vody → Nastavení Teploty Horké Vody → Nastavení Spínání Ovládání → Indikace Chyby Opentherm)
- 25. Péče A Údržba (Správná Obsluha → Zajištění Bezpečnosti → Údržba A Čištění → Opravy Výrobku → Používání Výrobku → Zpracování Odpadu)
- 26. Dôležité Upozornenia (Špecifikácia → Ovládacia (prenosná) Jednotka)
- 27. Inštalácia (Spárovanie Ovládacej Jednotky So Spínacou Jednotkou → Hlavný Spínač → Led Indikátory (diódy) → Odobratie Zadného Krytu Ovládacej Jednotky → Tlačidlo Dolu' → Nastavenie Teploty)
- 28. Testovanie Bezdrôtovej Komunikácie Medzi Jednotkami (Vymazanie Pamäti (kódu) Spárovaných Jednotiek → Výmena Pôvodného Termostatu → Značenie Drôtov)
- 29. Umiestenie Termostatu (Montáž Spínacej Jednotky Na Stenu → Schéma Zapojenie)
- 30. Schéma Pripojenia Čerpadla / Motorizovaného Ventilu (Schéma Pripojenia Podlahového Kúrenia → Schéma Pripojenia Kotla (beznapäťové Spínanie))
- 31. Schéma Opentherm Pripojenia (Montáž Ovládacej Jednotky (nechcete Využiť Mobilitu Jednotky) → Voľba Vykurovacieho/klimatizačného Systému → Voľba Rozptylu Teploty)
- 32. Inštalácia Batérií (Nastavenie Hodín/dňa → Podsvietenie Displeja)
- 33. Nastavenie Požadovanej Teploty (Nastavenie Programu → Výber Týždeň/deň → Výber Prednastaveného Programu → Číslo Programu → Programový Profil)
- 34. Programový Profil (Užívateľské Nastavenia Programu → Dočasná Zmena Nastaveného Programu → Dočasná Zmena Nastavenia Teploty)
- 35. Kalibrácia Izbovej Teploty (Protimrazový Režim → Nastavenie Parametrov Opentherm)
- 36. Nastavenie Teploty Horúcej Vody (Nastavenie Spínania Ovládania → Indikácia Chyby Opentherm → Výmena Batérií → Starostlivosť A Údržba)
- 37. K Čisteniu Používajte Mierne Navlhčenú Jemnú Handričku. Nepoužívajte Rozpúšťadlá Ani Čistiace Prípravky Mohli By Poškrabať Plastové Časti A … (Tento Prístroj Nie Je Určený Pre Používanie Osobami, Ktorým Fyzická, Zmyslová Alebo Mentálna Neschopnosť Či Nedostatok Skúseností A Znalostí Zabraňuje V Bezpečnom Používaní Prístroja. → Nevyhadzujte Elektrické Spotrebiče Ako Netriedený Komunálny Odpad, Použite Zberné Miesta Triedeného Odpadu. → Termostat P5611ot Jest Przeznaczony Do Sterowania Systemów Grzewczych Albo Klimatyzacji. → Ważne Uwagi → Specyfikacja)
- 38. Dokładność Zegara (Pomiar Temperatury → Ustawienie Temperatury → Histereza Ustawienia Temperatury → Temperatura Pracy → Zasilanie → Wielkość I Ciężar)
- 39. Wskaźniki Led (diody) (Wyłącznik Główny → Instalacja → Parowanie Jednostki Sterującej Z Jednostką Przełączającą → Testowanie Komunikacji Bezprzewodowej Między Jednostkami)
- 40. Zasięg Między Jednostką Sterującą A Przełączającą (Kasowanie Pamięci (kodu) Sparowanych Jednostek → Wymiana Dotychczasowego Termostatu → Oznaczenie Przewodów → Lokalizacja Termostatu)
- 41. Montaż Jednostki Przełączającej Na Ścianie (Schemat Połączeń → Schemat Podłączenia Pompy/zaworu Silnikowego)
- 42. Schemat Podłączenia Ogrzewania Podłogowego (Schemat Podłączenia Kotła (przełączanie Beznapięciowe) → Schemat Podłączenia Opentherm → Montaż Jednostki Sterującej (jeżeli Nie Chcemy Korzystać Z Jednostki Mobilnej))
- 43. Instalację (Wybór Systemu Grzewczego/klimatyzacji → Wybór Histerezy Temperatury → Instalacja Baterii)
- 44. Ustawienie Zegara/dnia (Podświetlenie Wyświetlacza → Ustawienie Wymaganej Temperatury)
- 45. Ustawienie Programu (Wybór Tygodnia/dnia → Wybór Zapisanego Wcześniej Programu → Numer Programu → Profile Programów)
- 46. Ustawienie Programu Użytkownika (Chwilowa Zmiana Ustawionego Programu → Chwilowa Zmiana Ustawionej Temperatury → Kalibracja Temperatury Pokojowej)
- 47. Tryb Przeciwzamrożeniowy (Ustawienie Parametrów Opentherm)
- 48. Wskazania Błędów Opentherm (Wymiana Baterii → Konserwacja I Czyszczenie)
- 49. Przy Uszkodzeniu Albo Wadzie Wyrobu Żadnych Napraw Nie Wykonujemy We Własnym Zakresie. Wyrób Przekazujemy Do Naprawy Do Sklepu, W Którym Zos…
- 50. Hőmérséklet Mérése (Hőmérséklet-szabályozás → Üzemi Hőmérséklet-tartomány → Tárolási Hőmérséklet → Tápellátás → Méretek És Súly → A Vezérlőegység Hátlapjának Leszerelése)
- 51. A Led-állapotjelző (dióda) (Főkapcsoló → Szerelés → A Vezérlőegység És A Kapcsolóegység Párosítása → A Vezeték Nélküli Kommunikáció Tesztelése)
- 52. A Párosított Egységek Memóriájának (kódjának) Törlése (Az Eredeti Termosztát Cseréje → A Vezetékek Jelölése → A Termosztát Elhelyezése → A Kapcsolóegység Felszerelése A Falra)
- 53. Kapcsolási Rajz (A P5611ot Termosztát Bármilyen Egyfokozatú Fűtési Vagy Légkondicionáló Rendszerrel Használható. → Szivattyú / Motorosszelep Bekötési Rajz → Padlófűtés Csatlakoztatási Rajza)
- 54. Kazán Csatlakoztatási Rajz (feszültségmentes Kapcsolás) (Opentherm Csatlakozási Rajz → A Vezérlőegység Felszerelése → A Fűtési/légkondicionáló Rendszer Kiválasztása)
- 55. Kapcsolási Hőmérséklet-tartomány (Az Elemek Behelyezése)
- 56. Óra/nap Beállítása (A Kijelző Háttérvilágítása → A Kívánt Hőmérséklet Beállítása → Program Beállítása → Hét/nap Választása → Egy Előre Beállított Program Választása)
- 57. Program-profil (Es Program: Az Egész Napos Komforthőmérséklet → Es Program: Az Egész Napos Gazdaságos Hőmérséklet → Felhasználói Program Beállítása)
- 58. Az Egész Nap Profiljának Beállítása Után (A Beállított Program Ideiglenes Módosítása → A Beállított Hőmérséklet Ideiglenes Módosítása → Szobahőmérséklet-kalibrálás → Fagyvédelmi Üzemmód)
- 59. Opentherm Paraméterek Beállítása (Opentherm Hibajelzés → Elemcsere)
- 60. Távolítsa El A Vezérlőegység Hátlapját! (Cserélje Ki Az Eredeti Elemeket Új 1,5 V-os Aa Tartós (alkáli) Elemekre! → Gondozás És Karbantartás → Tisztításához Használjon Enyhén Benedvesített Finom Törlőruhát! → A Terméket Ne Merítse Vízbe, Se Más Folyadékba! → A Termék Sérülése Vagy Meghibásodása Esetén Ne Próbálja Saját Maga Megjavítani! → A Készüléket Nem Használhatják Felügyelet Vagy A Biztonságukért Felelős Személyektől Kapott Megfelelő Tájékoztatás Nélkül.)
- 61. Az Elektromos Készülékeket Ne Dobja A Vegyes Háztartási Hulladék Közé, Használa A Szelektív Hulladékgyűjtő Helyeket. A Gyűjtőhelyekre Vonatk…
- 62. Dimenzije In Teža (Upravljalna (prenosna) Enota → Stikalna Enota → Led Indikatorji (diode) → Glavno Stikalo → Namestitev → Povezovanje Upravljalne Enote S Stikalno Enoto)
- 63. Opozorilo (Vstavite → Testiranje Brezžične Komunikacije Med Enotama → Brisanje Pomnilnika (kode) Povezanih Enot → Zamenjava Prvotnega Termostata)
- 64. Označevanje Žic (Namestitev Termostata → Namestitev Stikalne Enote Na Steno → Shema Priključitve)
- 65. Shema Priključitve Črpalke / Motoriziranega Ventila (Shema Priključitve Talnega Ogrevanja → Shema Priključitve Kotla (breznapetostno Stikanje))
- 66. Shema Priključitve Opentherm (Namestitev Upravljalne Enote → Izbira Ogrevalnega/klimatskega Sistema → Izbira Razpona Temperature)
- 67. Namestitev Baterij (Nastavitev Ure/dneva → Osvetlitev Zaslona → Nastavitev Želene Temperature)
- 68. Pritisnite Večkrat Na Tipko (Nastavitev Temperature → Nastavitev Programa → Izbira Tedna/dneva → Izbira Tovarniško Nastavljenega Programa → Številka Programa → Programski Profil)
- 69. Številka Programa (Programski Profil → Uporabniška Nastavitev Programa → Začasna Sprememba Nastavljenega Programa → Začasna Sprememba Nastavljene Temperature)
- 70. Umerjanje Sobne Temperature (Način Proti Zmrzovanju → Nastavitev Parametrov Opentherm)
- 71. Prikaz Napak Opentherm (Zamenjava Baterij → Skrb In Vzdrževanje)
- 72. Pri Poškodbah Ali Napaki Izdelka Ne Popravljajte Sami. Predajte Ga V Popravilo V Trgovino, Kjer Ste Ga Kupili.
- 73. Radna Temperatura (Temperatura Skladištenja → Međusobno Povezivanje Jedinica → Kapacitet Uparivanja → Domet Odašiljačke Jedinice → Napajanje → Dimenzije I Težina)
- 74. Glavni Prekidač (Postavljanje → Uparivanje Upravljačke Jedinice S Jedinicom Za Prebacivanje → Provjera Bežične Komunikacije Između Jedinica → Brisanje Memorije (koda) Uparenih Jedinica)
- 75. Zamjena Originalnog Termostata (Označavanje Žica → Postavljanje Termostata → Ugradnja Jedinice Za Prebacivanje Na Zid → Shema Ožičenja)
- 76. Shema Ožičenja Za Pumpu/motorizirani Ventil (Shema Ožičenja Za Podno Grijanje → Priključeni Uređaj)
- 77. Shema Ožičenja Za Bojler (prebacivanje Nultog Napona) (Dijagram Povezivanja Opentherm → Ugradnja Upravljačke Jedinice → Odabir Sustava Za Grijanje/klimatizaciju)
- 78. Odabir Temperaturne Razlike (Umetanje Baterija → Postavljanje Vremena/datuma)
- 79. Pritisnite Gumb (Osvjetljenje Zaslona → Podešenje Temperature → Postavljanje Programa → Odabir Tjedna/dana → Odabir Unaprijed Podešenog Programa → Broj Programa)
- 80. Broj Programa (Profil Programa → Program 3 → Program 4 → Program 5 → Program 6 → Postavljanje Programa Prilagodbe)
- 81. Privremena Promjena Postavljenog Programa (Privremena Promjena Postavke Temperature → Kalibracija Temperature U Prostoriji → Način Rada Protiv Smrzavanja → Postavljanje Parametara Opentherm)
- 82. Oznaka Pogreške Opentherm (Zamjena Baterija)
- 83. Servis I Održavanje (Nekoliko Savjeta Za Pravilan Rad → U Slučaju Oštećenja Proizvoda Ili Kvara → Ne Bacajte Električne Uređaje Kao Nerazvrstani Komunalni Otpad → Emos Spol. S R. O. Ovime Izjavljuje Da Je Radijska Oprema Tipa P5611ot U Skladu S Direktivom 2014/53/eu)
- 84. Wichtige Hinweise (Spezifikation → Stromversorgung → Abmessungen Und Gewicht)
- 85. Steuerungseinheit (mobil) (Abnahme Der Hinteren Abdeckung Der Steuereinheit → Schalteinheit → Led-anzeigen (dioden) → Hauptschalter → Montage → Verbinden Der Steuereinheit Mit Der Schalteinheit)
- 86. Einstellen Der Automatischen Verbindung (Testen Der Drahtlosen Kommunikation Zwischen Den Einheiten → Löschung Des Speichers (codes) Der Gepaarten Einheiten)
- 87. Austausch Des Ursprünglichen Thermostats (Kennzeichnung Der Drähte → Thermostat-standort → Montage Der Schalteinheit An Der Wand)
- 88. Schaltbild (Anschlussschema Für Die Pumpe/das Motorisierte Ventil → Anschlussschema Für Die Fußbodenheizung)
- 89. Anschlussschema Für Den Kessel (spannungsfreies Schalten) (Schema Opentherm Anschluss → Montage Der Steuereinheit (wenn Sie Die Einheit Nicht Mobil Nutzen Möchten) → Auswahl Heizmodus / Klimatisierungsmodus)
- 90. Wahl Der Temperaturvarianz (Einlegen Der Batterien)
- 91. Einstellung Von Uhrzeit/wochentag (Displaybeleuchtung → Einstellen Der Gewünschten Temperatur → Programmeinstellungen → Auswahl Woche/tag)
- 92. Auswahl Eines Voreingestellten Programmes (Programmnummer → Programmprofil → Benutzerdefiniert)
- 93. Benutzerdefinierte Programmeinstellungen (Temporäre Änderung Des Eingestellten Programmes → Temporäre Änderung Der Eingestellten Temperatur → Kalibrierung Der Raumtemperatur)
- 94. Anti-frost Modus (Einstellung Der Opentherm-parameter)
- 95. Heißwasser (Fehleranzeige Opentherm → Batteriewechsel → Pflege Und Instandhaltung)
- 96. Sicherheitshinweise (Reinigungshinweise → Reparaturhinweise → Verwendung Durch Personen Mit Eingeschränkten Fähigkeiten → Entsorgungshinweise → Eu-konformitätserklärung → Produktbeschreibung)
- 97. Важливе Попередження (Специфікація → Блок Живлення → Розмір І Вага → Блок Управління (переносний))
- 98. Зняття Задньої Кришки Блоку Управління (Блок Вмикання → Світлодіодні Індикатори (діоди) → Головний Перемикач → Установка → Сполучення Блоку Управління З Блоком Вмикання)
- 99. Тестування Бездротового Звязку Між Блоками (Анулювання Памяті (коду) Сполучених Блоків → Заміна Оригінального Термостата → Позначення Проводів → Розміщення Термостата)
- 100. Кріплення Вимикача На Стіні (Схема Підключення)
- 101. Схема Підключення Підлогового Опалення (Схема Підключення Котла (безнапругове Вмикання) → Схема Opentherm Підключення → Установка Блоку Управління)
- 102. Вибір Системи Опалення / Кондиціонування (Вибір Дисперсії Температури → Встановлення Батарейки)
- 103. Налаштування Годин/дня (Підсвічування Дисплея → Встановлення Бажаної Температури)
- 104. Налаштування Програми (Вибір Тижня / Дня → Вибір Запрограмованої Програми → Номер Програми → Профіль Програми)
- 105. Налаштування Програми Користувачем (Тимчасова Зміна Заданої Програми → Тимчасова Зміна Налаштування Температури → Калібрування Кімнатної Температури)
- 106. Режим Захисту Від Замерзання (Налаштування Параметрів Opentherm)
- 107. Індикація Помилки Opentherm (Заміна Батарейки → Догляд Та Обслуговування)
- 108. Пошкоджений Чи Дефектний Виріб Самі Не Ремонтуйте. Здайте Його Для Ремонту У Магазин Де Ви Його Придбали. Цей Пристрій Не Призначений Для Ко…
- 109. Reglarea Temperaturii (Temperatura De Funcționare → Temperatura De Depozitare → Interconexiunea Unităţilor → Capacitatea De Asociere → Alimentarea → Dimensiuni Şi Greutate)
- 110. Indicatoare Led (diode) (Comutatorul Principal → Instalare → Asocierea Unității De Comandă Cu Unitatea De Cuplare → Testarea Comunicaţiei Fără Fir Dintre Unităţi)
- 111. Radierea Memoriei (codului) Unităților Asociate (Înlocuirea Termostatului Original → Marcarea Fiilor → Amplasarea Termostatului → Montajul Unității De Cuplare Pe Perete)
- 112. Schema De Racordare (Termostatul P5611ot Poate Fi Folosit Cu Orice Sistem De Încălzire Sau De Climatizare Unietajat. → Schema De Conectare A Pompei / Supapei Motorizote → Schema De Conectare A Incălzirii În Pardoseală)
- 113. Schema De Conectare A Cazanului (cuplare Fără Tensiune) (Schema De Conectare Opentherm → Montarea Unităţii De Comandă → Selectarea Sistemului De Încălzire / De Climatizare)
- 114. Selectarea Abaterii Temperaturii (Instalarea Bateriilor → Reglarea Orei/zilei)
- 115. Iluminarea Ecranului (Reglarea Temperaturii Solicitate → Reglarea Programului → Selectarea Săptămânii/zilei → Selectarea Programului Presetat)
- 116. Numărul Programului (Profilul Programului → Temperatura Economică Zilnică → Combinaţia Temperaturii Confortabile Și Economice → De Utilizator → Reglarea Programului De Utilizator)
- 117. Modificarea Temporară A Programului Setat (Modificarea Temporară A Setării Temperaturii → Calibrarea Temperaturii De Cameră → Regim Antiîngheț → Setarea Parametrilor Opentherm)
- 118. Apăsați Butonul (Indicarea Erorii Opentherm → Înlocuirea Bateriilor)
- 119. Grija Şi Întreţinerea (Recomandări Pentru O Manipulare Corectă → Curăţare Şi Întreţinere → Reparaţii → Utilizare În Siguranţă → Eliminarea Deşeurilor Electrice → Conformitate Cu Directivele Ue)
- 120. Lt | Belaidis Termostatas (Specifikacijos → Valdymo (nešiojamasis) Blokas)
- 121. Temperatūros Nustatymas (Šalčio Indikacija → Veikimo Būsenos Simbolis → Baterijos Būsenos Indikacija → Dabartinė Patalpos Temperatūra → Dienos Profilis → Montavimas)
- 122. Belaidžio Ryšio Tarp Blokų Tikrinimas (Kaip Ištrinti Susietų Blokų Atmintį (kodą) → Originalaus Termostato Pakeitimas → Laidų Ženklinimas → Termostato Montavimo Vieta)
- 123. Perjungimo Bloko Montavimas Ant Sienos (Montavimo Schema → Siurblio Ir Motorizuoto Vožtuvo Prijungimo Schema)
- 124. Grindų Šildymo Laidų Schema (Katilo Laidų Schema (nulinės Įtampos Perjungimas) → Opentherm' Prijungimo Schema → Valdymo Bloko Montavimas (jei Nenorite Pasinaudoti Galimybe Bloką Nešioti))
- 125. Šildymo (oro Kondicionavimo) Sistemos Parinkimas (Pasirinkite Temperatūros Diferencialą → Baterijų Įdėjimas)
- 126. Laiko Ir Datos Nustatymas (Ekrano Apšvietimas → Temperatūros Nustatymas → Programos Nustatymas → Savaitės Ir Dienos Pasirinkimas)
- 127. Iš Anksto Nustatytos Programos Pasirinkimas (Programos Numeris → Programos Profilis)
- 128. Personalizuotos Programos Nustatymas (Laikinas Nustatytos Programos Pakeitimas → Laikinas Temperatūros Nustatymo Pakeitimas → Patalpos Temperatūros Sukalibravimas)
- 129. Apsaugos Nuo Užšalimo Režimas (Opentherm' Parametrų Nustatymas)
- 130. Opentherm Klaidos Rodymas (Baterijų Keitimas → Techninė Priežiūra Ir Eksploatacija)
- 131. Nemeskite Kartu Su Buitinėmis Atliekomis (P5611ot Termostats Ir Paredzēts Apkures Un Gaisa Kondicionēšanas Sistēmu Kontrolēšanai → Svarīgi → Tehniskā Specifikācija)
- 132. Raidītāja Diapazons (Barošanas Avots → Izmērs Un Svars → Portatīvais Vadības Modulis → Vadības Bloka Aizmugurējā Vāka Noņemšana → Pārslēgšanas Iekārta → Led Indikatori)
- 133. Galvenais Slēdzis (Uzstādīšana → Vadības Bloka Savienošana Pārī Ar Pārslēgšanas Iekārtu → Bezvadu Savienojuma Starp Iekārtām Pārbaude → Pārī Savienoto Moduļu Atmiņas (koda) Dzēšana)
- 134. Oriģinālā Termostata Nomaiņa (Marķēšanas Vadi → Termostata Novietojums → Vadības Moduļa Uzstādīšana Uz Sienas → Elektroinstalācijas Shēma)
- 135. Sūkņa/motorizētā Vārsta Elektroinstalācijas Shēma (Grīdas Apkures Elektroinstalācijas Shēma)
- 136. Apkures Katla Elektroinstalācijas Shēma ('opentherm' Savienojuma Shēma → Vadības Bloka Uzstādīšana → Apkures/gaisa Kondicionēšanas Sistēmas Izvēle)
- 137. Temperatūras Diferenciāļa Izvēlēšanās (Bateriju Ievietošana)
- 138. Laika/datuma Iestatīšana (Ekrāna Apgaismojums → Temperatūras Iestatīšana → Programmas Iestatīšana → Nedēļas/dienas Izvēle → Iepriekš Iestatītas Programmas Izvēle)
- 139. Programmas Numurs (Komforta Temperatūra Visu Dienu → Ekonomiska Temperatūra Visu Dienu → Individuāli Pielāgotas Programmas Iestatīšana)
- 140. Nospiediet Pogu (Kad Esat Iestatījis Profilu Visai Dienai → Pagaidu Iestatītās Programmas Īstermiņa Maiņa → Pagaidu Temperatūras Iestatījumu Maiņa → Telpas Temperatūras Kalibrēšana → Pretsasalšanas Režīms → 'opentherm' Parametru Iestatīšana)
- 141. Ilgi (Nospiediet Pogu → Ja Ar Iepriekšējo Darbību Izvēlējāties 'on' (ieslēgts) → Nospiežot Pogu → 'opentherm' Kļūdas Indikācija → Bateriju Nomaiņa)
- 142. Apkope Un Uzturēšana (Izstrādājuma Lietošana → Bojājumu Gadījumā → Izstrādājuma Tīrīšana → Drošības Norādījumi → Atkritumu Šķirošana → Atbilstība Direktīvām)
- 143. Ee | Juhtmevaba Termostaat (Oluline! → Kirjeldused → Toide: → Mõõtmed Ja Kaal: → Temperatuuri Mõõtmine: → Temperatuuri Seadistus:)
- 144. Käsitsi Juhtimine (Tööoleku Ikoon → Programmi Eelsäte → Mugavus-/säästurežiimi Lüliti → Juhtmevaba Side Ikoon → Lähtestamine → Paigaldus)
- 145. Seadmetevahelise Juhtmevaba Ühenduse Testimine (Seotud Seadmete Mälu (koodi) Kustutamine → Algse Termostaadi Asendamine → Juhtmete Märgistamine → Termostaadi Asukoht)
- 146. Lülitusseadme Paigaldamine Seinale (Juhtmestiku Skeem)
- 147. Põrandakütte Ühendusskeem (Katla Ühendusskeem (pingevaba Kommutatsioon) → Openthermi Ühendusskeem → Juhtseadme Kinnitamine (kui Te Ei Soovi Seadme Liikuvust Kasutada))
- 148. Kütte-/kliimaseadme Valimine (Temperatuurierinevuse Valimine → Patareide Paigaldamine)
- 149. Termostaat On Nüüd Kasutusvalmis. (Kellaaja/kuupäeva Määramine → Ekraani Valgustus → Temperatuuri Määramine → Programmi Määramine)
- 150. Eelseadistatud Programmi Valimine (Programmi Määramiseks Vajutage Uuesti Nuppu P' → Kohandatud Programmi Seadistamine)
- 151. Kui Olete Terve Päeva Profiili Seadistanud, Vajutage Valitud Programmi Kinnitamiseks Nuppu P' Ja Lahkuge Seadistusrežiimist. (Temperatuuriseadistuse Ajutine Muudatus → Toatemperatuuri Kalibreerimine → Külmumisvastane Režiim → Openthermi Parameetrite Seadistamine)
- 152. Openthermi (Patareide Vahetamine → Openthermi Tõrketeated)
- 153. Korrashoid Ja Hooldamine (Nõuanded Nõuetekohaseks Kasutamiseks → Toote Puhastamine → Toote Kahjustuse Või Defekti Korral → Seadme Ohutu Kasutamine → Jäätmete Käitlemine → Eli Vastavusdeklaratsioon)
- 154. Технически Характеристики (Важно)
- 155. Управляващ (преносим) Модул (Превключващ Модул → Светодиодни Индикатори → Главен Превключвател → Монтиране → Сдвояване На Управляващия И Превключващия Модул)
- 156. Внимание: Когато Свързвате Два Или Повече Приемника, Е Необходимо Режимът На Свързване Да Бъде Активиран На Всички Приемници Едновременно! (Проверка На Безжичната Връзка Между Модулите → Изтриване На Паметта (записания Код) На Свързаните Модули → Подмяна На Оригиналния Термостат)
- 157. Избиране На Място За Монтиране На Термостата (Монтиране На Превключващия Модул На Стена → Електрическа Схема На Свързване)
- 158. Електрическа Схема На Свързване На Помпата/моторизирания Клапан (Електрическа Схема На Свързване На Подово Отопление)
- 159. Диаграма За Окабеляване На Котела (превключване Нулево Напрежение) (Opentherm Схема На Свързване → Монтиране На Блока За Управление → Избиране На Режим За Управление На Отоплителна Или На Охлаждаща Система)
- 160. Избиране На Температурен Диференциал (Инсталиране На Батерии)
- 161. Настройка На Часа/датата (Осветление На Екрана → Настройване На Температурата → Настройване На Програма → Избиране На Седмица/ден → Избиране На Предварително Зададена Програма)
- 162. Номер На Програма (Профил На Програма → Програма 1: → Програма 2: → Програма 3: → Програма 4: → Програма 5:)
- 163. Настройване На Къстъмизирана Програма (Временна Промяна На Настроена Програма → Временна Промяна На Температурна Настройка → Калибриране На Стайната Температура)
- 164. Режим За Предпазване От Замръзване (Настройване На Параметрите На Opentherm)
- 165. Натискането (Индикация За Грешка На Opentherm → Смяна На Батериите → Обслужване И Поддръжка)
- 166. Почистване На Уреда (Безопасност При Употреба → Изхвърляне На Електрически Уреди → Декларация За Съответствие → Важни Предупреждения)
- 167. Spécifications (Précision De Lhorloge → Mesure De La Température → Réglage De La Température → Température Dexploitation → Alimentation → Dimensions Et Poids)
- 168. Unité De Commutation (Installation → Interrupteur Principal → Voyants Led (diodes) → Test De La Communication Sans Fil Entre Les Unités → Appareillage De Lunité De Commande Avec Lunité De Commutation)
- 169. Éviter Les Risques Daccidents (Remplacement Du Thermostat Dorigine → Marquage Des Fils → Emplacement Du Thermostat)
- 170. Montage De Lunité De Commutation Au Mur (Schéma De Raccordement → Schéma De Raccordement Pompe/vanne Motorisée)
- 171. Schéma De Raccordement Pour Le Chauffage Au Sol (Schéma De Raccordement De La Chaudière (commutation Sans Tension) → Schéma De Raccordement Opentherm → Installation De Lunité De Commande)
- 172. Choix Du Système De Chauffage/climatisation (Choix De La Variation De Température → Insertion Des Piles)
- 173. Réglage De Lheure/du Jour (Rétro-éclairage De Lécran → Réglage De La Température Requise)
- 174. Réglage Du Programme (Sélection De La Semaine/du Jour → Sélection Du Programme Par Défaut → Numéro Du Programme → Profil De Programme)
- 175. Numéro Du Programme (Profil De Programme → Paramétrage Du Programme Personnalisé → Modification Temporaire Du Programme Paramétré → Modification Temporaire De Réglage De La Température)
- 176. Étalonnage De La Température Ambiante (Mode Antigel → Réglage Des Paramètres Opentherm)
- 177. Indication Derreur Opentherm (Remplacement Des Piles → Entretien Et Maintenance)
- 178. Ne Pas Exposer Le Produit Aux Intempéries Ou À Lhumidité, Ni À Des Gouttes Deau Ou À Un Jet Deau. Ne Placer Aucune Source De Flamme Nue Sur …
- 179. Avvertenze Importanti (Specifiche → Collegamento Delle Unità → Alimentazione → Dimensioni E Peso → Unità Di Controllo (portatile))
- 180. Installazione (Abbinamento Dellunità Di Controllo Allunità Di Commutazione → Interruttore Principale → Indicatori Led (diodi) → Rimozione Del Coperchio Posteriore Dellunità Di Controllo)
- 181. Test Della Comunicazione Wireless Tra Le Unità (Cancellazione Della Memoria (del Codice) Delle Unità Abbinate → Sostituzione Del Termostato Originale → Marcatura Dei Fili)
- 182. Posizione Del Termostato (Montaggio Dellunità Di Commutazione A Parete → Schema Elettrico)
- 183. Schema Di Collegamento Della Pompa/valvola Motorizzata (Schema Di Collegamento Del Riscaldamento A Pavimento → Schema Di Collegamento Della Caldaia (commutazione Senza Tensione))
- 184. Schema Di Collegamento Opentherm (Installazione Dellunità Di Controllo → Scelta Del Sistema Di Riscaldamento/condizionamento → Selezione Della Dispersione Di Temperatura)
- 185. Impostare I Commutatori Dip (Istallazione Di Batterie → Impostazioni Ore/giorno → Retroilluminazione Del Display)
- 186. Impostazione Della Temperatura Desiderata (Impostazioni Del Programma → Selezione Della Settimana/giorno → Selezione Del Programma Preimpostato → Numero Del Programma → Profilo Del Programma)
- 187. Numero Del Programma (Profilo Del Programma → Impostazioni Del Programma Utente → Programma 4: → Programma 5: → Programma 6: → Programma 7:)
- 188. Modifica Temporanea Del Programma Impostato (Modifica Temporanea Dellimpostazione Della Temperatura → Calibrazione Della Temperatura Ambiente → Modalità Antigelo → Impostazioni Dei Parametri Opentherm)
- 189. Indicazione Di Errore Opentherm (Sostituzione Delle Batterie)
- 190. Cura E Manutenzione (Uso Corretto Del Prodotto → Pulizia E Manutenzione → Riparazioni → Sicurezza → Smaltimento Dei Rifiuti)
- 191. El Termostato P5611ot Está Diseñado Para El Control De Sistemas De Calefacción O Aire Acondicionado. A Diferencia De Los Termostatos De Hoga… (Avisos Importantes → Especificación)
- 192. Unidad De Control (portátil) (Cómo Quitar La Tapa Trasera De La Unidad De Control → Unidad De Conmutación → Indicadores Led (diodos) → Interruptor Principal)
- 193. Instalación (Vinculación De La Unidad De Control Con La Unidad De Conmutación → Pruebas De La Comunicación Inalámbrica Entre Las Unidades → Borrar La Memoria (código) De Las Unidades Vinculadas)
- 194. Cambio Del Termostato Original (Identificación De Los Cables → Ubicación Del Termostato → Montaje De La Unidad De Conmutación En La Pared)
- 195. Esquema De Conexión (Esquema De Conexión De La Bomba/válvula Motorizada → Esquema De Conexión Del Suelo Radiante)
- 196. Esquema De Conexión De La Caldera (conmutación Sin Voltaje) (Esquema De Conexión Opentherm → Montaje De La Unidad De Control (si No Quiere Aprovechar Su Movilidad) → Selección Del Sistema De Calefacción/aire Acondicionado)
- 197. Selección De La Dispersión De Temperatura (Inserción De Pilas)
- 198. Ajuste De Hora/día (Retroiluminación De La Pantalla → Ajuste De La Temperatura Deseada → Ajustes Del Programa → Selección De La Semana/ Del Día → Ajustes Del Programa Preseleccionado)
- 199. Número De Programa (Perfil De Programa → Temperatura Confort Del Día Entero → Temperatura Económica Del Día Entero → Combinación De La Temperatura Confort Y Económica → Ajustes De Usuario Del Programa)
- 200. Cambio Temporal Del Programa Seleccionado (Cambio Temporal De Los Ajustes De Temperatura → Calibración De La Temperatura Ambiente → Modo Anticongelante)
- 201. Ajustes De Los Parámetros Opentherm (Indicación De Los Errores Del Opentherm → Cambio De Pilas)
- 202. Cuidado Y Mantenimiento (Recomendaciones De Uso → Reparación Y Limpieza → Advertencias De Seguridad → Eliminación De Residuos)
- 203. Belangrijke Informatie (Specificatie)
- 204. Maten En Gewicht (Bedieningseenheid → Schakeleenheid → Verwijderen Van Het Achterdeksel Van De Regeleenheid → Led-indicatoren → Hoofdschakelaar)
- 205. Installatie (Koppelen Van De Regeleenheid Aan De Schakeleenheid → Testen Van De Draadloze Communicatie Tussen De Toestellen → Wissen Van Het Geheugen (de Code) Van Gekoppelde Eenheden)
- 206. Vervanging Van De Originele Thermostaat (Markering Van De Draden → Het Plaatsen Van De Thermostaat → Bevestiging Van De Schakeleenheid Aan De Muur)
- 207. Aansluitschema (Aansluitschema Pomp/gemotoriseerde Klep → Aansluitingsschema Van De Vloerverwarming)
- 208. Aansluitschema Voor De Boiler (spanningsvrij Schakelen) (Schema Voor De Opentherm-aansluiting → Installatie Van De Regeleenheid → Keuze Van Het Verwarmings-/ Airconditioningsysteem)
- 209. Selectie Van De Temperatuurspreiding (Installatie Van De Batterijen)
- 210. Uren/dag-instelling (Achtergrondverlichting Van De Display → Instelling Van De Benodigde Temperatuur → Programma-instelling → Week/dag-selectie → Keuze Van Het Vooringestelde Programma)
- 211. Programmaprofiel (Comforttemperatuur Gedurende De Hele Dag → Spaartemperatuur Gedurende De Hele Dag → Combinatie Van Comfort En Spaartemperatuur → Voor De Gebruiker → Gebruik De Toets → Gebruikersinstelling Van Het Programma)
- 212. Druk Op De Toets Of Om Het Uur Te Selecteren (Tijdelijke Wijziging Van Het Ingestelde Programma → Tijdelijke Wijziging Van De Temperatuurinstelling → Kalibratie Van De Kamertemperatuur → Antivriesmodus)
- 213. Instellen Van De Opentherm-parameters (Antivriesmodus Verlaten → Vooraf Ingestelde Temperatuur → Schakelinstelling Voor De Gewenste Waarde → Instelling Voor De Maximumwaarde → Instelling Van De Temperatuur Van Het Warme Water → Instelling Voor Het Omschakelen Van De Bediening)
- 214. Indicatie Van Een Opentherm-fout (Vervangen Van Batterijen → Zorg En Onderhoud)
- 215. Veilig Gebruik Van Het Apparaat (Afvalverwerking → Conformiteit Met Richtlijn 2014/53/eu)
- 216. Garancijska Izjava (Navodila Za Reklamacijski Postopek)
×
EMOS P5611OT Wireless Thermostat Instruction Manual








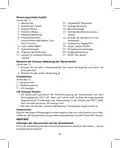


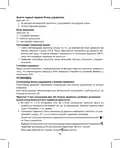


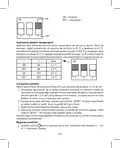


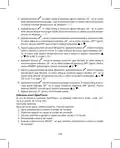


















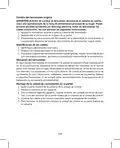




Deleting the Memory (Code) of Paired Units
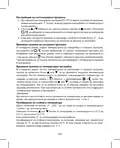
To delete the pairing code used between the control and switching unit, follow the
instructions below. Press and hold the “ID” button on the switching unit; the red LED
will start flashing. Short press the “ID” button again within 10 seconds. The red LED
will stop flashing and goes out. The pairing code is deleted.
Replacing the Original Thermostat
ATTENTION: Before replacing the thermostat, disconnect the heating/air-condi-
tioning system from the power in your flat. This will prevent potential injury by
electric current. Before disconnecting the leads, read the following instructions
carefully.
1. Turn off the original thermostat and remove the thermostat cover.
2. Unscrew the thermostat from the wall panel.
3. Unscrew the connecting rear panel of the thermostat from the wall. Pull the
rear panel out a sort distance from the wall, but do not disconnect any wires yet.
Marking Wires
1. Identify and disconnect each wire.
2. Secure the wires against getting torn out.
3. If the hole behind the thermostat is too large, seal it with insulating foam to prevent
air flow. This is to prevent incorrect temperature measurement.
Thermostat Placement
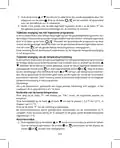
Thermostat (control unit) location significantly affects its function. Place it in a room
where members of the family spend most of their time. Choose a spot preferably on
an inside wall where air circulates freely and there is no direct sunlight. Do not place
the thermostat in the vicinity of heat sources (such as TV sets, radiators, fridges), or
close to a door (due to frequent shocks or vibrations). Failure to comply with these
recommendations will prevent proper control over room temperature.
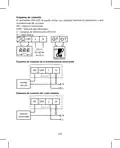
Mounting the Switching Unit onto the Wall
1. Remove the rear cover of the switching unit.
2. Mark positions for holes.
3. Drill two holes, carefully insert the plastic wall plugs into them and use two screws
to mount the rear cover of the switching unit.
4. Connect the wires to the labelled terminals according to the wiring diagram.
5. Complete the installation by fitting the switching unit onto the mounted rear cover.
6

| General | Details |
|---|---|
| Name | EMOS P5611OT Wireless Thermostat Instruction Manual |
| Make | EMOS |
| Language | English |
| Filetype | PDF (Download) |
| File size | 1.38 MB |
 (1 votes, average: 5.00 out of 5)
 Loading...

EMOS P56201BUF Floor Heating Thermostat User Guide

emos P56201 Digital Room Thermostat User Manual

EMOS P56201UF Floor Heating Thermostat Instruction Manual

emos P5604 Thermostat Instruction Manual

emos P5686 Immersion Thermostat Instructions

EMOS P56211 Wireless Thermostat Instruction Manual

emos P5616OT Wireless Thermostat Instruction Manual

emos P56201UF GoSmart Digital Room Thermostat Instruction Manual

EMOS P5601UF Floor Heating Thermostat User Manual

emos P5684 Capillary Sensor Thermostat User Manual


WhisperKOOL Phantom 24V Thermostat Conversion Kit Installation Guide

REPTO R3300030 Smart Thermostat Instruction Manual

meross MTS200HK Smart Wi-Fi Thermostat User Manual

namron 4512738 Touch Zigbee 16A Thermostat Instruction Manual

PRO1 T701 Digital Non Programmable Thermostat Instruction Manual

GENERALLIFE MITRA 260S RF Wireless Room Thermostat User Manual

COPELAND P-N 810-1600 Programmable Touchscreen Thermostat User Guide

ELKO ep TER-4 Double Thermostat Owner’s Manual

THORGEON 18007 Digital Plug In Thermostat Instructions

BEOK TDS23 Wifi Thermostat Owner’s Manual
Table of Contents
- 1. Wireless Thermostat - Bezdrátový Termostat →
- 2. Front Part - Rear Part →
- 3. Wireless Thermostat - Important →
- 4. Temperature Measurement - Temperature Setting →
- 5. Led Indicators - Main Switch →
- 6. Deleting The Memory (code) Of Paired Units - Replacing The O... →
- 7. Wiring Diagram - Pump/motorised Valve Wiring Diagram →
- 8. Boiler Wiring Diagram (zero Voltage Switching) - Opentherm C... →
- 9. Selecting Temperature Differential - Installing Batteries →
- 10. Setting The Time/date - Screen Illumination →
- 11. Programme Number - Programme Profile →
- 12. Temporary Change Of A Set Programme - Temporary Change Of Te... →
- 13. Pressing The Button - Opentherm Error Indication →
- 14. Upkeep And Maintenance - Proper Operation Tips →
- 15. Bezdrátový Termostat - Důležitá Upozornění →
- 16. Nastavení Času - Zobrazení Aktuální Pokojové Teploty →
- 17. Testování Bezdrátové Komunikace Mezi Jednotkami - Vymazání P... →
- 18. Montáž Spínací Jednotky Na Zeď - Schéma Zapojení →
- 19. Schéma Připojení Podlahového Vytápění - Schéma Připojení Kot... →
- 20. Volba Vytápěcího/klimatizačního Systému - Volba Rozptylu Tep... →
- 21. Nastavení Hodin/dne - Podsvícení Displeje →
- 22. Výběr Přednastaveného Programu - Uživatelské Nastavení Progr... →
- 23. Dočasná Změna Nastaveného Programu - Dočasná Změna Nastavení... →
- 24. Stiskněte Tlačítko - Nastavení Spínání Požadované Hodnoty →
- 25. Péče A Údržba - Správná Obsluha →
- 26. Dôležité Upozornenia - Špecifikácia →
- 27. Inštalácia - Spárovanie Ovládacej Jednotky So Spínacou Jedno... →
- 28. Testovanie Bezdrôtovej Komunikácie Medzi Jednotkami - Vymaza... →
- 29. Umiestenie Termostatu - Montáž Spínacej Jednotky Na Stenu →
- 30. Schéma Pripojenia Čerpadla / Motorizovaného Ventilu - Schéma... →
- 31. Schéma Opentherm Pripojenia - Montáž Ovládacej Jednotky (nec... →
- 32. Inštalácia Batérií - Nastavenie Hodín/dňa →
- 33. Nastavenie Požadovanej Teploty - Nastavenie Programu →
- 34. Programový Profil - Užívateľské Nastavenia Programu →
- 35. Kalibrácia Izbovej Teploty - Protimrazový Režim →
- 36. Nastavenie Teploty Horúcej Vody - Nastavenie Spínania Ovláda... →
- 37. K Čisteniu Používajte Mierne Navlhčenú Jemnú Handričku. Nepo... →
- 38. Dokładność Zegara - Pomiar Temperatury →
- 39. Wskaźniki Led (diody) - Wyłącznik Główny →
- 40. Zasięg Między Jednostką Sterującą A Przełączającą - Kasowani... →
- 41. Montaż Jednostki Przełączającej Na Ścianie - Schemat Połącze... →
- 42. Schemat Podłączenia Ogrzewania Podłogowego - Schemat Podłącz... →
- 43. Instalację - Wybór Systemu Grzewczego/klimatyza... →
- 44. Ustawienie Zegara/dnia - Podświetlenie Wyświetlacza →
- 45. Ustawienie Programu - Wybór Tygodnia/dnia →
- 46. Ustawienie Programu Użytkownika - Chwilowa Zmiana Ustawioneg... →
- 47. Tryb Przeciwzamrożeniowy - Ustawienie Parametrów Opentherm →
- 48. Wskazania Błędów Opentherm - Wymiana Baterii →
- 49. Przy Uszkodzeniu Albo Wadzie Wyrobu Żadnych Napraw Nie Wykon... →
- 50. Hőmérséklet Mérése - Hőmérséklet-szabályo... →
- 51. A Led-állapotjelző (dióda) - Főkapcsoló →
- 52. A Párosított Egységek Memóriájának (kódjának) Törlése - Az E... →
- 53. Kapcsolási Rajz - A P5611ot Termosztát Bármilyen Egyfokozatú... →
- 54. Kazán Csatlakoztatási Rajz (feszültségmentes Kapcsolás) - Op... →
- 55. Kapcsolási Hőmérséklet-tartomán... - Az Elemek Behelyezése →
- 56. Óra/nap Beállítása - A Kijelző Háttérvilágítása →
- 57. Program-profil - Es Program: Az Egész Napos Komforthőmérsékle... →
- 58. Az Egész Nap Profiljának Beállítása Után - A Beállított Prog... →
- 59. Opentherm Paraméterek Beállítása - Opentherm Hibajelzés →
- 60. Távolítsa El A Vezérlőegység Hátlapját! - Cserélje Ki Az Ere... →
- 61. Az Elektromos Készülékeket Ne Dobja A Vegyes Háztartási Hull... →
- 62. Dimenzije In Teža - Upravljalna (prenosna) Enota →
- 63. Opozorilo - Vstavite →
- 64. Označevanje Žic - Namestitev Termostata →
- 65. Shema Priključitve Črpalke / Motoriziranega Ventila - Shema ... →
- 66. Shema Priključitve Opentherm - Namestitev Upravljalne Enote →
- 67. Namestitev Baterij - Nastavitev Ure/dneva →
- 68. Pritisnite Večkrat Na Tipko - Nastavitev Temperature →
- 69. Številka Programa - Programski Profil →
- 70. Umerjanje Sobne Temperature - Način Proti Zmrzovanju →
- 71. Prikaz Napak Opentherm - Zamenjava Baterij →
- 72. Pri Poškodbah Ali Napaki Izdelka Ne Popravljajte Sami. Preda... →
- 73. Radna Temperatura - Temperatura Skladištenja →
- 74. Glavni Prekidač - Postavljanje →
- 75. Zamjena Originalnog Termostata - Označavanje Žica →
- 76. Shema Ožičenja Za Pumpu/motorizirani Ventil - Shema Ožičenja... →
- 77. Shema Ožičenja Za Bojler (prebacivanje Nultog Napona) - Dija... →
- 78. Odabir Temperaturne Razlike - Umetanje Baterija →
- 79. Pritisnite Gumb - Osvjetljenje Zaslona →
- 80. Broj Programa - Profil Programa →
- 81. Privremena Promjena Postavljenog Programa - Privremena Promj... →
- 82. Oznaka Pogreške Opentherm - Zamjena Baterija →
- 83. Servis I Održavanje - Nekoliko Savjeta Za Pravilan Rad →
- 84. Wichtige Hinweise - Spezifikation →
- 85. Steuerungseinheit (mobil) - Abnahme Der Hinteren Abdeckung D... →
- 86. Einstellen Der Automatischen Verbindung - Testen Der Drahtlo... →
- 87. Austausch Des Ursprünglichen Thermostats - Kennzeichnung Der... →
- 88. Schaltbild - Anschlussschema Für Die Pumpe/das Motorisierte ... →
- 89. Anschlussschema Für Den Kessel (spannungsfreies Schalten) - ... →
- 90. Wahl Der Temperaturvarianz - Einlegen Der Batterien →
- 91. Einstellung Von Uhrzeit/wochentag - Displaybeleuchtung →
- 92. Auswahl Eines Voreingestellten Programmes - Programmnummer →
- 93. Benutzerdefinierte Programmeinstellungen - Temporäre Änderun... →
- 94. Anti-frost Modus - Einstellung Der Opentherm-parameter →
- 95. Heißwasser - Fehleranzeige Opentherm →
- 96. Sicherheitshinweise - Reinigungshinweise →
- 97. Важливе Попередження - Специфікація →
- 98. Зняття Задньої Кришки Блоку Управління - Блок Вмикання →
- 99. Тестування Бездротового Звязку Між Блоками - Анулювання Памя... →
- 100. Кріплення Вимикача На Стіні - Схема Підключення →
- 101. Схема Підключення Підлогового Опалення - Схема Підключення К... →
- 102. Вибір Системи Опалення / Кондиціонування - Вибір Дисперсії Т... →
- 103. Налаштування Годин/дня - Підсвічування Дисплея →
- 104. Налаштування Програми - Вибір Тижня / Дня →
- 105. Налаштування Програми Користувачем - Тимчасова Зміна Заданої... →
- 106. Режим Захисту Від Замерзання - Налаштування Параметрів Opent... →
- 107. Індикація Помилки Opentherm - Заміна Батарейки →
- 108. Пошкоджений Чи Дефектний Виріб Самі Не Ремонтуйте. Здайте Йо... →
- 109. Reglarea Temperaturii - Temperatura De Funcționare →
- 110. Indicatoare Led (diode) - Comutatorul Principal →
- 111. Radierea Memoriei (codului) Unităților Asociate - Înlocuirea... →
- 112. Schema De Racordare - Termostatul P5611ot Poate Fi Folosit C... →
- 113. Schema De Conectare A Cazanului (cuplare Fără Tensiune) - Sc... →
- 114. Selectarea Abaterii Temperaturii - Instalarea Bateriilor →
- 115. Iluminarea Ecranului - Reglarea Temperaturii Solicitate →
- 116. Numărul Programului - Profilul Programului →
- 117. Modificarea Temporară A Programului Setat - Modificarea Tempor... →
- 118. Apăsați Butonul - Indicarea Erorii Opentherm →
- 119. Grija Şi Întreţinerea - Recomandări Pentru O Manipulare Core... →
- 120. Lt | Belaidis Termostatas - Specifikacijos →
- 121. Temperatūros Nustatymas - Šalčio Indikacija →
- 122. Belaidžio Ryšio Tarp Blokų Tikrinimas - Kaip Ištrinti Susiet... →
- 123. Perjungimo Bloko Montavimas Ant Sienos - Montavimo Schema →
- 124. Grindų Šildymo Laidų Schema - Katilo Laidų Schema (nulinės Į... →
- 125. Šildymo (oro Kondicionavimo) Sistemos Parinkimas - Pasirinki... →
- 126. Laiko Ir Datos Nustatymas - Ekrano Apšvietimas →
- 127. Iš Anksto Nustatytos Programos Pasirinkimas - Programos Nume... →
- 128. Personalizuotos Programos Nustatymas - Laikinas Nustatytos P... →
- 129. Apsaugos Nuo Užšalimo Režimas - Opentherm' Parametrų Nustaty... →
- 130. Opentherm Klaidos Rodymas - Baterijų Keitimas →
- 131. Nemeskite Kartu Su Buitinėmis Atliekomis - P5611ot Termostat... →
- 132. Raidītāja Diapazons - Barošanas Avots →
- 133. Galvenais Slēdzis - Uzstādīšana →
- 134. Oriģinālā Termostata Nomaiņa - Marķēšanas Vadi →
- 135. Sūkņa/motorizētā Vārsta Elektroinstalācijas Shēma - Grīdas A... →
- 136. Apkures Katla Elektroinstalācijas Shēma - 'opentherm' Savien... →
- 137. Temperatūras Diferenciāļa Izvēlēšanās - Bateriju Ievietošana →
- 138. Laika/datuma Iestatīšana - Ekrāna Apgaismojums →
- 139. Programmas Numurs - Komforta Temperatūra Visu Dienu →
- 140. Nospiediet Pogu - Kad Esat Iestatījis Profilu Visai Dienai →
- 141. Ilgi - Nospiediet Pogu →
- 142. Apkope Un Uzturēšana - Izstrādājuma Lietošana →
- 143. Ee | Juhtmevaba Termostaat - Oluline! →
- 144. Käsitsi Juhtimine - Tööoleku Ikoon →
- 145. Seadmetevahelise Juhtmevaba Ühenduse Testimine - Seotud Sead... →
- 146. Lülitusseadme Paigaldamine Seinale - Juhtmestiku Skeem →
- 147. Põrandakütte Ühendusskeem - Katla Ühendusskeem (pingevaba Ko... →
- 148. Kütte-/kliimaseadme Valimine - Temperatuurierinevuse Valimin... →
- 149. Termostaat On Nüüd Kasutusvalmis. - Kellaaja/kuupäeva Määram... →
- 150. Eelseadistatud Programmi Valimine - Programmi Määramiseks Va... →
- 151. Kui Olete Terve Päeva Profiili Seadistanud, Vajutage Valitud ... →
- 152. Openthermi - Patareide Vahetamine →
- 153. Korrashoid Ja Hooldamine - Nõuanded Nõuetekohaseks Kasutamis... →
- 154. Технически Характеристики - Важно →
- 155. Управляващ (преносим) Модул - Превключващ Модул →
- 156. Внимание: Когато Свързвате Два Или Повече Приемника, Е Необх... →
- 157. Избиране На Място За Монтиране На Термостата - Монтиране На ... →
- 158. Електрическа Схема На Свързване На Помпата/моторизирания Кла... →
- 159. Диаграма За Окабеляване На Котела (превключване Нулево Напре... →
- 160. Избиране На Температурен Диференциал - Инсталиране На Батери... →
- 161. Настройка На Часа/датата - Осветление На Екрана →
- 162. Номер На Програма - Профил На Програма →
- 163. Настройване На Къстъмизирана Програма - Временна Промяна На ... →
- 164. Режим За Предпазване От Замръзване - Настройване На Параметр... →
- 165. Натискането - Индикация За Грешка На Opentherm →
- 166. Почистване На Уреда - Безопасност При Употреба →
- 167. Spécifications - Précision De Lhorloge →
- 168. Unité De Commutation - Installation →
- 169. Éviter Les Risques Daccidents - Remplacement Du Thermostat D... →
- 170. Montage De Lunité De Commutation Au Mur - Schéma De Raccorde... →
- 171. Schéma De Raccordement Pour Le Chauffage Au Sol - Schéma De ... →
- 172. Choix Du Système De Chauffage/climatisation - Choix De La Va... →
- 173. Réglage De Lheure/du Jour - Rétro-éclairage De Lécran →
- 174. Réglage Du Programme - Sélection De La Semaine/du Jour →
- 175. Numéro Du Programme - Profil De Programme →
- 176. Étalonnage De La Température Ambiante - Mode Antigel →
- 177. Indication Derreur Opentherm - Remplacement Des Piles →
- 178. Ne Pas Exposer Le Produit Aux Intempéries Ou À Lhumidité, Ni... →
- 179. Avvertenze Importanti - Specifiche →
- 180. Installazione - Abbinamento Dellunità Di Controllo Allunità ... →
- 181. Test Della Comunicazione Wireless Tra Le Unità - Cancellazio... →
- 182. Posizione Del Termostato - Montaggio Dellunità Di Commutazio... →
- 183. Schema Di Collegamento Della Pompa/valvola Motorizzata - Sch... →
- 184. Schema Di Collegamento Opentherm - Installazione Dellunità D... →
- 185. Impostare I Commutatori Dip - Istallazione Di Batterie →
- 186. Impostazione Della Temperatura Desiderata - Impostazioni Del... →
- 187. Numero Del Programma - Profilo Del Programma →
- 188. Modifica Temporanea Del Programma Impostato - Modifica Tempo... →
- 189. Indicazione Di Errore Opentherm - Sostituzione Delle Batteri... →
- 190. Cura E Manutenzione - Uso Corretto Del Prodotto →
- 191. El Termostato P5611ot Está Diseñado Para El Control De Siste... →
- 192. Unidad De Control (portátil) - Cómo Quitar La Tapa Trasera D... →
- 193. Instalación - Vinculación De La Unidad De Control Con La Uni... →
- 194. Cambio Del Termostato Original - Identificación De Los Cable... →
- 195. Esquema De Conexión - Esquema De Conexión De La Bomba/válvul... →
- 196. Esquema De Conexión De La Caldera (conmutación Sin Voltaje) ... →
- 197. Selección De La Dispersión De Temperatura - Inserción De Pil... →
- 198. Ajuste De Hora/día - Retroiluminación De La Pantalla →
- 199. Número De Programa - Perfil De Programa →
- 200. Cambio Temporal Del Programa Seleccionado - Cambio Temporal ... →
- 201. Ajustes De Los Parámetros Opentherm - Indicación De Los Erro... →
- 202. Cuidado Y Mantenimiento - Recomendaciones De Uso →
- 203. Belangrijke Informatie - Specificatie →
- 204. Maten En Gewicht - Bedieningseenheid →
- 205. Installatie - Koppelen Van De Regeleenheid Aan De Schakeleen... →
- 206. Vervanging Van De Originele Thermostaat - Markering Van De D... →
- 207. Aansluitschema - Aansluitschema Pomp/gemotoriseerde Klep →
- 208. Aansluitschema Voor De Boiler (spanningsvrij Schakelen) - Sc... →
- 209. Selectie Van De Temperatuurspreiding - Installatie Van De Ba... →
- 210. Uren/dag-instelling - Achtergrondverlichti... Van De Display →
- 211. Programmaprofiel - Comforttemperatuur Gedurende De Hele Dag →
- 212. Druk Op De Toets Of Om Het Uur Te Selecteren - Tijdelijke Wi... →
- 213. Instellen Van De Opentherm-parameters - Antivriesmodus Verla... →
- 214. Indicatie Van Een Opentherm-fout - Vervangen Van Batterijen →
- 215. Veilig Gebruik Van Het Apparaat - Afvalverwerking →
- 216. Garancijska Izjava - Navodila Za Reklamacijski Postopek →