Home > Meross > meross MTS200HK Smart Wi-Fi Thermostat User Manual

meross MTS200HK Smart Wi-Fi Thermostat User Manual

User Manual  
GeneralDetails
Namemeross MTS200HK Smart Wi-Fi Thermostat User Manual
MakeMeross
LanguageEnglish
FiletypePDF (Download)
File size1.44 MB
Download PDF
1 Star2 Stars3 Stars4 Stars5 Stars (1 votes, average: 5.00 out of 5)
Loading...
meross T6R Wireless Smart Thermostat User Manual
Meross MTS200HK Smart Thermostat User Manual
Meross MTS960 Smart Wi-Fi Socket Thermostat Instruction Manual

meross MTS200HK Smart Wi-Fi Thermostat User Manual
Get the free PDF manual for the meross MTS200HK Smart Wi-Fi Thermostat User Manual and access setup steps, usage instructions, and troubleshooting tips. 👉 View online or download now to keep your thermostat running smoothly!
meross MTS200HK Smart Wi-Fi Thermostat User Manual Overview
Summary of Contents

  • Page 1: Page 1
  • Page 2: Page 2
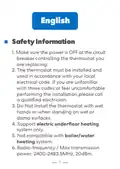
  • Page 3: Safety information Make sure the power is off at the circuit breaker controlling the thermostat you are replacing. The thermostat must be installed and used in accordance with your local electrical code. If you are unfamiliar with these codes, or feel uncomfortable performing the installation, please call a qualified electrician. Do not install the thermostat with wet hands or when standing on wet or damp surfaces. Support electric underfloor heating system only. Not compatible with boiler/water heating system. Radio-frequency / Max transmission power: 2400-2483.5MHz, 20dBm.
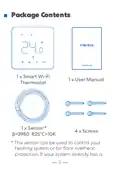
  • Page 4: Package contents include a smart Wi-Fi thermostat, user manual, sensor, and screws. The sensor can be used to control the heating system or for floor overheat protection.
  • Page 5: Getting to know your thermostat This external sensor is optional, you can install it or not. You can also connect it to the thermostat to use. If you have an external sensor with the same parameters installed, you can connect it.
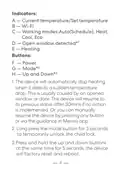
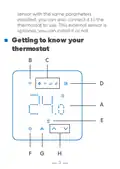
  • Page 6: Indicators include current temperature/set temperature, Wi-Fi status, and working modes such as auto, heat, cool, and eco. The device detects open windows and will stop heating when a sudden temperature drop is detected. It will resume its previous status after 30 minutes if no action is taken. Users can manually resume the device by pressing any button or through the Meross app. A long press of the mode button for 3 seconds temporarily unlocks the child lock. Pressing and holding the up and down buttons simultaneously for 5 seconds will factory reset and reboot the device.
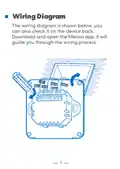
  • Page 7: Wiring diagram is shown below. You can also check it on the device back. Download and open the Meross app. It will guide you through the wiring process.
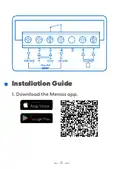
  • Page 8: Download the Meross app.
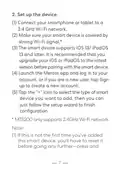
  • Page 9: Set up the device. Connect your smartphone or tablet to a 2.4 GHz Wi-Fi network. Make sure your smart device is covered by strong Wi-Fi signal. The smart device supports iOS 13/iPadOS 13 and later. It is recommended that you upgrade your iOS or iPadOS to the latest version before pairing with the smart device. Launch the Meross app and log in to your account, or if you are a new user, tap Sign up to create a new account. Tap the “+” icon to select the type of smart device you want to add, then follow the setup wizard to finish configuration. MTS200 only supports 2.4GHz Wi-Fi network. If this is not the first time you've added this smart device, you’ll have to reset it before going any further.
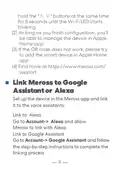
  • Page 10: Hold the ∧ ∨ buttons at the same time for 5 seconds until the Wi-Fi LED starts blinking. As long as you finish configuration, you’ll be able to manage the device in the Apple Home app. If the QR code does not work, please try to add the smart device in the Apple Home app. Set up the device in the Meross app and link it to the voice assistants. Go to Account -> Alexa and allow Meross to link with Alexa. Go to Account -> Google Assistant and follow the step-by-step instructions to complete the linking process.
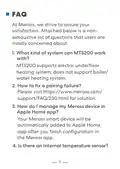
  • Page 11: FAQ At Meross, we strive to assure your satisfaction. Attached below is a non-exhaustive list of questions that users are mostly concerned about. What kind of system can MTS200 work with? MTS200 supports electric underfloor heating system, does not support boiler/water heating system. How to fix a pairing failure? Please visit the support page for solution. How do I manage my Meross device in Apple Home app? Your Meross smart device will be automatically added to Apple Home app after you finish configuration in the Meross app. Is there an internal temperature sensor?
  • Page 12: There is an internal and an external sensor (optional). To learn more, you can visit the support page for frequently asked questions.
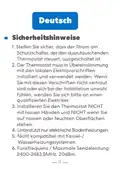
  • Page 13: Sicherheitshinweise Stellen Sie sicher, dass der Strom am Schutzschalter, der den auszutauschenden Thermostat steuert, ausgeschaltet ist. Der Thermostat muss in Übereinstimmung mit den lokalen Elektrovorschriften installiert und verwendet werden. Wenn Sie mit diesen Vorschriften nicht vertraut sind oder sich bei der Installation unwohl fühlen, wenden Sie sich bitte an einen qualifizierten Elektriker. Installieren Sie den Thermostat NICHT mit nassen Händen und NICHT wenn Sie auf nassen oder feuchten Oberflächen stehen. Unterstützt nur elektrische Bodenheizungen. Nicht kompatibel mit Kessel-/Wasserheizungssystemen. Funkfrequenz / Maximale Sendeleistung: 2400-2483,5MHz, 20dBm.
  • Page 14: Paketinhalt 1 x Gebrauchsanweisung 1 x Smart Wi-Fi Thermostat 1 x Sensor 4 x Schrauben Dieser Sensor kann zur Steuerung Ihrer Heizungsanlage oder als Überhitzungsschutz für den Fußboden verwendet werden.
  • Page 15: Ein externer Sensor ist optional. Sie können ihn installieren oder nicht. Ein Fühler mit den gleichen Parametern kann angeschlossen werden. Kennen Sie jetzt Ihren Thermostat.
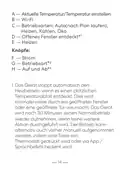
  • Page 16: Aktuelle Temperatur/Temperatur einstellen Betriebsarten: Auto(nach Plan laufen), Heizen, Kühlen, Öko Das Gerät stoppt automatisch den Heizbetrieb, wenn es einen plötzlichen Temperaturabfall entdeckt. Dies wird normalerweise durch ein geöffnetes Fenster oder eine geöffnete Tür verursacht. Das Gerät wird nach 30 Minuten seinen Normalbetrieb wieder aufnehmen, wenn keine weitere Aktion durchgeführt wird. Der Betrieb kann alternativ auch vorher manuell aufgenommen werden, indem eine Taste am Thermostat gedrückt wird oder via App / Sprachbefehl bedient wird.
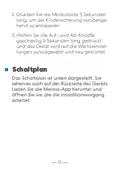
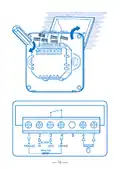
  • Page 17: Drücken Sie die Modustaste 3 Sekunden lang, um die Kindersicherung vorübergehend zu entsperren. Halten Sie die Auf- und Ab-Knöpfe gleichzeitig 5 Sekunden lang gedrückt und das Gerät wird auf die Werkseinstellungen zurückgesetzt und neu gestartet. Das Schaltplan ist unten dargestellt. Sie sehen es auch auf der Rückseite des Geräts. Laden Sie die Meross-App herunter und öffnen Sie sie, die die Installationsvorgang anleitet.
  • Page 18: Page 18
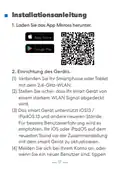
  • Page 19: Installationsanleitung Laden Sie das App Meross herunter. Einrichtung des Geräts. Verbinden Sie Ihr Smartphone oder Tablet mit dem 2,4-GHz-WLAN. Stellen Sie sicher, dass Ihr smart Gerät von einem starken WLAN Signal abgedeckt wird. Das smart Gerät unterstützt iOS13 / iPadOS 13 und andere neueren Stände. Für bessere Benutzererfahrung wird es empfohlen, Ihr iOS oder iPadOS auf dem neuesten Stand vor der Zusammenstellung mit dem smart Gerät zu aktualisieren. Melden Sie sich bei Ihrem Konto an, oder wenn Sie ein neuer Benutzer sind, tippen.
  • Page 20: Sie auf Anmelden, um ein neues Konto zu erstellen. MTS200 unterstützt nur 2,4-GHz-Netzwerke. Wenn dies nicht das erste Mal ist, dass Sie dieses Smartgerät hinzufügen, müssen Sie es zurücksetzen, bevor Sie weitermachen. Halten Sie die Knöpfe ∧ ∨ gleichzeitig für 5 Sekunden gedrückt, bis die Wi-Fi LED zu blinken startet. Solange Sie die Konfiguration fertig gemacht haben, sind Sie auch in der Lage, das Gerät in Apple Home App zu verwalten. Wenn QR-Code nicht funktioniert, versuchen Sie bitte, das Smartgerät in Apple Home App hinzuzufügen. Um mehr zu erfahren, besuchen Sie bitte die Support-Seite. Verbinden mit Google Assistant oder Alexa.
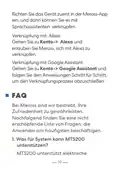
  • Page 21: Richten Sie das Gerät zuerst in der Meross-App ein, und dann können Sie es mit Sprachassistenten verknüpfen. Verknüpfung mit Alexa: Gehen Sie zu Konto-> Alexa und erlauben Sie Meross, sich mit Alexa zu verknüpfen. Verknüpfung mit Google Assistant: Gehen Sie zu Konto-> Google Assistant und folgen Sie den Anweisungen Schritt für Schritt, um den Verknüpfungsprozess abzuschließen. FAQ: Bei Meross sind wir bestrebt, Ihre Zufriedenheit zu gewährleisten. Nachfolgend finden Sie eine nicht erschöpfende Liste von Fragen, die Anwender am häufigsten beschäftigen. Was für System kann MTS200 unterstützen? MTS200 unterstützt elektrische.
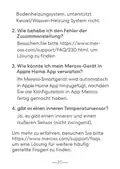
  • Page 22: Bodenheizungsystem unterstützt Kessel/Wasser-Heizung System nicht. Wie behebe ich den Fehler der Zusammenstellung? Besuchen Sie bitte die Support-Seite für Lösungen. Wie könnte ich mein Meross-Gerät in Apple Home App verwalten? Ihr Meross-Smartgerät wird automatisch in Apple Home App hinzugefügt. Gibt es einen inneren Temperatursensor? Ja, es gibt einen inneren und einen äußeren Sensor. Um mehr zu erfahren, besuchen Sie bitte die FAQ-Seite.
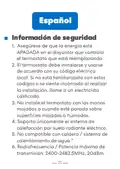
  • Page 23: Información de seguridad Asegúrese de que la energía esté apagada en el disyuntor que controla el termostato que está reemplazando. El termostato debe instalarse y usarse de acuerdo con su código eléctrico local. Si no está familiarizado con estos códigos o se siente incómodo al realizar la instalación, llame a un electricista calificado. No instale el termostato con las manos mojadas o cuando esté parado sobre superficies mojadas o húmedas. Soporta únicamente el sistema de calefacción por suelo radiante eléctrico. No compatible con caldera o sistema de calentamiento de agua. Radiofrecuencia / Potencia máxima de transmisión: 2400-2483,5MHz, 20dBm.
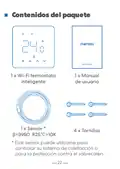
  • Page 24: Contenidos del paquete 1 x Wi-Fi termostato inteligente 1 x Manual de usuario 1 x Sensor 4 x Tornillos Este sensor puede utilizarse para controlar su sistema de calefacción o para la protección contra el sobrecalentamiento.
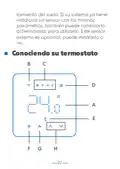
  • Page 25: Conociendo su termostato. Este sensor externo es opcional, puede instalarlo o no. Si su sistema ya tiene instalado un sensor con los mismos parámetros, también puede conectarlo al termostato para utilizarlo.
  • Page 26: Indicadores: A — Temperatura actual / temperatura establecida B — Wi-Fi C — Modos de trabajo: automático (programación), calor, frío, eco D — Ventana abierta detectada E — Calefacción Botones: F — Poder G — Modo H — Arriba y abajo El dispositivo detendrá automáticamente el calentamiento cuando detecte una caída repentina de temperatura. Esto generalmente es causado por una ventana o puerta abierta. El dispositivo volverá a su estado anterior después de 30 minutos si no se implementa ninguna acción. O puede reanudar manualmente el dispositivo presionando cualquier botón o mediante la guía de la aplicación Meross.
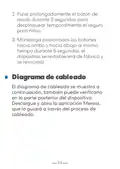
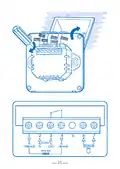
  • Page 27: Pulse prolongadamente el botón de modo durante 3 segundos para desbloquear temporalmente el seguro para niños. Mantenga presionados los botones hacia arriba y hacia abajo al mismo tiempo durante 5 segundos, el dispositivo se restablecerá de fábrica y se reiniciará. El diagrama de cableado se muestra a continuación, también puede verificarlo en la parte posterior del dispositivo. Descargue y abra la aplicación Meross, que lo guiará a través del proceso de cableado.
  • Page 28: Page 28
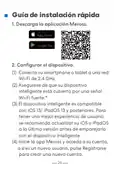
  • Page 29: Guía de instalación rápida Descarga la aplicación Meross. Configurar el dispositivo. Conecta su smartphone o tablet a una red Wi-Fi de 2,4 GHz. Asegúrese de que su dispositivo inteligente está cubierto por una señal Wi-Fi fuerte. El dispositivo inteligente es compatible con iOS 13/iPadOS 13 y posteriores. Se recomienda actualizar su iOS o iPadOS a la última versión antes de emparejarlo con el dispositivo inteligente. Inicie la app Meross y acceda a su cuenta. Si es un nuevo usuario, pulse Registrarse para crear una nueva cuenta.
  • Page 30: Toca el icono + para seleccionar el tipo de dispositivo inteligente que quieres añadir. El enchufe MTS200 solo es compatible con las redes de 2.4GHz. Si no es la primera vez que agregas este dispositivo inteligente, tendrás que restablecerlo antes de continuar. Mantén presionados los botones ∧ ∨ al mismo tiempo durante 5 segundos hasta que se encienda el WiFi LED parpadeo. En cuanto termines la configuración, también podrás gestionar el dispositivo en la app Apple Home. Si el código QR no funciona, intenta añadir el dispositivo inteligente en la aplicación Apple Home. Para más información, visita el sitio de soporte.
  • Page 31: Enlaza Meross con Google Assistant o Alexa. Configura primero el dispositivo en la app de Meross y luego vincúlalo con los asistentes de voz. Ve a Cuenta-> Alexa y permitir que Meross se vincule con Alexa. Ve a Cuenta-> Google Assistant y sigue las instrucciones paso a paso para completar el proceso de vinculación. En Meross, nos esforzamos por asegurar su satisfacción. A continuación se adjunta una lista no exhaustiva de las preguntas que más preocupan principalmente a los usuarios. ¿Con qué tipo de sistema puede trabajar el MTS200?
  • Page 32: El MTS200 es compatible con el sistema de calefacción por suelo radiante eléctrico. No es compatible con el sistema de calentamiento de agua / caldera. Para solucionar un fallo de emparejamiento, visite el sitio de soporte. Tu dispositivo inteligente Meross se añadirá automáticamente a la app Apple Home. Hay un sensor interno y externo opcional. Para más información, puede visitar el sitio de soporte para encontrar soluciones a las preguntas más frecuentes.
  • Page 33: Informazioni sulla sicurezza Assicurarsi che l'alimentazione sia disattivata sull'interruttore del circuito che controlla il termostato che si sta sostituendo. Il termostato deve essere installato e utilizzato in conformità con il codice elettrico locale. Se non avete familiarità con questi codici, o non vi sentite a vostro agio nell'eseguire l'installazione, chiamate un elettricista qualificato. Non installare il termostato con le mani bagnate o su superfici bagnate o umide. Supportare solo il sistema di riscaldamento elettrico a pavimento. Non è compatibile con il sistema di riscaldamento a caldaia/acqua. Radiofrequenza / Potenza massima di trasmissione: 2400-2483,5MHz, 20dBm.
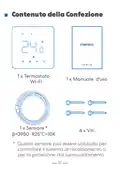
  • Page 34: Contenuto della confezione include un termostato, un manuale d'uso, un sensore, e quattro viti. Il sensore può essere utilizzato per controllare il sistema di riscaldamento o per la protezione dal surriscaldamento.
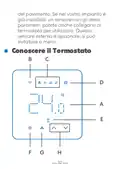
  • Page 35: Conoscere il termostato. Il sensore esterno è opzionale e può essere installato o meno. Se nel vostro impianto è già installato un sensore con gli stessi parametri, potete collegarlo al termostato per utilizzarlo.
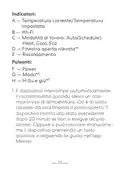
  • Page 36: Indicatori: A — Temperatura corrente/Temperatura impostata B — Wi-Fi C — Modalità di lavoro: Auto(Schedule), Heat, Cool, Eco D — Finestra aperta rilevata E — Riscaldamento Pulsanti: F — Power G — Modo H — H-Su e giù Il dispositivo interrompe automaticamente il riscaldamento quando rileva un calo improvviso di temperatura. Ciò è di solito causato da una finestra o porta aperta. Il dispositivo ritorna allo stato precedente dopo 30 minuti se non si esegue alcuna azione. Oppure si può riavviare manualmente il dispositivo premendo un tasto qualsiasi o seguendo la guida nell'app Meross.
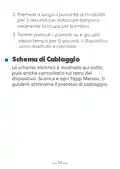
  • Page 37: Premere a lungo il pulsante di modalità per 3 secondi per sbloccare temporaneamente la sicura per bambini. Tenere premuti i pulsanti su e giù allo stesso tempo per 5 secondi, il dispositivo verrà resettato e riavviato. Lo schema elettrico è mostrato qui sotto, puoi anche controllarlo sul retro del dispositivo. Scarica e apri l'app Meross, ti guiderà attraverso il processo di cablaggio.
  • Page 38: Page 38
  • Page 39: Guida d'installazione Scarica l'app Meross. Configura il dispositivo. Collegare il tuo smartphone o tablet a una rete Wi-Fi a 2,4 GHz. Assicurati che il tuo dispositivo smart sia coperto da un forte segnale Wi-Fi. Il dispositivo smart supporta iOS 13 / iPadOS 13 e versioni successive. Si consiglia di aggiornare il proprio iOS o iPadOS alla versione più recente prima dell'accoppiamento con il dispositivo smart. Aprire l'app Meross e accedi al tuo account oppure, se sei un nuovo utente, tocca.
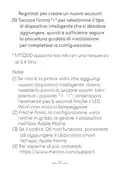
  • Page 40: Registrati per creare un nuovo account. Toccare l'icona + per selezionare il tipo di dispositivo intelligente che si desidera aggiungere, quindi seguire la procedura guidata di installazione per completare la configurazione. MTS200 supporta solo reti con una frequenza di 2,4 GHz. Se non è la prima volta che aggiungi questo dispositivo intelligente, dovrai resettarlo prima di andare avanti. Tieni premuti i pulsanti ∧ ∨ contemporaneamente per 5 secondi finché il LED Wi-Fi non inizia a lampeggiare. Finché finisci la configurazione, sarai anche in grado di gestire il dispositivo nell'app Apple Home. Se il codice QR non funziona, prova ad aggiungere il dispositivo smart nell'app Apple Home.
  • Page 41: Collega Meross ad Google Configurare prima il dispositivo nell'app Meross, quindi collegarlo agli assistenti vocali. Collegamento ad Alexa Vai su Account-> Alexa e consentire a Meross di collegarsi ad Alexa. Collegamento ad Assistente Google Vai su Account-> Assistente Google e segui le istruzioni passo passo per completare il processo di collegamento. Domande Frequenti In Meross, ci sforziamo di assicurare la vostra soddisfazione. Di seguito è allegata una lista non esaustiva delle domande che preoccupano maggiormente gli utenti. Con quale tipo di sistema può funzionare MTS200? MTS200 supporta il sistema di riscaldamento elettrico a pavimento.
  • Page 42: Supporta il sistema di riscaldamento a caldaia/acqua. Come risolvo un errore di accoppiamento? Visita il sito per la soluzione. Come gestisco il mio dispositivo Meross nell'app Apple Home? Il tuo dispositivo smart Meross verrà automaticamente aggiunto all'app Apple Home al termine della configurazione nell'app Meross. C'è un sensore di temperatura interno? Sì, c'è un sensore interno e uno esterno (opzionale). Per saperne di più, puoi visitare il sito per trovare soluzioni per le domande più frequenti.
  • Page 43: Information sur la sécurité Assurez-vous que le courant est coupé au disjoncteur qui contrôle le thermostat que vous remplacez. Le thermostat doit être installé et utilisé conformément à votre code électrique local. N'installez pas le thermostat avec des mains mouillées ou en vous tenant sur des surfaces mouillées ou humides. Compatible uniquement avec les systèmes de chauffage par le sol électriques. Non compatible avec le système de chauffage par chaudière/ à eau. Radiofréquence / puissance de transmission maximale : 2400-2483,5 MHz, 20 dBm.
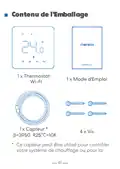
  • Page 44: Contenu de l'emballage 1 x thermostat 1 x mode d'emploi 1 x capteur 4 x vis Ce capteur peut être utilisé pour contrôler votre système de chauffage.
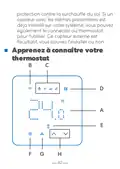
  • Page 45: Protection contre la surchauffe du sol. Un capteur avec les mêmes paramètres peut être connecté au thermostat. Ce capteur externe est facultatif. Vous pouvez choisir de l'installer ou non. Apprenez à connaître votre thermostat.
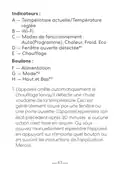
  • Page 46: Indicateurs : A — Température actuelle/Température réglée B — Wi-Fi C — Modes de fonctionnement : Auto(Programme), Chaleur, Froid, Eco D — Fenêtre ouverte détectée E — Chauffage Boutons : F — Alimentation G — Mode H — Haut et Bas L'appareil arrête automatiquement le chauffage lorsqu'il détecte une chute soudaine de la température. Ceci est généralement causé par une fenêtre ou une porte ouverte. L'appareil reprendra son état précédent après 30 minutes si aucune action n'est mise en œuvre. Ou vous pouvez manuellement reprendre l'appareil en appuyant sur n'importe quel bouton ou en suivant les instructions de l'application Meross.
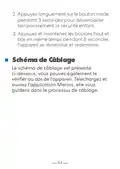
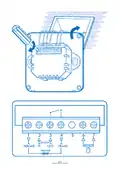
  • Page 47: Appuyez longuement sur le bouton mode pendant 3 secondes pour déverrouiller temporairement la sécurité enfant. Appuyez et maintenez les boutons haut et bas en même temps pendant 5 secondes, l'appareil se réinitialise et redémarre. Le schéma de câblage est présenté ci-dessous, vous pouvez également le vérifier au dos de l'appareil. Téléchargez et ouvrez l'application Meross, elle vous guidera dans le processus de câblage.
  • Page 48: Page 48
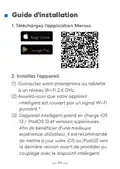
  • Page 49: Guide d'installation Téléchargez l'application Meross. Installez l'appareil. Connectez votre smartphone ou tablette à un réseau Wi-Fi 2,4 GHz. Assurez-vous que votre appareil intelligent est couvert par un signal Wi-Fi puissant. L'appareil intelligent prend en charge iOS 13 / iPadOS 13 et versions supérieures. Il est recommandé de mettre à jour votre iOS ou iPadOS vers la dernière version avant de procéder au couplage avec le dispositif intelligent.
  • Page 50: Lancez l'application Meross et connectez-vous à votre compte, ou si vous êtes un nouvel utilisateur, appuyez sur S'inscrire pour créer un nouveau compte. Appuyez sur l'icône « + » pour sélectionner le type de périphérique intelligent que vous souhaitez ajouter, puis vous pouvez simplement suivre l'assistant de configuration pour terminer la configuration. Le thermostat MTS200 ne supporte que les réseaux 2,4 GHz. Si ce n'est pas la première fois que vous ajoutez cet appareil intelligent, vous devrez le réinitialiser avant d'aller plus loin. Appuyez et maintenez les boutons « ∧ ∨ » en même temps pendant 5 secondes jusqu'à ce que le voyant Wi-Fi commence à clignoter. Dès que vous aurez terminé la configuration, vous pourrez également gérer l'appareil dans l'application Apple Home.
  • Page 51: Si le code QR ne fonctionne pas, essayez d'ajouter l'appareil intelligent dans l'application Apple Home. Pour en savoir plus, visitez le site de support. Relier Meross à Google Assistant ou Alexa. Configurez d'abord l'appareil dans l'application Meross, puis associez-le aux assistants vocaux. Accédez à Compte-> Alexa et autorisez Meross à se connecter à Alexa. Accédez à Compte-> Assistant Google et suivez les instructions étape par étape pour terminer le processus d'association. Chez Meross, nous nous efforçons d'assurer votre satisfaction.
  • Page 52: Ci-dessous une liste non exhaustive des questions qui préoccupent le plus les utilisateurs. MTS200 prend en charge le système de chauffage électrique par le sol, ne prend pas en charge le système de chauffage par chaudière/à eau. Veuillez consulter le site pour trouver la solution. Votre appareil intelligent Meross sera automatiquement ajouté à l'application Apple Home une fois que vous aurez terminé la configuration. Y a-t-il un capteur de température interne ?
  • Page 53: Il y a un capteur interne et un capteur externe (en option). Pour en savoir plus, vous pouvez consulter le site pour trouver des solutions aux questions les plus fréquemment posées.
  • Page 54: Simple device Simplify your life Indoor use only
  • Page 55: Package contents include a smart Wi-Fi thermostat, user manual, and optional sensor. Safety information emphasizes ensuring power is off before installation and compliance with local electrical codes. The thermostat is compatible only with electric underfloor heating systems and not with boiler/water heating systems. The device features indicators for current temperature, Wi-Fi status, and working modes such as auto, heat, cool, and eco. Setup involves connecting to a 2.4 GHz Wi-Fi network and using the Meross app for configuration. The device will automatically stop heating if a sudden temperature drop is detected, typically due to an open window or door. Users can link the device to voice assistants like Google Assistant and Alexa through the Meross app. The internal and optional external sensor can be used for heating control or floor overheat protection. For troubleshooting pairing failures, users are directed to the Meross support website. The manual includes a wiring diagram and instructions for resetting the device if necessary.