Home > DEVI > DEVI 530M Electronic Thermostat Installation Guide

DEVI 530M Electronic Thermostat Installation Guide

Installation Guide  
DEVIreg™ 530M  
Electronic Thermostat  
ww.DEVI.com  
GeneralDetails
NameDEVI 530M Electronic Thermostat Installation Guide
MakeDEVI
LanguageEnglish
FiletypePDF (Download)
File size0.7 MB
Download PDF
1 Star2 Stars3 Stars4 Stars5 Stars (1 votes, average: 5.00 out of 5)
Loading...
DEVI 140F1143 Electronic Intelligent Timer Thermostat Installation Guide
DEVIreg Electronic Intelligent Timer Thermostat Installation Guide
DEVI 330 Electronic Thermostat Installation Guide
DEVI 532 Electronic Thermostat Installation Guide
DEVI 140F1161 Intelligent Electronic Timer Controlled Thermostat Installation Guide
DEVIreg 130 Electronic Thermostat Installation Guide
DEVI 140F1064 Touch Electronic Intelligent Timer Thermostat Installation Guide
DEVIreg 316 Electronic Thermostat Installation Guide
DEVI 610 Electronic Thermostat Installation Guide
DEVI 316 Electronic Thermostat Installation Guide

DEVI 530M Electronic Thermostat Installation Guide
Get the free PDF manual for the DEVI 530M Electronic Thermostat Installation Guide and access setup steps, usage instructions, and troubleshooting tips. 👉 View online or download now to keep your thermostat running smoothly!

DEVI 530M Electronic Thermostat Installation Guide Overview

Summary of Contents

  • Page 1: Installation guide for DEVIreg™ 530M electronic thermostat.
  • Page 2: Introduction DEVIreg™ 530M is an electronic thermostat provided with a 2-pole switch and a wire sensor to measure and control the desired floor temperature. It can be either flush-mounted (standard) or surface-mounted (using special box). The thermostat has a button for adjusting the temperature setting with a scale from 1 to 6 (each step corresponds to approximately 3°C). Furthermore, it has a LED indicator showing standby periods (green light) and heating periods (red light). Technical specifications Safety instructions Mounting instructions Settings Warranty Disposal instruction
  • Page 3: DEVIreg™ 530M Technical specifications Operation voltage: 220-240 V~, 50/60 Hz Max. standby power consumption: 0.25 W Relay specifications for resistive and inductive loads Max. load: 15 A / 3450 W @ 230 V Sensing units: NTC 15 kOhm at 25°C Temperature range: -10 to +30°C Cable specification max.: 1x4 mm² or 2x2.5 mm² Storage temperature: -20°C to +65°C Protection class: Class II Dimensions: 85 x 85 x 36 mm
  • Page 4: DEVIreg™ 530M complies with the EN/IEC Standard for automatic electrical controls for household and similar use. Safety instructions include ensuring the mains supply to the thermostat is turned off before installation. When controlling a floor heating element with a wooden floor, always use a floor sensor and do not set the maximum floor temperature above 35°C. Installation must be performed by an authorized and qualified installer according to local regulations. The thermostat should be connected to a power supply via an all-pole disconnection switch. The sensor is considered live voltage, so precautions are necessary if it must be extended. Always connect the thermostat to a continuous power supply. Avoid exposing the thermostat to moisture, water, dust, and excessive heat.
  • Page 5: Mounting instructions Place the thermostat at a suitable height on the wall (typically 80-170cm). The thermostat should not be placed in wet rooms. Always place the thermostat according to local regulation on IP classes. A floor sensor enables a more accurate temperature control and is recommended in all floor heating applications. Place the floor sensor in a conduit in an appropriate place where it is not exposed to sunlight or draft from door openings. The conduit should be flush with the floor surface - countersink the conduit if necessary. Route the conduit to the connection box. The bending radius of the conduit must be a minimum of 50 mm.
  • Page 6: DEVIreg™ 530M Follow the steps below to mount the thermostat. Press the release tab in the bottom of the thermostat using a flat object. Carefully detach the front cover. Carefully detach the frame. Connect the thermostat according to the connection diagram. Mains Max. Load 220-240V~ 15 (1) A.
  • Page 7: DEVIreg™ 530M By connecting an external timer to the terminal marked by a moon symbol, the thermostat can be set to reduce the temperature by 5ºC during specified periods. The screen of the heating cable must be connected to the earth conductor of the power supply cable by using a separate connector. Always install the floor sensor in a conduit in the floor. Fasten the thermostat to a socket or an exterior wall box by driving the screws through the holes in each side of the thermostat. Install the frame and front cover in the reverse order of disassembly. Turn on the power supply.
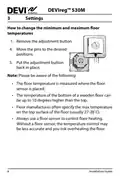
  • Page 8: DEVIreg™ 530M settings How to change the minimum and maximum floor temperatures Remove the adjustment button. Move the pins to the desired positions. Put the adjustment button back in place. The floor temperature is measured where the floor sensor is placed. The temperature of the bottom of a wooden floor can be up to 10 degrees higher than the top. Floor manufacturers often specify the max temperature on the top surface of the floor (usually 27-28˚C). Always use a floor sensor to control floor heating. Without a floor sensor, the temperature control may be less accurate and you risk overheating the floor. Installation guide.
  • Page 9: DEVIreg™ 530M Thermal resistance flooring Approximate setting for 25˚C floor temperature Max. carpet thickness suitable for floor heating Installation guide
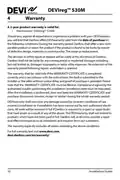
  • Page 10: Warranty A 2-year product warranty is valid for thermostats: DEVIreg™ 530M. Danfoss offers DEVIwarranty valid from the date of purchase under specific conditions. During the warranty period, Danfoss shall offer a new comparable product or repair the product if found faulty due to defective design, materials, or workmanship. The decision to repair or replace will be solely at the discretion of Danfoss. Danfoss shall not be liable for any consequential or incidental damages. The warranty is valid only if the WARRANTY CERTIFICATE is completed correctly and proof of purchase is provided. The WARRANTY CERTIFICATE must be filled in, stamped, and signed by the authorized installer. DEVIwarranty does not cover damage caused by incorrect use or installation by non-authorized electricians. All work will be invoiced in full if Danfoss inspects or repairs faults due to incorrect conditions. The warranty explicitly excludes all claims exceeding the specified conditions.
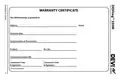
  • Page 11: Warranty certificate details include the name of the warranty holder, address, purchase date, serial number of the product, product information, and installation and connection dates with signatures.
  • Page 12: DEVIreg™ 530M Installation guide
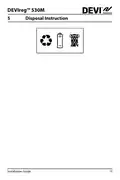
  • Page 13: Disposal instruction Installation guide
  • Page 14: DEVIreg™ 530M Installation guide
  • Page 15: DEVIreg™ 530M Produced by Danfoss © 01/2024
  • Page 16: DEVIreg™ 530M Thermostat Floor Sensor Product documentation Designed in Denmark for Danfoss A/S