
DEVI 316 Electronic Thermostat Installation Guide






| General | Details |
|---|---|
| Name | DEVI 316 Electronic Thermostat Installation Guide |
| Make | DEVI |
| Language | English |
| Filetype | PDF (Download) |
| File size | 1.06 MB |
 (1 votes, average: 5.00 out of 5)
 Loading...

DEVI 330 Electronic Thermostat Installation Guide

DEVI 140F1143 Electronic Intelligent Timer Thermostat Installation Guide

DEVIreg Electronic Intelligent Timer Thermostat Installation Guide

DEVI 532 Electronic Thermostat Installation Guide

DEVI 140F1161 Intelligent Electronic Timer Controlled Thermostat Installation Guide

DEVIreg 130 Electronic Thermostat Installation Guide

DEVI 140F1064 Touch Electronic Intelligent Timer Thermostat Installation Guide

DEVIreg 316 Electronic Thermostat Installation Guide

DEVI 530M Electronic Thermostat Installation Guide

DEVI 610 Electronic Thermostat Installation Guide

DEVI 316 Manual: Questions and Answers
DEVI 316 specifications
| Power supply | 220 - 240V~, 50Hz |
| Setpoint range | -10 ° to +50 °C |
| Differential | 0 ° to 6 °C |
| Sensor | NTC 15 kOhm at 25 °C |
| Operating temperature | -10 °C to +45 °C |
| Storage temperature | -20 °C to +65 °C |
| Dimensions | 86 x 36 x 58 mm |
| Weight | 180 g |
| Power consumption | Max 0.25W |
How do I set up temperature set-back on the DEVI 316 thermostat?
Connect an external timer to terminals 4 and 6 to reduce the temperature by 0°C to 8°C. Installation Guide, p. 9
What does the button on the DEVI 316 control?
The button adjusts the temperature setting across a scale from -10°C to +50°C. Installation Guide, p. 4
What document must an authorized installer complete for the DEVI 316?
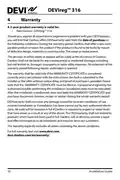
The WARRANTY CERTIFICATE, which must be filled in, stamped and signed with the installation date indicated. Installation Guide, p. 10
DEVI 316 compared with other DEVI thermostats
| Specification | DEVI 316 | DEVI 530M Electronic Thermostat | DEVI 532 | DEVI DEVIreg 530 |
|---|---|---|---|---|
| Power supply | 220 - 240V~, 50Hz | 220-240 V~, 50/60 Hz | 220-240 V~, 50 Hz | 220-240V~, 50Hz |
| Setpoint range | -10 ° to +50 °C | 15-35°C with floor sensor only | 5-35 °C room temperature | 5-45°C with floor |
| Differential | 0 ° to 6 °C | 0.4°C | 0.4 °C | 0.4°C |
| Sensor | NTC 15 kOhm at 25 °C | NTC 15 kOhm at 25°C (Default) | NTC 15 kOhm at 25 °C | NTC 15kOhm at 25°C |
| Operating temperature | -10 °C to +45 °C | -10 to +30°C | -10 to +30 °C | -10 to +30°C |
| Storage temperature | -20 °C to +65 °C | -20°C to +65°C | -20 to +65°C | -20 to +65°C |
| Dimensions | 86 x 36 x 58 mm | 85 x 85 x 36 mm | 85 x 85 x 36 mm | 85 x 85 x 36 mm |
| Weight | 180 g | 90 g | 90 g | 90 g |
| Power consumption | Max 0.25W | Max. 0.25 W | Max 0.25 W | Max 0.25W |
More DEVI thermostat manuals

VIMAR 30810.G View Wireless Connected Dial Thermostat Instruction Manual

Vaillant VRT15 Room Thermostat User Guide

THE HEATING COMPANY Slim and Compact WiFi Thermostat User Manual

Vaillant VRC 700 Weather Compensating Thermostat Instruction Manual

Danfoss RA 2000 Radiator Thermostat Installation Guide

Danfoss KP 61 Thermostat Installation Guide

Danfoss KPU 19 Thermostat Installation Guide

MODINE DFG Mild Temperature Thermostat Installation Guide

GENERAL LIFE FH252S Underfloor Heating Thermostat User Manual

Drayton 2290M Mains Digital Room Thermostat User Manual