
VENSTAR Fan Coil Thermostat T2100 / T2150 User Guide


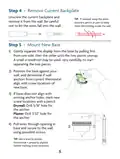




Step 4 - Remove Current Backplate
Unscrew the current backplate and
remove it from the wall. Be careful
not to let the wires fall into the wall.
TIP: If needed, wrap the wires
around a pencil or pen to keep
them from falling inside the wall.
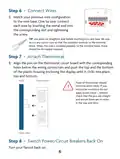
Step 5 - Mount New Base
1) Gently separate the display from the base by pulling first
from one side, then the other until the two pieces unsnap.
A small screwdriver may be used, very carefully, to start
separating the two pieces.
2) Position the base against your
wall, and determine if wall
anchors from current thermostat
align with screw locations of
new base.
3) If base does not align with
existing anchor holes, mark new
screw locations with a pencil.
Drywall: Drill 3/16" hole for
the anchor
Plaster: Drill 7/32” hole for
the anchor
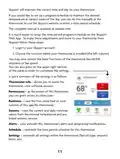
4) Pull wires through opening in
base and secure to the wall
using provided screws.
TIP: Use a level to ensure
thermostat is properly aligned
before marking screw locations.
5

| General | Details |
|---|---|
| Name | VENSTAR Fan Coil Thermostat T2100 / T2150 User Guide |
| Make | VENSTAR |
| Language | English |
| Filetype | PDF (Download) |
| File size | 0.34 MB |
 (1 votes, average: 5.00 out of 5)
 Loading...


Wengart TP808 Wi-Fi Low Voltage Thermostat User Guide

Danfoss RET 230 Electronic Heat Cool Thermostat Instruction Manual

BEOK TCB38WIFI Color TFT-LCD Heating Thermostat User Manual

INKBIRD ITC-306A Digital Thermostat User Manual

seitron DR R02M Thermostat Wireless Kit Instruction Manual

TROTEC BN35 Radio Thermostat Instruction Manual

Roth Touchline SL Standard Room Thermostat Installation Guide

aube technologies TH104PLUS 5-2 Day Programmable Electric Thermostat Owner’s Manual

TRANE XR102 Non-Programmable Thermostat User Guide

GENERAL Life ARUNA 300S RF Wireless Room Thermostat User Guide