Roth Touchline SL Standard Room Thermostat Installation Guide


23.2
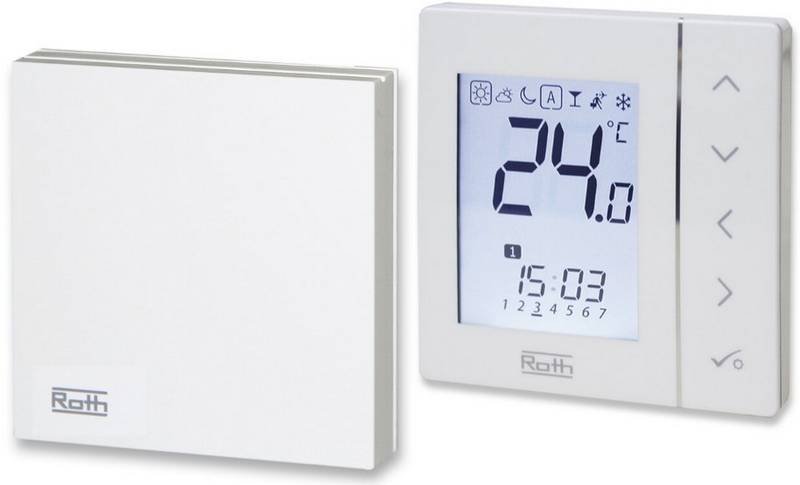
Roth Touchline® SL Standard rumtermostat >
Roth Touchline® SL termostat >
Roth Touchline® SL termostat >
<
>
~ 1,6 M.
Roth Touchline® SL Standard huonetermostaatti >
Roth Touchline® SL Standard room thermostat
1
2
(DK) Tryk let på snaplåsen med en nger eller en skruetrækker (hvis
monteret på væggen) for at skubbe soklen af termostaten.
(DK) Indsæt batterierne, vær opmærksom på +/- polerne.
(SE) Sätt i batterierna (inkluderade). Kontrollera +/- poler.
(NO) Sett inn batteriene (inkl.). Sjekk +/- polene.
(SE) Tryck lätt på snäppfästet med ett nger eller en skruvmejsel (om
termostaten är monterad på vägg) för att få loss termostaten.
(NO) Trykk lett på snepplåsen med en nger eller en skrutrekker (hvis den
er montert på veggen) for å skyve bakplaten av termostaten.
(FI) Aseta paristot (sisältyvät) ja huomioi +/- navat.
(UK) Insert batteries (included), be aware of +/- polarity.
(FI) Irrota termostaatin takalevy painamalla pikalukkoa kevyesti sormella
tai ruuvimeisselillä (jos se on asennettu seinälle).
(UK) Push lightly on the snap lock with a nger or screwdriver (if mounted
on the wall) to slide the backplate of the thermostat.
3
4a
1
100 cm
2
(DK) Det er muligt at tilslutte en gulvføler til termostaten (gulvføler ikke
inkl.). Tryk forsigtigt på klemmerne mens ledningerne føres ind i klemmen.
Føleren skal trækkes i trækrør og følerenden placeres lige under øverste
gulvbelægning, midt imellem gulvvarmeslangerne.
(DK) Monter soklen på væggen (skruer ikke inkl.) og påsæt rumtermostaten.
(SE) Montera bakstycket (skruvar ej inkl.). Återmontera termostatdelen.
(NO) Skru fast underdelen (skruer ikke inkl.) og skyv på termostaten.
(SE) Möjligt att ansluta golvgivare till termostaten (golvgivare ej inkl.).
Tryck försiktigt på klämmorna medans ledningarna ansluts.
(FI) Asenna takalevy seinälle (ruuvit eivät sis. toim.) ja liu’uta
Givaren ska placeras i ett skyddsrör och änden på givaren ska placeras
direkt under den översta golvbeläggningen, i mitten mellan golvvärmerören.
termostaatti paikoilleen.
(UK) Mount backplate on the wall (screws not incl.) thermostat slides
(NO) Det er mulig å tilkoble en gulvføler til termostaten (gulvføler ikke inkl.).
Trykk forsiktig på klemmene samtidig som ledningene føres inn i klemmen.
Gulvføleren skal trekkes i k-rør/trekkerør og følerenden plasseres rett under
øverste gulvsjikt, i midten mellom gulvvarmerørene.
onto back plate.
(FI) Termostaattiin on mahdollista liittää lattia-anturi (lattia-anturi ei
sis. toim.). Asenna johdot varovasti termostaatin riviliittimeen. Anturi on
asennettava suojaputkeen ja anturin pää on sijoitettava mahdollisimman
pinnalle kahden putken väliin.
(UK) It is possible to connect a oor sensor to the thermostat (oor sensor
not incl.). Push gently on the terminals while you put the cable into the
terminal. The sensor must be drawn in a tube and the tip placed directly
beneath the top oor cover, in the middle between the oorheating pipes.
| General | Details |
|---|---|
| Name | Roth Touchline SL Standard Room Thermostat Installation Guide |
| Make | Roth |
| Language | English |
| Filetype | PDF (Download) |
| File size | 0.55 MB |


Roth Basicline 230T Programmable Clock Thermostat Instruction Manual

Roth Basicline H 230V Room Thermostat Instructions

Roth Minishunt Room Thermostat Installation Guide

Roth Minishunt Plus Wireless Room Thermostat Installation Guide

Roth VVS-nr. 466397.058 Softline Standard Room Thermostat Instruction Manual

Roth SL Car Air Conditioner Thermostat Instructions

Roth Minishunt Plus Thermostat and Capillary Sensor Installation Guide

Roth Touchline SL Plus Room Thermostat Instruction Manual
Roth Basicline Wired Thermostat Installation Guide

Roth Touchline PL Wireless Room Thermostat Installation Guide

Roth Touchline SL Standard Room Thermostat Installation Guide Overview
Summary of Contents
- Page 1: Roth Touchline® SL Standard room thermostat Insert batteries, be aware of +/- polarity. Push lightly on the snap lock with a finger or screwdriver to slide the backplate of the thermostat. It is possible to connect a floor sensor to the thermostat (floor sensor not included). Mount backplate on the wall (screws not included) and slide the thermostat onto back plate. The sensor must be drawn in a tube and the tip placed directly beneath the top floor cover, in the middle between the floor heating pipes. The sensor should be placed in a protective tube. Carefully push on the terminals while inserting the wires into the terminal. Ensure the sensor end is positioned just below the top flooring. Screws for mounting are not included.
- Page 2: If you want to use the thermostat as a free-standing, the supplied foot can be mounted in the back plate before it’s mounted again. The thermostat can be connected to all Controllers in the Touchline® SL series. Pairing/registering is made the same way on all Controllers using the same buttons. Pairing/registering the thermostat to a zone (channel) must be done before start-up. All connections must be made to the Controller (pump, actuators and optionally potential free relay). Do not press the buttons on the front of the thermostat whilst pushing the pairing button on the rear. All connections must be made to the Controller before start-up. Refer to the controller manual for details on connections. Attention is required when handling the thermostat during the pairing process. The thermostat can be used with all controllers in the Touchline® SL series. Registration of the thermostat is done in the same way regardless of which controller it is connected to. Ensure all electrical connections are completed before applying power to the controller.
- Page 3: Touchline® SL Controller 8 ch master The thermostat is now registered to the zone. The display shows the current room temperature (25.0°C) and desired (22.0°C), as well as battery status (99%), signal strength (100% - must be at least 10%), and mode of operation (CON = continuous). Repeat the registration for the other room thermostats on different channels until all room thermostats are registered. If a thermostat is registered to the wrong channel, you do not need to delete it; simply register the thermostat to the correct channel, and the incorrect registration will be automatically deleted.
- Page 4: If the thermostat has a floor sensor connected, this must also be paired/registered as shown below. In the overview you can see both the thermostat and the actual floor temperature. Repeat this for all other zones/channels with a floor sensor.
- Page 5: Indstilling af gulvføleren skal udføres på kontrolenheden. Golvgiverens driftsläge kan ställas in som antingen ”Golvskydd” eller ”Komfort”. Betjening/innstillinger for gulvfølerene gjøres på kontrollpanelet. Lattia-anturin käyttö/säätö on tehtävä kytkentälaatikon näytöltä. Operation/setting of the floor sensor is carried out on the display of the Controller. Indstil gulvføler til “Floor protection”. Ställ in golvgivaren till ”Golvskydd”. Sett sensoren som ”Gulvbeskyttelse”. Aseta anturi lattiasuojaksi. Set max. floor temperature to protect your floor. Indstil max. temperatur for at beskytte dit gulv. Set sensor as ”Comfort”. Vælg driftsstilstand og derefter ”Komfort”. Set min. floor temperature for your comfort level. OBS! Når gulvføleren anvendes til ”Beskyttelse af gulvet” vil opvarmningen stoppe hvis temperaturen overstiger den indstillede max. temperatur.
- Page 6: Page 6
Roth Basicline Wired Thermostat Installation Guide

Amana DS01G Digi Smart Thermostat Instruction Manual

BEOK BOT306RF-WIFI Thermostat Owner’s Manual

Sygonix SY-6052180 Wi-Fi Thermostat Instruction Manual

Danfoss RAS-C2 Combi Radiator Thermostat Installation Guide

Danfoss ECtemp 330 Electronic Thermostat Installation Guide

stelpro STZW402 ELECTRONIC THERMOSTAT SMART HOME User Guide

dahua TRV1 Smart Radiator Thermostat Owner’s Manual

ENSTO ECO16BTD Floor Heating Thermostat User Guide

industrie technik TF Frost Protection Thermostat Instruction Manual