Roth SL Car Air Conditioner Thermostat Instructions
| General | Details |
|---|---|
| Name | Roth SL Car Air Conditioner Thermostat Instructions |
| Make | Roth |
| Language | English |
| Filetype | PDF (Download) |
| File size | 0.47 MB |

Roth Basicline 230T Programmable Clock Thermostat Instruction Manual

Roth Basicline H 230V Room Thermostat Instructions

Roth Minishunt Room Thermostat Installation Guide

Roth Touchline SL Standard Room Thermostat Installation Guide

Roth Minishunt Plus Wireless Room Thermostat Installation Guide

Roth VVS-nr. 466397.058 Softline Standard Room Thermostat Instruction Manual

Roth Minishunt Plus Thermostat and Capillary Sensor Installation Guide

Roth Touchline SL Plus Room Thermostat Instruction Manual

Roth Basicline Wired Thermostat Installation Guide

Roth Touchline PL Wireless Room Thermostat Installation Guide

Roth SL Car Air Conditioner Thermostat Instructions Overview
Summary of Contents
- Page 1: Roth Touchline® SL Installation Roth Touchline® SL thermostat, inbygging, 230 V Roth Touchline® SL thermostat, inbyggnad, 230 V Roth Touchline SL termostat, innfelling, 230V Roth Touchline® SL 230V huonetermostaatti Roth Touchline® SL In-wall thermostat, 230V Living full of energy
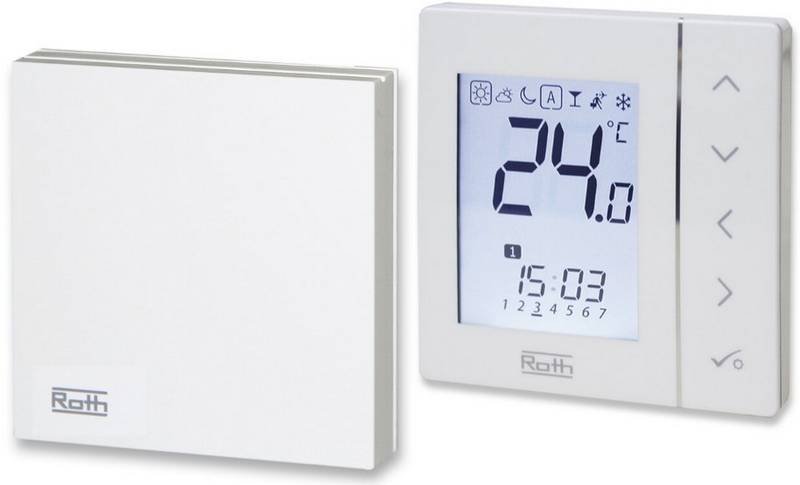
- Page 2: Roth Touchline SL thermostat must be installed in a wall box. 55 x 55 frame systems can be used, e.g., ELKO, Schneider, and Siemens. Connect the power cable (N, L) to the thermostat’s terminal “Power.” Fasten the thermostat backplate in the wall box using 2 screws. It is possible to connect a floor sensor to the thermostat (floor sensor not included). Connect the floor sensor to the terminal “Floor sensor.” Ensure all parts are aligned and carefully click the thermostat into the socket. In the next step, the thermostat is registered to the controller. Communication to the controller is wireless. The sensor must be placed directly beneath the top floor cover, in the middle between the floor heating pipes.
- Page 3: The thermostat can be used with all controllers in the Roth Touchline® SL series. Pairing/registering the thermostat is done the same way on all controllers using the same buttons. To register a room thermostat to a channel on the controller, follow steps 5 to 10. To confirm the registration from the thermostat, press and hold the menu button for 2 seconds. Navigate to rEg using the buttons and press the menu button. All electrical connections to the pump, actuators, and optional relay must be made before applying 230V to the controller. Refer to the installation manual for details on connections. The display of the Roth Touchline® SL controller, master is shown in the pictures. Ensure all connections are made to the controller before startup. Please see the controller manual for further details.
- Page 4: Roth Touchline® SL Controller 8 ch master The thermostat is now registered to the zone. The display shows the current room temperature (25.0°C) and desired (22.0°C), as well as battery status (99%), signal strength (100% - must be at least 10%), and operating mode (CON = continuous operation). Repeat the registration for other room thermostats on different channels until all room thermostats are registered. If a thermostat is registered to the wrong channel, you do not need to delete it; simply register the thermostat to the correct channel, and the incorrect registration will be automatically deleted.
- Page 5: If the thermostat has a floor sensor connected, this must also be paired/registered as shown below. In the overview you can see both the thermostat and the actual floor temperature. Repeat this for all other zones/channels with a floor sensor.
- Page 6: Indstilling af gulvføleren skal udføres på kontrolenheden. Golvgivarens driftstilstand kan ställas in som antingen ”Golvskydd” eller ”Komfort”. Betjening/innstillinger for gulvfølerene gjøres på kontrollpanelet på kontrollenheten. Lattia-anturin käyttö/säätö on tehtävä kytkentälaatikon näytöltä. Operation/setting of the floor sensor is carried out on the display of the Controller. Indstil gulvføler til “Floor protection”. Vælg driftstilstand og derefter ”Beskyttelse af gulv”. Indstil max. temperatur for at beskytte dit gulv. Indstil gulvføler til ”Komfort”. OBS! Når gulvføleren anvendes til ”Beskyttelse af gulvet” vil opvarmningen stoppe hvis temperaturen overstiger den indstillede max. temperatur.
- Page 7: In standby mode, the current temperature is displayed. To set/change temperature, press the ▼/▲ buttons. Confirm by pressing or wait 5 seconds. You can switch between temperature display and relative humidity display by briefly pressing the button. Select rEg to confirm registration of the room thermostat. Enables you to view battery level. Select Bat, the display flashes. To lock the buttons, select Yes using one of the buttons ▼/▲, and confirm. You can reset the room thermostat to factory settings. Select dEF, the display flashes and shows the selected value. Enables you to return from the menu manually. After selecting rEt, the screen flashes for 5 seconds and returns to view the current temperature.
- Page 8: Risiko for livsfarligt elektrisk stød ved berøring af strømforbindelser. Inden du arbejder på termostaten, skal du altid slukke for 230V strømforsyningen og forhindre, at den tændes ved et uheld. Fara för livshotande skador vid kontakt med strömförande ledningar. Innan arbete påbörjas, koppla ur termostaten från 230V försörjningen och säkerställ att de inte kan slås på igen av misstag. Kontrollera att det inte finns någon spänning! Risk of fatal electric shock from touching live connections. Before working on the thermostat always switch off the 230V power supply and prevent it from being accidentally switched on.