Home > Roth > Roth Touchline SL Plus Room Thermostat Instruction Manual

Roth Touchline SL Plus Room Thermostat Instruction Manual
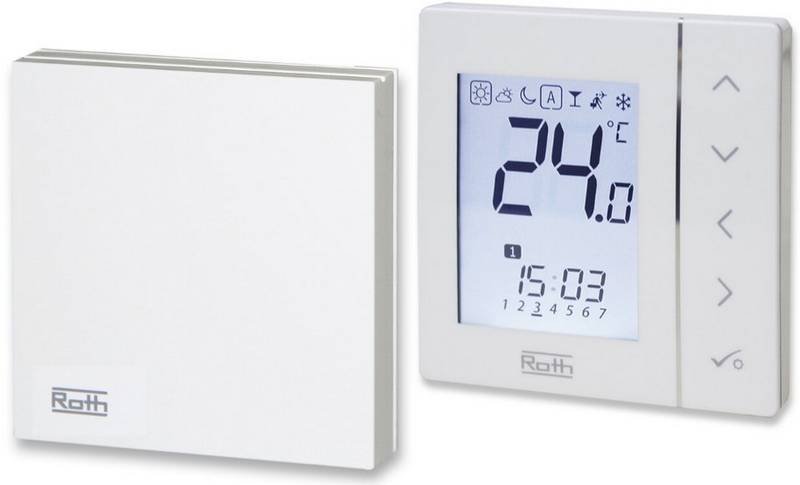
Roth Touchline® SL Plus rumtermostat >  
Roth Touchline® SL Plus termostat >  
~ 1,6 M.  
Roth Touchline® SL Plus huonetermostaatti >  
Roth Touchline® SL Plus room thermostat  
1
2
-
FLOOR  
SENSOR  
+
+
-
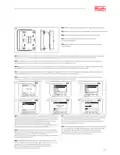
(DK) Stik spidsen af en ligekærvet skruetrækker ind i sprækken mellem  
front og bagpladen og vrid parterne fra hinanden.  
(DK) Indsæt batterierne, vær opmærksom på +/- polerne.  
(SE) Sätt i batterierna (inkluderade). Kontrollera +/- poler.  
(NO) Sett inn batteriene (inkl.). Sjekk +/- polene.  
(SE) Sätt in spetsen på en skruvmejsel med rak kant i springan mellan  
främre och bakre plattan och vrid isär delarna.  
(NO) Stikk en at skrutrekker inn i sprekken mellom front og bakplaten.  
Vri forsiktig så de går fra hverandre.  
(FI) Aseta paristot (sisältyvät) ja huomioi +/- navat.  
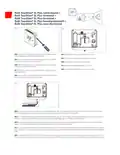
(UK) Insert batteries (included), be aware of +/- polarity.  
(FI) Työnnä suorauraisen ruuvimeisselin kärki etu- ja takaosa väliin ja  
kierrä osat erilleen.  
(UK) Insert the tip of a straight-edged screwdriver into the slot between  
the front and the back and twist the parts apart.  
3
-
FLOOR  
SENSOR  
+
+
-
100cm  
(DK) Det er muligt at tilslutte en gulvføler til termostaten (gulvføler ikke inkl.). Tryk forsigtigt ledningerne ind i klemmen og skru dem fast. Føleren skal  
trækkes i trækrør og følerenden placeres lige under øverste gulvbelægning, midt imellem gulvvarmeslangerne.  
(SE) Det är möjligt att ansluta en golvgivare till termostaten (golvgivare ingår ej). Tryck försiktigt in ledningarna i klämman och skruva fast dem. Sensorn  
måste dras i dragröret och givaränden placeras strax under den övre golvbeläggningen, mitt emellan golvvärmeslangarna.  
(NO) Det er mulig å tilkoble en gulvføler til termostaten (gulvføler er ikke inkl.). Trykk forsiktig ledningene inn i klemmen og skru dem fast. Føleren skal  
trekkes i k-rør og følerenden plasseres rett under øverste gulvsjiktet, midt mellom gulvvarmerørene.  
(FI) Huonetermostaattiin on mahdollista liittää lattia-anturi (lattia-anturi ei sisälly toimitukseen). Asenna johdot varovasti pidikkeeseen ja ruuvaa johdot  
kiinni. Lattia-anturi on asennettava suojaputkeen ja anturin pää sijoitettava mahdollisimman lähelle lattiapintaa, ja keskelle kahden lattialämmitysputken  
väliin.  
(UK) It is possible to connect a oor sensor to the thermostat (oor sensor not included). Carefully push the wires into the clamp and screw them on. The  
sensor must be pulled into the draw pipe and the sensor end placed just below the upper oor covering, in the middle between the underoor heating pipes.  
GeneralDetails
NameRoth Touchline SL Plus Room Thermostat Instruction Manual
MakeRoth
LanguageEnglish
FiletypePDF (Download)
File size0.5 MB
Download PDF
1 Star2 Stars3 Stars4 Stars5 Stars (1 votes, average: 5.00 out of 5)
Loading...
Roth Basicline 230T Programmable Clock Thermostat Instruction Manual
Roth Basicline H 230V Room Thermostat Instructions
Roth Minishunt Room Thermostat Installation Guide
Roth Touchline SL Standard Room Thermostat Installation Guide
Roth Minishunt Plus Wireless Room Thermostat Installation Guide
Roth VVS-nr. 466397.058 Softline Standard Room Thermostat Instruction Manual
Roth SL Car Air Conditioner Thermostat Instructions
Roth Minishunt Plus Thermostat and Capillary Sensor Installation Guide
Roth Basicline Wired Thermostat Installation Guide
Roth Touchline PL Wireless Room Thermostat Installation Guide

Roth Touchline SL Plus Room Thermostat Instruction Manual
Get the free PDF manual for the Roth Touchline SL Plus Room Thermostat Instruction Manual and access setup steps, usage instructions, and troubleshooting tips. 👉 View online or download now to keep your thermostat running smoothly!

Roth Touchline SL Plus Room Thermostat Instruction Manual Overview
Summary of Contents

  • Page 1: Roth Touchline® SL Plus room thermostat Insert batteries (included), be aware of +/- polarity. It is possible to connect a floor sensor to the thermostat (floor sensor not included). Carefully push the wires into the clamp and screw them on. The sensor must be pulled into the draw pipe and the sensor end placed just below the upper floor covering, in the middle between the underfloor heating pipes.
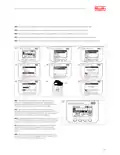
  • Page 2: Mount backplate on the wall and slide thermostat onto back plate. The thermostat can be connected to all controllers in the Roth Touchline® SL series. Pairing/registering is made the same way on all controllers using the same buttons. All connections must be made to the controller before start-up. Do not press the buttons on the front of the thermostat whilst pushing the pairing button on the rear.
  • Page 3: Touchline® SL Controller 8 ch master The thermostat is now registered to the zone. The display shows the current room temperature (25.0°C) and desired (22.0°C), as well as battery status (99%) and signal strength (displayed with 4 bars, at least 1 bar must be present during installation). Repeat the registration for the other room thermostats on other channels until all room thermostats are registered. If you register the thermostat to the wrong channel, you do not need to delete it; simply register the thermostat to the correct channel, and the incorrect registration will be automatically deleted.
  • Page 4: If the thermostat has a floor sensor connected, this must also be paired/registered as shown below (picture 21, must be two quick presses). In the overview you can see both the thermostat (setpoint 22,0°C, actual 25,0°C) and the actual floor temperature (21,0°C). Repeat this for all other zones/channels (2 to 8) with a floor sensor.
  • Page 5: Indstilling af gulvføleren skal udføres på kontrolenheden. Golvgiverens driftsläge kan ställas in som antingen “Golvskydd” (standard) eller “Komfort”. Betjening/innstillinger for gulvføleren gjøres på kontrollpanelet på kontrollenheten. Lattia-anturin käyttö/säätö on tehtävä kytkentälaatikon näytöltä. Operation/setting of the floor sensor is carried out on the display of the Controller. Indstil gulvføler til “Floor protection”. Ställ in golvgivaren till “Golvskydd”. Sett sensoren som “Gulvbeskyttelse”. Aseta anturi lattiasuojaksi. Set max. floor temperature to protect your floor.
  • Page 6: Manual mode Battery level Pre-set temperature Button lock Current temperature Heating/Cooling WiFi signal strength