
Honeywell T140 7-Day Programmable Wired Thermostat User Guide


1
2
3
4
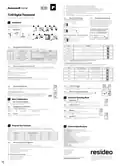
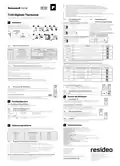
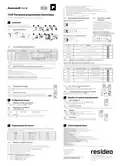
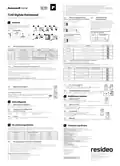
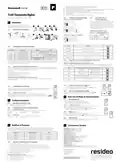
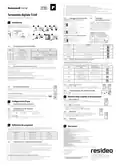
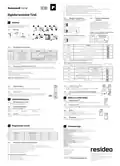
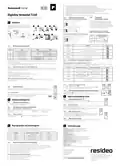
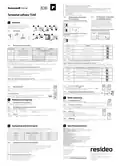
Loosen the captive screw holding the faceplate to the mounting plate.
Pull the lower part of the faceplate to remove it from the mounting plate.
Loosen the screw (captive) holding the wire cover and remove the wire cover.
Pull wires through the hole in the mounting plate and secure the mounting plate to the wall
(or onto an electrical box for line voltage wiring) using the enclosed wall anchors and screws.
Wire the thermostat to the heating system and, if necessary, connect the remote input.
Once wiring is complete, re-install the wire cover.
Use the switches located at the back of the faceplate to configure your thermostat according to your application.
Install the batteries.
Mount the faceplate on the mounting plate and tighten the screw.
EN + DE
5
6
7
8
9
T140 Digital Thermostat
Installation and User Guide
1.2
Thermostat Wiring
1.3
Remote Input Wiring
For a 2-wire connection: no polarity.
The thermostat is equipped with a remote input
which allows connection of a telephone controller or
a home automation system. When a signal is received
through this input, the thermostat will automatically
switch from normal operating mode to Vacation
mode. For details on operating the telephone
controller, refer to the instruction manual.
Direct wiring to the circulator
1
Installation
240 V
Must be installed by a competent person. To ensure
your safety, make sure the mains power is switched OFF
before accessing wiring.
1
2
3
4
5
Connection to the thermostat terminals of a furnace
Connection to telephone controller
or a home automation system
Relay
1.1
Guidelines
Home automation system
or telephone controller
Furnace
T140
6
7
8
9
For a 3-wire connection: observe the polarity
1.2-1.5m
Wiring to a power-operated mixing control valve
240 V
Cycles
EUROPE
Position
1.4
Configure the Thermostat
5 minutes
Not recommended for furnaces
Gas or electric wall furnace
The switches are located on the back of the faceplate. Default settings are highlighted.
Switch
1 & 2
Description
Cycles (proportional)
Span (conventional)
Clock display
Temperature display 1
Temperature control mode
Pump protection 2
UP
DOWN
10 minutes
15 minutes
20 minutes
15 min (see 1.4.1)
0.5°C (0.9°F) (see 1.4.2)
Fuel or gas floor furnace, forced air heating
Commercial unit
3
4
5
6
12H
°F
24H
°C
Proportional (see 1.4.1)
Deactivate
Conventional (see 1.4.2)
Activate
1.4.2
Conventional mode with anticipation (switch #5)
This mode is compatible with all heating systems.
1. If you change from °C to °F (or vice versa), you will need to reprogram your Comfort, Economy and Vacation settings.
2. For hot water installations, it is recommended to enable this option to activate the pump for one minute every
24 hours to prevent pump seizure.
Programmable Span Selection (switches #1 and #2)
Select the span using switches #1 and #2. The default temperature span is 0.5°C. For example, if the
temperature setpoint is 20°C, the heating system will turn on at 19.5°C and turn off at 20.5°C.
1.4.1
Proportional Adaptive Mode (switch #5)
This mode analyzes previous cycles to define the the next duty cycle. This control mode guarantees optimal
temperature control based on the system’s capacity. To extend the life of the system, a minimum On/Off time
of 10% of the cycle has been implemented.
Span
0,3°C
Hot Water Heating
Forced Air Heating
Position
Not recommended
for furnaces
Not recommended for
central units
Ideal for:
• Radiant or convection electrical heating system
• Circulator control in a hot water system
• Electrical hot-air furnace
Radiant or convection
electric heating
0,4°C
0,5°C
0,6°C
Gas or electric wall furnace
• Conventional gas or fuel hot-air furnace
Fuel or gas floor furnace,
forced air heating
Central heating
Heating Cycle Selection (switches #1 and #2)
Select the cycle using switches #1 and #2. Short cycles help eliminate temperature variations,
thus increasing user comfort.
Commercial unit
2.2.3
To Modify a Setpoint
1.5
Install the Batteries
1
Set the temperature using pq.
When you first install the batteries, the unit runs a sequence of tests and a complete reset to zero.
The screen should display 0:00 MOJ and the ambient temperature. The current setpoint is 20°C.
2
Press and hold one of the setpoint buttons (R or or
) until the icon is displayed
on the screen (approx. 3 seconds).
2.3
View the Current Setpoint
1.5.1 Replacing the batteries
To view the current setpoint, quickly press once one of the arrow buttons pq.
The thermostat will display an icon indicating that the batteries must be replaced. This icon
will be displayed for 60 days; after this delay, the thermostat will shut down the heating unit.
The time and programming are saved for 15 seconds when replacing the batteries.
The screen displays the setpoint; the arrow indicates a setpoint.
3
Select the Operating Mode
Automatic
2
Basic Configuration
3.1
This mode executes the schedule. To activate:
2.1
Set the Time and Day
Set the time, using the Hour and Minute buttons.
Set the day, using the Day button.
•
Press Manual/Auto until
is displayed. The program setpoint icon is displayed.
1
2
3.1.1
Temporary Bypass
When in Automatic mode, you can temporarily bypass the current program setpoint until
the beginning of the next program. To bypass:
2.2
2.2.1
Configure the Setpoints
Comfort and Economy
•
Set the desired temperature pq OR quickly press R or to use a pre-defined setpoint.
These setpoints are associated to the schedule’s programs and are pre-programmed as follows:
Comfort
Economy
R
20°C (68°F)
18°C (64°F)
Programs 1 and 3
Programs 2 and 4
3.2 Manual J
This mode allows you to maintain a constant temperature.
•
•
Press Manual/Auto until is displayed.
Set temperature pq OR quickly press R or to use a pre-defined setpoint.
2.2.2
Vacation
This pre-programmed setpoint is used when the Vacation mode is activated.
Vacation
10°C (50°F)
3.3
Vacation
Maintains a specific temperature when away for a prolonged absence (e.g. vacation).
From the thermostat, quickly press to activate.
•
4
Program Your Schedule
5
Technical Specifications
The thermostat allows four setting changes for each day of the week. There are no pre-set programs. Your
heating system switches betwwen the Comfort setpoint and the Economy setpoint according to the times you
would have set.
Power supply: 2 AA or LR6 alkaline batteries 1.5 V
Max. resistive load: 5 A @ 240 VAC / 5 A @ 30 VDC
Max. inductive load: 2 A @ 240 VAC / 2 A @ 30 VDC (P.F. = 0.4)
Remote input: 12 VDC, 10%, 2.5 mA
Certifications: CE, c UL us
Control device: Electronic
Programs
PROG 1
PROG 2
PROG 3
PROG 4
Associated Setpoint
R (Comfort)
Time
Wake-up
Leave
Automatic action: Type 1 B
(Economy)
R (Comfort)
Number of programs: 4 programs / day, total of 28 programs
Storage temperature: -20°C to 50°C (-4°F to 122°F)
Operating temperature: 0°C to 50°C (32°F to 122°F), 95% R.H.
Temperature setting range: 5°C to 30°C (40°F to 85°F)
Temperature display resolution: 0.1 degree
Temperature reading accuracy: 0.5°C ( 0.9°F)
Software: Class A
Protection class: II
Protection degree: IP 40
The terminals are designed to handle a cross-section of wire measuring up to 2.5 mm2 (14 AWG).
Return
Sleep
(Economy)
4.1
Set or Modify the Programs
Press Program. The screen displays MO and PROG 1.
1
2
3
Press Day to select the day (hold for 3 seconds to select all days of the week).
Press Hour and Minute to set the start time. To clear an entry, press Clear, the time zone displays --:-- when
the program is inactive.
4
5
6
Press Program to select the program number (2, 3 or 4).
Repeat steps 3 and 4 for remaining programs.
Bk-electronic GmbH
Hardhofweg 40
74821 Mosbach
Press Manual/Auto to exit.
To erase program for desired day:
Germany
© 2019 Resideo Technologies, Inc.
1
2
3
4
Press Program until desired program is selected.
This product manufactured by Resideo and its affiliates.
The Honeywell Home trademark is used under license
from Honeywell International Inc. All rights reserved.
Press Day to select desired day.
For assistance with this product please visit
livewell.honeywellhome.com
Press Clear to erase the time (--:--).
Press Manual/Auto to exit.
33-00057ED-02


| General | Details |
|---|---|
| Name | Honeywell T140 7-Day Programmable Wired Thermostat User Guide |
| Make | Honeywell |
| Language | English |
| Filetype | PDF (Download) |
| File size | 1.67 MB |
 (1 votes, average: 5.00 out of 5)
 Loading...

Honeywell T6 Pro Programmable Thermostat User Manual

Honeywell D1-528 Direct Thermostat Installation Guide

Honeywell FocusPRO P200 Programmable Thermostat User Guide

Honeywell RCHT8610WF Series Smart Thermostat Installation Guide

Honeywell T9 Smart Thermostat Installation Guide

Honeywell TH2320WF4011 FocusPRO Smart S200 Series Thermostat User Guide

Honeywell TL116A Thermostat Installation Guide

T10 Pro Smart Thermostat with Redlink Room Sensor

Honeywell TH6320WF2003 Lyric T6 Pro Wi-Fi Programmable Thermostat User Guide

Honeywell RTH9580 Wi-Fi Color Touchscreen Programmable Thermostat User Guide

Honeywell T140 Manual: Questions and Answers
Honeywell T140 specifications
| Power supply | 2 AA or LR6 alkaline batteries 1.5 V |
| Setpoint range | 5°C to 30°C (40°F to 85°F) |
| Operating temperature | 0°C to 50°C (32°F to 122°F), 95% R.H |
| Storage temperature | -20°C to 50°C (-4°F to 122°F) |
| IP rating | IP 40 |
What is the temperature setting range for the Honeywell T140?
5°C to 30°C (40°F to 85°F). User Guide, p. 1
Can I use the Honeywell T140 with a power-operated mixing control valve?
Yes. The thermostat supports wiring to a power-operated mixing control valve for heating systems. User Guide, p. 1
Honeywell T140 compared with other Honeywell thermostats
| Specification | Honeywell T140 | Honeywell RLV3150 | Honeywell RLV3100 | Honeywell RLV4300 |
|---|---|---|---|---|
| Power supply | 2 AA or LR6 alkaline batteries 1.5 V | 240 VAC, 60 Hz | 240 VAC, 60 Hz | 120/240 VAC, 60 Hz |
| Setpoint range | 5°C to 30°C (40°F to 85°F) | 5.0°C to 30.0°C (41°F to 86°F) | 40 to 85°F (5 to 30°C) | 5.0°C to 27.0°C (41°F to 81°F) |
| Storage temperature | -20°C to 50°C (-4°F to 122°F) | -20.0°C to 50.0°C (-4°F to 122°F) | -4 to 120°F (-20 to 50°C) | -20.0°C to 50.0°C (-4°F to 120°F) |
More Honeywell thermostat manuals

Carrier TSTATCCEWF-01 Smart Thermostat Owner’s Manual

Immax neo LITE 07534L Smart Thermostat for Underfloor Heating User Manual

ENGO CONTROLS EASY-24W 24V Wired Thermostat User Guide

Vive Comfort TP-S-955WH Programmable Thermostat Instruction Manual

vaillant VR 92f/3 Wireless Additional Room Thermostat Instructions

GLOBAL HY09RF WIFI Wireless Thermostat User Manual

Danfoss living eco Intelligent Radiator Thermostat User Guide

RTH21 Programmable Thermostat Coldbuster Dual Instruction Manual

Sinum R-S3 Room Thermostat Owner’s Manual

BEOK CONTROLS TGP508 Wi-fi Touch Screen Thermostat Instruction Manual