
Home > Honeywell Home > Honeywell Home X1N Non Programmable Thermostat Installation Guide
Honeywell Home X1N Non Programmable Thermostat Installation Guide


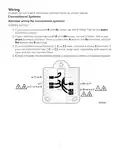
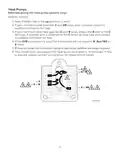
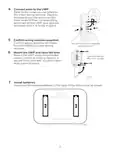


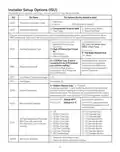









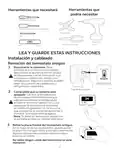


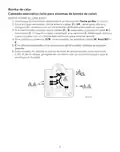





Herramientas que
podría necesitar
Herramientas que necesitará
Destornillador Phillips
Destornillador pequeño de cabeza plana
Pelacables
Lápiz
Taladro y
broca
Pinzas de punta
M36270
Nivel
LEA Y GUARDE ESTAS INSTRUCCIONES
Instalación y cableado
Remoción del termostato antiguo
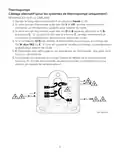
1
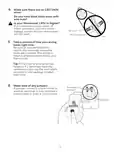
Desconecte la corriente. Para
Encendido
protegerse a sí mismo y a su equipo,
desconecte la alimentación en la caja
de disyuntores o en el interruptor que
controla su sistema de calefacción/
refrigeración. Algunos sistemas pueden
tener disyuntores de calefacción y
refrigeración separados.
Apagado
Apagado
INTERRUPTOR
MS39590
Caja de disyuntores
2
Compruebe que su sistema está
apagado. Cambie la temperatura
de su antiguo termostato para que
esté por encima de la temperatura
ambiente en modo calefacción o por
debajo de la temperatura ambiente
en modo refrigeración. Si no escucha
que el sistema se enciende dentro de 5
minutos, la energía está apagada.
Nota: Si tiene un termostato digital con
la pantalla en blanco, sáltese este paso
24
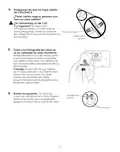
3
Retire la placa frontal del termostato antiguo.
En la mayoría de los termostatos, puede quitar
la placa frontal agarrando y tirando suavemente.
Algunos termostatos pueden tener tornillos,
botones o cierres.
No retire ningún cable del termostato en este
momento
2

| General | Details |
|---|---|
| Name | Honeywell Home X1N Non Programmable Thermostat Installation Guide |
| Make | Honeywell Home |
| Language | English |
| Filetype | PDF (Download) |
| File size | 1.69 MB |
 (1 votes, average: 5.00 out of 5)
 Loading...

Honeywell Home TH8320R1003-Uv VisionPRO 8000 with RedLINK Multistage Thermostat Installation Guide

Honeywell Home TH2110DH 1 Cool Programmable Digital Thermostat Installation Guide

Honeywell Home DT4R Wireless Room Thermostat User Guide

Honeywell Home N100 Series Non Programmable Thermostat User Guide

Honeywell Home DT4M Wired Room Thermostat User Manual

Honeywell Home T834 Series Thermostat Owner’s Manual

Honeywell Home M38794 T10 and T10 plus Pro Smart Thermostat with RedLINK Installation Guide

Honeywell Home DT4 Channel Wired Room Thermostat Instruction Manual

Honeywell Home T10 Smart Home Thermostat Instructions

Honeywell Home FocusPRO Smart S200 Series Smart Thermostat User Guide


Honeywell T834 Series Thermostat Owner’s Manual

GENERAL HT100S Digital Room Thermostat User Manual

Honeywell T841A,B Easy-To-SeeTM Heat Pump Thermostat Instruction Manual

GLOBAL Touch Screen Thermostat HY08AC User Manual

BAXI uSense 2 Wired Smart Thermostat Gateway Installation Guide

Honeywell VisionPRO TH8000 Series Touchscreen Programmable Thermostat Instruction Manual
PECO CONTROL SYSTEMS T8168B-2 BACnet IP Connection Thermostat Instructions

SALUS RT510 Thermostat Instruction Manual

Honeywell CM921 Wireless Programmable Room Thermostat User Guide

INKBIRD ITC-306A Digital Thermostat User Manual