
Home > Honeywell Home > Honeywell Home X1N Non Programmable Thermostat Installation Guide
Honeywell Home X1N Non Programmable Thermostat Installation Guide




















8
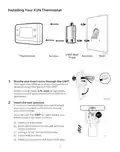
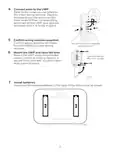
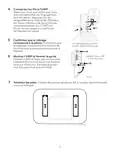
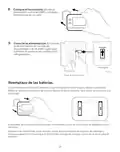
Attach the thermostat.
Align the thermostat onto the UWP
and firmly snap it into place.
M39565
9
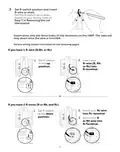
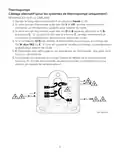
Turn the power ON.
Turn on the power at the breaker box
or switch that controls the heating/
cooling system.
ON
ON
OFF
Switch
M39591
Breaker box
Battery Replacement
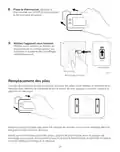
The thermostat’s display will let you know when the batteries are low and must be
replaced. Remove the thermostat by pulling it away from its mount as seen at
left below.
M39559
M39489
Be sure to use fresh AA batteries and insert them as shown in the diagram at right
above.
After inserting the new batteries, align the thermostat with the mounting plate
and push gently until the thermostat snaps back into place as seen in Step 8
above.
10

| General | Details |
|---|---|
| Name | Honeywell Home X1N Non Programmable Thermostat Installation Guide |
| Make | Honeywell Home |
| Language | English |
| Filetype | PDF (Download) |
| File size | 1.69 MB |
 (1 votes, average: 5.00 out of 5)
 Loading...

Honeywell Home TH8320R1003-Uv VisionPRO 8000 with RedLINK Multistage Thermostat Installation Guide

Honeywell Home TH2110DH 1 Cool Programmable Digital Thermostat Installation Guide

Honeywell Home DT4R Wireless Room Thermostat User Guide

Honeywell Home N100 Series Non Programmable Thermostat User Guide

Honeywell Home DT4M Wired Room Thermostat User Manual

Honeywell Home T834 Series Thermostat Owner’s Manual

Honeywell Home M38794 T10 and T10 plus Pro Smart Thermostat with RedLINK Installation Guide

Honeywell Home DT4 Channel Wired Room Thermostat Instruction Manual

Honeywell Home T10 Smart Home Thermostat Instructions

Honeywell Home FocusPRO Smart S200 Series Smart Thermostat User Guide


neptronic TMA54-EXT1 Thermostat Instruction Manual

White Rodgers BP150 Line Voltage Programmable Thermostat User Guide

vtech Installing E-Smart W960 Thermostat User Manual

Thermafloor TF1 Programmable Radiant Floor Thermostat User Manual

VIMAR 02971 Smart Automation Rotary Dial Thermostat Instruction Manual

GENERAL LIFE ARUNA HT300S Smart Room Thermostat User Manual

SOGEDIS 1001 MODEL UP Refrigerator Thermostat Instruction Manual

CENTER EHE0200123 Wired 7 Day Programmable Thermostat Installation Guide

ecoartheating B07QZRVC8K Temperature Controller Electric Thermostat Instruction Manual

Uponor T-247 BUS Smatrix Base Thermostat Installation Guide