
heatmiser Slimline-RF V3 Programmable Wireless Thermostat Instructions


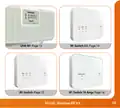










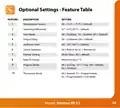


Pairing Menu Explained
Feature P1 - Pairing: to the RF-Switch V1 & V2, RF-Switch 16 Amp & UH8-RF V2.
Feature P2 - Setting the UH8-RF address: This is the number set on the rotary
dials inside the UH8-RF unit, the zone number & zone type.
Feature P3 - Failsafe: If the receiver fails to receive a signal from the
Slimline-RF V3 within a 40 minute period, it will activate the output for
12 minutes every hour. The receiver will continue to do this until it receives a
signal from the Slimline-RF V3.
Pairing Menu
FEATURE
SETTING
DESCRIPTION
P1
Pairing to RF-Switch 1&2
& UH8-RF V2
Commences countdown from
99 – 00 seconds.
P2
P3
Pairing to UH8-RF
00 – 99 = Receiver address/zone no. & type.
00 = Disabled 01 = Enabled (Default)
Failsafe
•
•
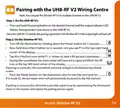
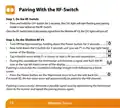
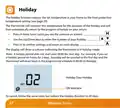
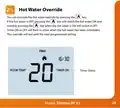
Turn Off the thermostat by, holding down the Power button for 3 seconds.................
Now hold down the H button for 3 seconds unit you see P1 in the top right hand
corner of the display..........................................................................................................................
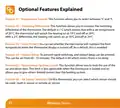
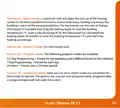
Repeatedly press Clock to select the desired P1, P2 or P3 setup pages.........................
•
11
Wireless Series

| General | Details |
|---|---|
| Name | heatmiser Slimline-RF V3 Programmable Wireless Thermostat Instructions |
| Make | heatmiser |
| Language | English |
| Filetype | PDF (Download) |
| File size | 0.35 MB |
 (1 votes, average: 5.00 out of 5)
 Loading...

heatmiser neoStat Touch-e Touchscreen Electric Floor Heating Thermostat Owner’s Manual

heatmiser DS1-V2 Thermostat Owner’s Manual

heatmiser neoStat-e Electric Floor Heating Thermostat Instructions

heatmiser neoStat-Pro Smart Thermostat Instruction Manual

heatmiser Slimline-B V3 Programmable Room Thermostat Owner’s Manual


Vine TJ-560 Smart Thermostat User Manual

Lachin TDS72 Series WiFi Thermostat User Guide

Munters RDT-5 Triple Phase Digital Thermostat User Manual

AVATTO TRV06 Wireless Smart Radiator Thermostat User Manual

GEWiSS GW 10 794H KNX Timed Thermostat Instruction Manual

BlueLink 8205 Smart Wi-Fi Thermostat User Manual

EBECO EB500 Electric Floor Heating Thermostat Instruction Manual

Honeywell T7350 Programmable Thermostat Owner’s Manual

Vine TJ-610E Smart Thermostat User Manual

KCONTR K6HWIFI WiFi Smart Thermostat User Guide