Home > Vine > Vine TJ-610E Smart Thermostat User Manual

Vine TJ-610E Smart Thermostat User Manual

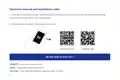
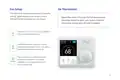
Vine Smart Control  
TJ-610E Wi-Fi Thermostat  
User Guide  
R
GeneralDetails
NameVine TJ-610E Smart Thermostat User Manual
MakeVine
LanguageEnglish
FiletypePDF (Download)
File size0.45 MB
Download PDF
1 Star2 Stars3 Stars4 Stars5 Stars (1 votes, average: 5.00 out of 5)
Loading...
Vine Smart Wi-Fi Thermostat with Nightlight TJ-225 User Guide
Vine TJ-560 Smart Thermostat User Manual

Vine TJ-610E Smart Thermostat User Manual
Get the free PDF manual for the Vine TJ-610E Smart Thermostat User Manual and access setup steps, usage instructions, and troubleshooting tips. 👉 View online or download now to keep your thermostat running smoothly!
Vine TJ-610E Smart Thermostat User Manual Overview

Summary of Contents

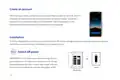
  • Page 1: Vine Smart Control J-610E Wi-Fi Thermostat User Guide
  • Page 2: This user manual only includes installation and simple setup instructions. For the more detailed operating instructions and user guide, scan the QR code. Watch installation video by scanning the QR code.
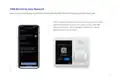
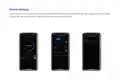
  • Page 3: Vine App Setup To download the Vine Smart Control app, scan the QR code or search Vine Smart Control in the Apple App Store or Google Play Store. Open the Vine Smart Control app. If you already have an account, tap Sign In. To create a new account, tap Sign Up. You must create your own Vine account to use third-party services and products. These will not work with a guest account. Tap + and select your smart thermostat. Follow the in-app instructions to set up your smart thermostat. You can change the name and icon at any time by going to the smart thermostat screen and tapping. You can use the Vine app to connect your smart thermostat to Amazon Alexa or Google Assistant.
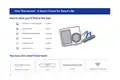
  • Page 4: Vine thermostat - a smart choice for smart life. Here's what you'll find in the box: Vine Wi-Fi thermostat. Screw sets. Flathead screwdriver. Wire labels. Jumper wire. User manual. You may also need these tools: Pencil. Home Wi-Fi password. Phillips screwdriver.
  • Page 5: Compatibility section outlines the systems supported, including conventional, heat-pump, and dual fuel systems. The thermostat is compatible with various configurations such as 2-heat & 2-cool and 1-heat & 1-cool. C-wire is required to power the thermostat. Incompatible wiring and voltage should be checked. The thermostat does not work with electric baseboard heat or millivolt systems. It does not support S terminals for indoor and outdoor sensors. Voltage options include 110 VAC, 120 VAC, and 240 VAC. Users are advised to check the wall plate of their old thermostat for compatibility indications. If unsure about compatibility, contacting a professional is recommended.
  • Page 6: Create an account with a valid email address and remember the password for thermostat registration. T J -610E is designed to work with most standard 24V AC low voltage heating and cooling systems. Switch off power to protect from blowing a fuse in your equipment. Change the temperature with your current thermostat and wait for at least 5 minutes to ensure the system is off.
  • Page 7: Check that your system is off. Confirm your system is off by turning on your heat or your AC. Wait a few minutes—you should not feel air coming from your vents. If you have a digital thermostat that has a blank display, skip this step. Remove your old thermostat from the wall plate. Most thermostats allow you to remove the main unit for access to the wall plate. You can take off the thermostat by grasping and gently pulling. Some thermostats may have screws, buttons, or clasps. Do not remove any wires from your old thermostat in this step.
  • Page 8: Take a picture of the wiring. Make sure the wire terminal labels are clear enough to be read. This will be important reference for the next step. Label the old wall plate wires with labels from our new thermostat box. If there's an Rc or Rh wire, attach the R label to it.
  • Page 9: Disconnect the wires and remove the old wall plate. Disconnect the wires from the old thermostat one by one; you may need a screwdriver to release wires from terminals. Wrap the wires around a pen or pencil so they don’t fall back into the hole in the wall. Mount the new wall plate using the screw set (screw & anchor). In most cases, the old mounting position can be used; if not, apply the new set. Be sure to check the alignment of the new wall plate before and after the installation.
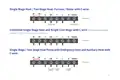
  • Page 10: Use the picture you took before as reference to wire. Make sure that a C-wire exists in your old thermostat system. The chart is a wiring diagram for common systems. Conventional system includes power for cooling, power for heating, common wire, and fan. Heat pump system includes power for cooling, power for heating, common wire, RC, RH, C, fan, G, and various stages of heat and cool. Connections for heat pump include changeover (reversing valve) and 2nd stage heat.
  • Page 11: Single stage heat / two stage heat - furnace / boiler with C-wire Combined single stage heat and single cool stage with C-wire Cool furnace and air conditioner Single stage / two stage heat pump with emergency heat and auxiliary heat with C-wire Emergency / auxiliary 1st stage heating 2nd stage heat
  • Page 12: Single stage cool / two stage cool - air conditioner Dual fuel system - combined single stage heat pump and single stage furnace
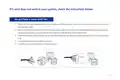
  • Page 13: If C-wire does not exist in your system, check the instruction below. Check for the spare wire behind your wall plate or old thermostat. Connect it to the C-terminal of the new wall plate. Remove the cover of the furnace or heating system. Open the cover of the heating/cooling system to find the control board. Locate the bundle of wire with the same labels as that of your thermostat end. Connect the spare wire to the C-terminal. Close the cover of the furnace or heating system.
  • Page 14: Conventional system without C wire (also known as 4-wire system) Remove the cover of the furnace or heating system to find the control board. Move the G-wire to the C-wire and connect G and Y terminals with the jumper wire. At the thermostat, connect C-wire and G-wire. By this configuration, the thermostat will have no fan control function. You may need to unscrew the cover; the control board may be either at the top or bottom.
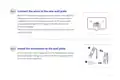
  • Page 15: Connect the wires to the new wall plate. Refer to the wiring diagram and insert all wires vertically into the proper terminal. Ensure each wire is inserted into the matching terminal. Pull wires gently to ensure they are securely fastened. When all wires are connected, place excess wire back into the wall. Install the thermostat to the wall plate. Aim the two clips in the upper part of the thermostat to the top of the wall plate. Gently push and fit the wiring pole to the terminals on the wall plate. Firmly press forward to secure it into position.
  • Page 16: Power on and enjoy. Turn on the switch that controls your heating and cooling system; the thermostat will be powered on and prompt you to start the setup. If you have any trouble installing the device or app, check the below information for help. Visit our websites for installation videos. We are here to help, 24/7!
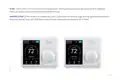
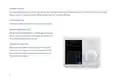
  • Page 17: Main screen displays essential information. Wi-Fi connectivity status is shown. Night-light control options are available. Current date and time are displayed. Current humidity levels are indicated. Current temperature is shown. Dial control allows for adjustments. Next schedule period is visible. Temperature can be increased or decreased. Menu provides access to additional settings.
  • Page 18: Device initial setup For a quick and easy way to start using your new smart thermostat, the device will automatically direct you to the initialization setup process once it’s turned on for the first time. Equipment type Select your home's heating equipment type from the options available: gas/oil/furnace, electric, heat pump, dual fuel or no heating. Select according to your heating system.
  • Page 19: If you have a furnace or boiler, select Gas/Oil/Furnace and tap Setup. Then select Appliance or Thermostat depending on your personal preferences for fan control. Tap Next at the bottom of the screen to continue. If you have a heat pump, select Heat Pump and tap the Setup button. Then follow the on-screen instructions. Tap Next at the bottom of the screen to continue.
  • Page 20: If you have a dual fuel system, select Dual Fuel and tap Setup. Follow the on-screen instructions to configure the fossil fuel heating appliance settings. Tap Next at the bottom of the screen to continue. Follow the on-screen instructions to configure the heat pump heating appliance setting.
  • Page 21: Schedule Only 2 schedules (Home & Vacation) will be available during offline operation. This list can be expanded to up to 4 schedules when a Wi-Fi connection is established. Please enter your location's current date and time. Once the device is registered or linked to a user account, the date and time on the device will be updated automatically to the current time associated with the user account.
  • Page 22: Wi-Fi setup is essential for smart features like remote control and weather forecast. Follow the on-screen instructions to complete the Wi-Fi setup. A success notice will appear on the registration screen once connected to Wi-Fi. Complete the setup by following the instructions on the screen. You can add the device to a user account after downloading the mobile app and setting up an account.
  • Page 23: Tap the Wi-Fi icon to enter the Wi-Fi setup screen, then tap the Scan icon to list available Wi-Fi networks. Follow on-screen instructions to complete the Wi-Fi setup. If the network is a hidden one, press the SSID button on the scan page to bring up the interface. This interface allows you to enter your own SSID. Follow the on-screen instructions to complete Wi-Fi setup.
  • Page 24: Follow instructions on the next page to add the device to your account. Possible reasons for Wi-Fi connection failure include weak Wi-Fi signal, SSID with non-ASCII characters, incorrect password, inactive internet, and required additional webpage authentication. An account ID will appear once the connection is established successfully. For an unregistered device, a message will be displayed indicating the device needs to be registered.
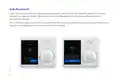
  • Page 25: Add device to your account. You will be asked to enter the MAC-ID and the Temporary Verification Code. The Temporary Verification Code (TVC) is a 4-digit code randomly generated each time you enter this screen. It expires after 180 seconds (3 minutes). Tap the Temporary Verification Code to generate a new one if it expires.
  • Page 26: Auto reconnect feature attempts to reconnect to the wireless network every two minutes if the connection is lost. Manual network reconfiguration will stop automatic reconnection attempts. Wi-Fi can be manually turned off or on. Disabling Wi-Fi will also disable the internet connection and all smart features, including remote access from the mobile app.
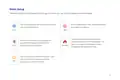
  • Page 27: Mode setup The HVAC system settings depend on the type of system you use. Turn on cooling when the current temperature rises above the setpoint. Turn on heating when the current temperature drops below the setpoint. Use only the emergency heat or backup heat source to maintain the heat setpoint. This option only appears if emergency heat is configured in the equipment menu. Activate the heating or cooling system as required to keep your home within the configured range of setpoint. Turn the system off. When the system is off, only the current temperature will be displayed on the home screen.
  • Page 28: On the thermostat, tap the System Mode icon on the Home Screen to select your system mode. The available modes are Cool, Heat, Auto, Emergency Heat, or Off. Emergency Heat mode is only available if Heat Pump is selected as the Heat Type and the Emergency Heat function is enabled in the setup menu.
  • Page 29: Fan setup options are available on the thermostat. The fan menu displays the current furnace fan setting. Users can select the fan mode from options such as Auto, On, and Circulation. The On setting forces the fan to run continuously, regardless of the scheduled programming. The Auto setting enables the fan when the system is actively heating or cooling. The Circulation option allows the fan to turn on and off based on a user programmed schedule. A circulation schedule can be programmed on both the device and the app.
  • Page 30: Adjust the temperature by tapping the + and - to change the cooling/heating set point. In Auto mode, set both the heating and cooling set points for the mode to function properly.
  • Page 31: Temporary hold and holding one temperature To temporarily change your setpoint, use the “+” and “-” button on the thermostat or by knob. Your thermostat will display the time it will hold for next to the setpoint. It will hold your new setpoint until the next scheduled setpoint. If you want to hold one temperature, adjust the set point using the “+” and “-” buttons or by knob. Then click “Hold,” the thermostat will hold this setpoint until you click “Cancel” to cancel your temporary adjustment.
  • Page 32: Menu setting includes all setting options for the thermostat. Weather helps to check the weather in your location and the forecast for the next 5 days. EZ Comfort allows for a quick setup for your setpoint at home.
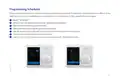
  • Page 33: Programming schedules are available for selection when the device is offline. There are two default schedules: Home and Vacation. When connected to the Internet, you can have up to four schedules. To program schedules, select Schedule. Choose the day type to edit: weekdays or weekend. Select the set point you want to edit. Adjust the set point using the up and down arrows. Save your changes using the arrow in the upper left corner. Continue editing the set points as desired. Return to the Schedule screen using the arrow in the upper left corner.
  • Page 34: Setting Date & time Setup your thermostat date & time Screen Select the brightness and time out of the screen Nightlight Select the brightness of the night-light. Temperature Follow the on-screen instructions to set temperature display unit (C/F) and temperature safety functions. Advanced setting Designed for HVAC professionals who want to modify advanced features for better unit control. Reset Allow users to reset the device to factory settings, this will clear all set schedules and preferences.
  • Page 35: Advanced setting allows access to equipment setup. To modify default values, follow the steps: Menu - Setting - Advanced setting. Deadband is the temperature range where heating or cooling is not engaged. Fan delay indicates the time the fan continues after mode turn off. Min run time refers to the minimum time the system is on after engaging. Cycle time is the waiting time between heating and cooling. Runtime displays system runtime for heating, cooling, and air filter. Sensor calibration improves accuracy as the thermostat nears the end of its lifecycle. Temperature readings can be adjusted for better sensor accuracy. The document includes specific values for deadband, fan delay, min run time, cycle time, and sensor calibration.
  • Page 36: Installer access requires clicking on advanced settings and entering the professional access code along with the action code. Initial setup allows you to repeat the initial setup process. Sensor calibration enables adjustment of temperature readings for improved sensor accuracy as the thermostat ages. Sensitivity level allows adjustment of the thermostat sensor's sensitivity to air temperature changes. A lower sensitivity level results in more frequent system cycling to maintain the setpoint.
  • Page 37: To have the system alert, filter change reminder, service message. Displays a quick glance at your thermostat information. It includes your model number, MAC ID, build date, firmware version, technical support contact information.
  • Page 38: App main screen Menu Lock Device date & time Heating setpoint Cooling setpoint Indoor humidity Indoor temperature Current mode Current fan mode
  • Page 39: Program/Adjust a schedule Tap + on the upper right corner to add a new schedule, name it and tap OK to confirm. To modify an existing schedule, select one from the list and edit. Tap Add Period button and select and set starting time, heating setpoint and cooling setpoint. To delete an existing schedule, swipe left the schedule and select Delete. Tap on the starting, heating or cooling value of the existing period to edit as you desire.
  • Page 40: Delete an existing period by swiping left on the existing period and selecting Delete. To copy a schedule to other days of the week, tap and select the days you want to copy at the bottom of the screen, then tap Copy. Use the arrow on the upper left corner to save and return to the schedule list.
  • Page 41: Device settings allow you to view and modify thermostat settings. You can adjust the night-light, brightness, and schedule. You can also set the date and time. Temperature units can be modified. Safety functions regarding your thermostat are available.
  • Page 42: Advanced features Vine Smart Wi-Fi Thermostat allows connection to Alexa and Google Assistant for voice control of room temperature. Instructions for connecting to Alexa include downloading the Vine Smart Control app and creating an account. Users must also download the Amazon Alexa app and set up their Alexa-enabled device. Linking the Vine Control skill in the Alexa app is an important step. To enable the skill, users need to search for Vine Control in the Alexa app. After enabling the skill, users must enter their Vine Control app account and password. Once linked, users can control their thermostat using Amazon Alexa.
  • Page 43: Common commands for Alexa to control Vine Thermostat: Control the device via voice commands. You can control your thermostat with the following commands: Alexa, turn (Device Name) on. Alexa, turn (Device Name) off. Alexa, Change (Device Name) Mode to Cool/Heat/Auto. Alexa, Increase (Device Name) by __ degrees. Alexa, Decrease (Device Name) by __ degrees. Alexa, Set (Device Name) to __ degrees. Alexa, what is the (Device Name) set to? Alexa, what is the temperature of the (Device Name)?
  • Page 44: How to connect to Google Assistant? Download and register the thermostat as instructed in page 1 ~ 39. Download Google Home app and set up your Google-enabled device. Tap + button in the middle of the Google Home app screen. IMPORTANT step - link Action. Tap the sidebar menu on the upper left corner of the main page of Google Home, select Home Control. Tap the + button on the lower right corner and search for Vine Control. Open Vine Control and select country, then enter app account/password and tap Link Now to link your Vine account to Google. Enter the Vine Control app account and password, then tap Link Now to link your Vine Control account. Choose the room where your device is located, and then the skill will appear on the Home Control account to Alexa Skill. Now you can control your thermostat over Google Home.
  • Page 45: Common commands for Google Home to control Vine Thermostat include various temperature-related queries and adjustments. Commands supported by Google Home are in English only. Users can ask about the current temperature or set specific temperature preferences. Commands include making the temperature warmer or cooler, setting it to a specific degree, and adjusting it by a certain number of degrees. Users can inquire about the temperature in specific rooms like the Bedroom or Living Room. Commands also allow for changing modes, such as turning on heat or cool mode. Automatic mode can be activated in designated areas. The document emphasizes the use of voice commands for thermostat control. The commands are designed for ease of use with Google Home. The instructions highlight the compatibility of the thermostat with Google Home.
  • Page 46: User manual for the T J -610E Smart Wi-Fi Thermostat includes important limited warranty information. The product is warranted to be free from defects in materials and workmanship for two years from the date of delivery. If the product fails to conform to the limited warranty during the warranty period, options include repair, replacement, or refund. Repair or replacement may be made with new or refurbished products at the discretion of VINE CONNECTED. If a component is no longer available, a similar product may be provided. The warranty is the sole and exclusive remedy for breach of the limited warranty. Repaired or replaced products are covered for ninety days or the remaining warranty period, whichever is longer. The limited warranty is transferable to subsequent owners but does not extend the warranty period or coverage. Original purchasers may return the product within thirty days for a full refund if not satisfied. The document outlines restrictions and exclusions that may apply.
  • Page 47: WARRANTY TERMS How to receive service if you want to claim under this limited warranty Before making a claim under this limited warranty, the owner of the product must notify VINE CONNECTED of the intention to claim by visiting vineconnected.com/support during the warranty period and providing a description of the alleged failure. VINE CONNECTED will have no warranty obligations with respect to a returned product if it determines that the product is an ineligible product. This limited warranty does not cover products marked as sample or not for sale, or sold as is. Products that have been subject to modifications, alterations, tampering, or improper maintenance or repairs are not covered. This limited warranty does not cover consumable parts, including batteries, unless damage is due to defects in materials or workmanship of the product. VINE CONNECTED recommends that you use only authorized service providers for maintenance or repair. Except as stated above in this limited warranty, VINE CONNECTED disclaims all express, implied, and statutory warranties and conditions with respect to the product.