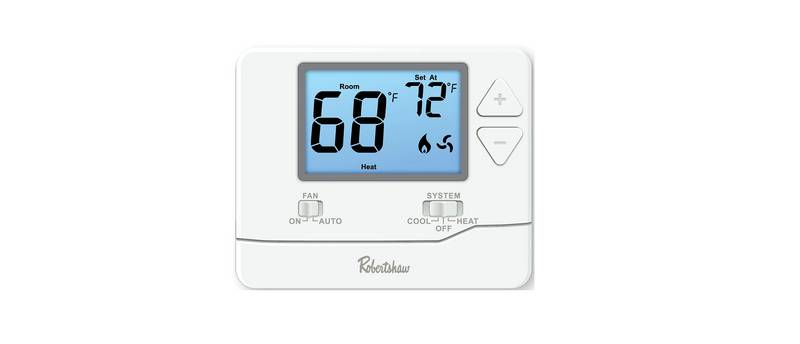
Home > Robertshaw > Robertshaw 9602 Programmable Thermostat User Manual
Robertshaw 9602 Programmable Thermostat User Manual
110-732E 7/18/01 3:04 PM Page 1
DIGITAL
PROGRAM M ABLE
THERM OSTAT
9620
®
I N T E G R A T E D C O M F O R T S O L U T I O N S ™
H
HEAT PUM P
7 Day Programmable
2 Heat / 2 Cool
User’s Manual
Quick Start
Installation and
Programming
110-732E
As an ENERGY STA R® partner, M aple Chase has
determined that this thermostat product meets
©2001 Maple Chase Company
the ENERGY STA R® guidelines for energy efficiency.
!
Important Safety Information
WARNING:
Always turn off power at the main power source by unscrewing
fuse or switching circuit breaker to the off position before installing,
removing, cleaning, or servicing thermostat.
•
Read all of the information in this manual before installing or
programming this thermostat.
•
•
•
•
This is a 24V AC low voltage thermostat. Do not install on voltages
higher than 30V AC.
All wiring must conform to local and national building and electrical
codes and ordinances.
Do not short (jumper) across terminals on the gas valve or at the
system control to test installation. This will damage the thermostat
and void the warranty.
1
More user manuals on ManualsBase.com
| General | Details |
|---|---|
| Name | Robertshaw 9602 Programmable Thermostat User Manual |
| Make | Robertshaw |
| Language | English |
| Filetype | PDF (Download) |
| File size | 0.21 MB |

Robertshaw RS9220 Programmable Thermostat Installation Guide

Robertshaw RS10420T WIFI Programmable Thermostat User Guide

Robertshaw RS8110 Non Programmable Thermostat Instruction Manual

Robertshaw RS8210 Non-Programmable Multi-Stage 2H-1C Wall Thermostat User Manual

Robertshaw RS8210 Thermostat Installation Guide

Robertshaw RS9220 Digital Programmable Wall Thermostat Instruction Manual

Robertshaw RS9320T Programmable Touchscreen Wall Thermostat Instruction Manual

Robertshaw RS9423T Thermostat Installation Guide

Robertshaw RTC500 WIFI Thermostat Instruction Manual

Robertshaw RS1110 Programmable 1 Heat 1 Cool Wall Thermostat Instruction Manual

Robertshaw 9602 Programmable Thermostat User Manual Overview
Summary of Contents
- Page 1: Digital programmable thermostat 9620 user’s manual. 7 day programmable, 2 heat / 2 cool. Important safety information includes turning off power before installation. Read all information in the manual before installing or programming. This is a 24V AC low voltage thermostat. Do not install on voltages higher than 30V AC. All wiring must conform to local and national codes. Do not short across terminals on the gas valve or system control. This thermostat product meets ENERGY STAR guidelines for energy efficiency. ©2001 Maple Chase Company.
- Page 2: Features Four preprogrammed ENERGY STAR setpoints for each day of the week. Quickset programming for quickly programming all days of the week simultaneously. Energy Efficient Recovery (EER). Residual cooling for added air conditioning efficiency. Two AA ENERGIZER brand batteries retain program memory, even during power outages. Low battery indicator. Multi-colored LED indicators for system status. Zone compatible as master thermostat. Fahrenheit/Celsius display option. Programmable from 45°F (7°C) to 90°F (32°C). Step 1: Replacing Existing Thermostat Turn off power to heating and cooling system. Remove cover of old thermostat to expose wires. Disconnect wires one at a time from existing terminals. Use enclosed labels to mark existing wires. Remove existing thermostat base from wall.
- Page 3: Table 1 outlines the old terminal labels and their new equivalents along with descriptions for various circuits. The thermostat requires a 24V AC common wire for proper operation. Instructions for removing the existing thermostat base from the wall are provided. If replacing a mercury-containing thermostat, proper disposal instructions should be followed. For new installations, the thermostat should be mounted on an inside wall, 4-5 feet above the floor. Installation should avoid locations behind doors, in corners, near air vents, in direct sunlight, or near heat sources. The thermostat is compatible with 100% lockout systems. To reset the system, turn the thermostat to the off position for at least 60 seconds. Power to the heating and cooling systems should be turned off before installation. The thermostat has multiple operational settings including cool, off, heat, and emergency modes.
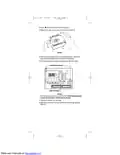
- Page 4: Place the auto-on switch into the auto position. Remove the cover using a coin or screwdriver. Place the thermostat against the wall at the desired location. Make sure wires will feed through the opening on the base of the thermostat. Mark the placement of mounting holes. Drill the marked holes using a 3/16 drill bit. Enclosed plastic anchors do not require a drilled hole for drywall. Tap plastic anchors into the holes. Align the base with plastic anchors and feed wires through the opening.
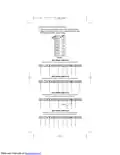
- Page 5: Secure base to wall with supplied screws. Insert wires into terminal strip matching the label to the corresponding terminal. Tighten screws. Wiring sample #1: Typical heat pump with cool active reversing valve and auxiliary/emergency heat. Wiring sample #2: Typical heat pump with heat active reversing valve and auxiliary/emergency heat. Wiring sample #3: Typical heat pump with heat active reversing valve and auxiliary/emergency heat. Does not have separate wire for emergency heat. Wiring sample #4: Typical heat pump with cool active reversing valve, auxiliary/emergency heat and second stage of cooling. System fault indicator connected.
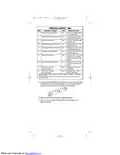
- Page 6: Terminal legend for 9620 includes various connections such as 24VAC common, system fault indicator, and different stage heating and cooling connections. Connections include C for 24VAC common, L for system fault indicator, R for 24VAC hot side, and E for second stage cooling. Emergency heat connection energizes on a call for heat in EM mode only. Indoor fan connection energizes with E, Y1, Y2, and W2 terminals. W2 is for second stage heat connection, energizing on a call for auxiliary heat. O and B are for cool and heat active reversing valve connections, respectively. Instructions include installing two AA Energizer brand batteries into the battery compartment. Ensure positive ends of batteries match positive terminals in the compartment. Replace the cover on the thermostat by snapping it into place. Turn on power to the system and test the thermostat as described in the following section.
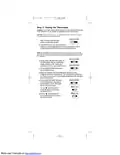
- Page 7: Testing the thermostat Warning: Do not short (jumper) across terminals of gas valve or system control to test operation. This will damage the thermostat and void your warranty. Caution: Do not switch system to cool if the temperature is below 50°F (10°C). This can damage the air conditioning system and cause personal injury. Cool-off-heat-em switch instructions: - Place the switch into the cool position. - Press the button until the temperature setting is at least 3 degrees below room temperature. The air conditioning system should turn on within a few seconds. - Once the thermostat turns the system off while in the cool or heat mode, a built-in delay keeps the compressor from turning on for about 5 minutes. To override the delay for installation, press reset. Cool-off-heat-em switch operation: - Put the switch into the off position. The air conditioning system should turn off. - Put the switch into the heat position. - Press the button until the temperature setting is at least 3 degrees above room temperature. The heating system should turn on. - Put the switch into the off position. The heating system should turn off. Auto-on switch operation: - Put the auto-on switch to the on position. The blower fan should turn on. - Put the auto-on switch to the auto position. The blower fan should turn off.
- Page 8: Customizing your thermostat Set time of day, day of week, temperature differential, residual cooling. Press SET and PROG/MAN. Release simultaneously. Press SET or to change time of day. Press to change day of week. Press SET to change 1st stage temperature differential. The temperature differential is factory preset at 1°. Press SET to change 2nd stage temperature differential. The second stage temperature differential is factory preset at 2°. Press SET to change residual cooling. The residual cooling feature will keep the system fan on for an additional 30, 60, or 90 seconds after the compressor cycles off in cool mode.
- Page 9: Changing Fahrenheit (F) to Celsius (C) involves pressing and holding the SET button and then pressing P, followed by releasing both simultaneously. The Energy Efficient Recovery (EER™) feature monitors performance up to 2 hours before the end of the setback period to determine when to activate the system. The thermostat indicates EER in the display when this program feature is active. The EER™ feature locks out auxiliary stages until 20 minutes prior to the upcoming setpoint time to utilize the most energy-efficient first stage. Auxiliary stages of heating and cooling are available during the lock-out period to maintain the setpoint temperature. The Robertshaw thermostat is preprogrammed with ENERGY STAR® settings for optimal energy savings. The preprogrammed settings include specific heat and cool setpoint temperatures for different times of the day. These settings can be customized using QuickSet™ or daily programming guides.
- Page 10: QuickSet™ will program all 7 days of the week with the same program. Place COOL-OFF-HEAT-EM in COOL or HEAT position. Press and hold SET. Press the Release button simultaneously. The MORN indicator should be blinking. Program the time of day and the temperature as outlined in the Setting Daily Program section. Place COOL-OFF-HEAT-EM in COOL position. The display will show a number from 1 to 7, representing the day of the week to be programmed. Press SET to change the MORN time. Repeat steps to program DAY, EVE, and NITE. Shift COOL-OFF-HEAT-EM to HEAT position. Repeat steps to program HEAT (winter) settings.
- Page 11: Begin programmed operation by placing AUTO-ON into AUTO. Set COOL-OFF-HEAT-EM to COOL or HEAT, depending on the season. Press the PROG/MAN button until the indicator is in the PROG position. Once the thermostat turns the system off while in the cool or heat mode, a built-in delay keeps the compressor from turning on for about 5 minutes. To override the 5-minute delay for installation, press RESET. This will erase the delay as well as all programming. To temporarily increase or decrease temperature, press the appropriate button. The thermostat will automatically return to the program at the next scheduled setting change or after four hours.
- Page 12: Manual operation involves pressing the PROG/MAN button until the indicator is in the MAN position. Adjust temperature settings using the or buttons. To reset the thermostat to factory preprogrammed conditions, press the RESET button located beneath the lower left corner of the display.
- Page 13: LED indicators are used to indicate system activity. The AUX indicator illuminates during a call for second stage heating. The auxiliary stages are used to maintain comfort during extremes in weather conditions. If the AUX LED is illuminated too frequently during periods of moderate temperature, check the differential settings. The CHECK indicator is used to monitor system status. If the CHECK indicator is illuminated, call your local HVAC service provider. The EM ER indicator is illuminated only when the system switch is moved to the EM (emergency heat) position. The EM position is used only when the primary stage of heat is not functioning or requires service. Troubleshooting includes checking wiring if the thermostat does not turn on the system. Check the fuse and replace it with a 3 amp fuse if it has opened. If the thermostat turns on and off too frequently, increase the temperature differential. If the display is blank, flashing, or shows constant LO BAT, replace the batteries. If the time shown on the display is not the current time of day, change the time of day setting. If the thermostat does not follow the program, ensure it is not in MANUAL mode and verify the program settings. If problems with thermostats cannot be resolved, contact technical support.
- Page 14: Five-year limited warranty Maple Chase Company warrants to the original contractor installer, or to the original consumer user, each new Robertshaw thermostat to be free from defects in materials and workmanship under normal use and service for a period of five years from date of purchase. This warranty does not cover batteries, damage caused by batteries, damage resulting from improper installation, alteration, misuse or abuse of the thermostat occurring after the date of purchase. Maple Chase Company agrees to repair or replace at its option any thermostat under warranty provided it is returned within the warranty period, postage prepaid, with proof of the date of purchase. Cost of thermostat removal or reinstallation is not the responsibility of Maple Chase Company. Repair or replacement as provided under this warranty is the exclusive remedy of the consumer. Maple Chase Company shall not be liable for any incidental or consequential damages for breach of any express or implied warranty on this product, or under any other theory of liability. Except to the extent prohibited by applicable law, any implied warranty of merchantability or fitness for a particular purpose on this product is limited to the duration of this warranty. Some states do not allow the exclusion or limitation of incidental or consequential damages, or allow limitations on how long an implied warranty lasts, so the above limitations or exclusions may not apply to you. This warranty gives you specific legal rights, and you may also have other rights which vary from state to state. For warranty returns, send thermostat, shipping prepaid to: Uni-Line North America Warranty Claims Department.