
Home > Robertshaw > Robertshaw RS8110 Non Programmable Thermostat Instruction Manual
Robertshaw RS8110 Non Programmable Thermostat Instruction Manual



RS8110
Operation Manual


| General | Details |
|---|---|
| Name | Robertshaw RS8110 Non Programmable Thermostat Instruction Manual |
| Make | Robertshaw |
| Language | English |
| Filetype | PDF (Download) |
| File size | 0.12 MB |
 (1 votes, average: 5.00 out of 5)
 Loading...

Robertshaw RS9220 Programmable Thermostat Installation Guide

Robertshaw RS10420T WIFI Programmable Thermostat User Guide
Robertshaw RS8210 Thermostat Installation Guide

Robertshaw RS8210 Non-Programmable Multi-Stage 2H-1C Wall Thermostat User Manual

Robertshaw RS9220 Digital Programmable Wall Thermostat Instruction Manual

Robertshaw 9602 Programmable Thermostat User Manual

Robertshaw RS9320T Programmable Touchscreen Wall Thermostat Instruction Manual

Robertshaw RS9423T Thermostat Installation Guide

Robertshaw RTC500 WIFI Thermostat Instruction Manual

Robertshaw RS1110 Programmable 1 Heat 1 Cool Wall Thermostat Instruction Manual

Robertshaw RS8110 Manual: Questions and Answers
How do I replace the batteries in my Robertshaw RS8110?
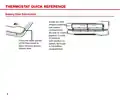
Press the lower portion of the thermostat to open the easy access battery door.
- Open the battery door by pressing its lower portion.
- Install two 1.5V AAA alkaline batteries into the compartment.
- Match the positive (+) ends of the batteries with the positive (+) battery terminals.
- Close the battery door. Instruction Manual, p. 6
Can I adjust the cooling differential on my Robertshaw RS8110 if it cycles too often?
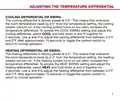
Yes. Select COOL, hold the + and - buttons together for 3 seconds, then use + and - to adjust the cooling differential between 0.2°F and 2°F. Factory preset is 0.5°. Instruction Manual, p. 9
More Robertshaw thermostat manuals

MAGNUM FIRST M9-TS1 24 Volt Intelligent Thermostat Owner’s Manual

Coplax PH1001T Portable Electric Space Heater with Thermostat Instruction Manual

Wyze WTHERM Smart WI-FI Thermostat User Manual

GREYSTONE TLDCB24J01 Flexible Copper Duct Average Low Limit Thermostat Instruction Manual

Remotec REMEZTRVV01 Z Wave Thermostat User Guide

SIEMENS RDF660MB Flush Mount Room Thermostat Instruction Manual

KCONTR K6HWIFI WiFi Smart Thermostat User Guide

WarmlyYours UTN5-4999 Thermostat User Guide

Honeywell Home DT92E Wireless Room Thermostat User Manual

Danfoss CET2000B-RF + RX1-S + CS2 Thermostat User Guide