
Home > ENGO CONTROLS > ENGO CONTROLS E901-RF Programmable Wireless Thermostat Instruction Manual
ENGO CONTROLS E901-RF Programmable Wireless Thermostat Instruction Manual

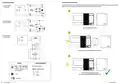
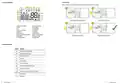
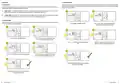
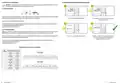
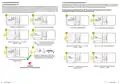

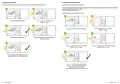
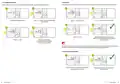


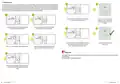


E901RF | Programmable, wireless thermostat
FULL MANUAL


| General | Details |
|---|---|
| Name | ENGO CONTROLS E901-RF Programmable Wireless Thermostat Instruction Manual |
| Make | ENGO CONTROLS |
| Language | English |
| Filetype | PDF (Download) |
| File size | 2.03 MB |
 (1 votes, average: 5.00 out of 5)
 Loading...

ENGO Controls EONE230W Internet Controlled Thermostat User Guide

ENGO CONTROLS EFAN-230W Fan Coil Thermostat User Guide

ENGO CONTROLS FAN-24W 24V Fan Coil Thermostat User Guide

ENGO CONTROLS EASY230W Non-Programmable Wired Thermostat User Guide

ENGO CONTROLS EONE230 Internet Controlled Thermostat User Guide

ENGO CONTROLS EONEBATW, EONEBATB Internet Controlled Thermostat User Manual

ENGO Controls E901WIFI Internet Wireless Thermostat User Guide

ENGO CONTROLS EONE-BATW, EONE-BATB Internet Controlled Thermostat User Guide

ENGO CONTROLS EFAN-24W Fan Coil Thermostat User Guide

ENGO CONTROLS EFAN-230W WIFI 230V Fan Coil Thermostat User Guide

ENGO CONTROLS E901-RF Programmable Wireless Thermostat Instruction Manual Overview
Summary of Contents
- Page 1: Programmable, wireless thermostat Full manual
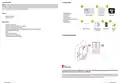
- Page 2: Introduction This product complies with the essential requirements and other relevant provisions of Directives 2014/53/EU and 2011/65/EU. Safety Informations Before starting installation work and before using the product, read the entire manual. To avoid accidents resulting in personal injury and material damage, please follow all safety precautions specified in this manual. The device should not be used by people with limited mental, sensory or mental abilities, without experience, or insufficient knowledge as well as children. WARNING! Installation must be carried out by a qualified person with appropriate electrical qualifications in accordance with standards and regulations in force in the given country and in the EU. Never try to connect the device other than as described in the manual. Before assembly, repair or maintenance as well as during any connection works it is absolutely necessary to disconnect the mains supply and make sure that the terminals and electric wires are not live. The device may not be exposed to extreme temperatures, strong vibrations or subjected to mechanical shock. Care for the natural environment is of paramount importance to us. The crossed out symbol on the product means that the product must not be disposed of with ordinary waste containers. It is the user’s responsibility to surrender used equipment to a designated collection point for recycling waste from electrical and electronic equipment.
- Page 3: Product overview E901RF is a weekly, surface-mounted electronic room thermostat for wireless control of heating and cooling devices. It offers better temperature control accuracy than traditional mechanical thermostats. The thermostat requires 2xAA, 1.5V alkaline batteries; rechargeable batteries are not allowed. Package content includes the E901RF thermostat, E901RX receiver, quick guide, thermostat bracket, power supply wire, control wire, and mounting screws. Product features include two types of time schedules, selectable hysteresis or built-in TPI algorithm, and maximum/minimum temperature limitation. The thermostat supports two relay types: normally open (NO) or normally closed (NC). It has a heating/cooling function and unique transmission codes with a working range of up to 60m in open space. Proper thermostat location is about 1.5m under floor level, away from heating or cooling sources. The thermostat should not be exposed to sunlight or extreme conditions, including flammable gases or liquids. It cannot be used in conditions with water vapor condensation or exposed to water action.
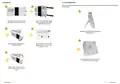
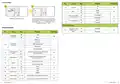
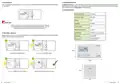
- Page 4: Wall mounting Free-standing thermostat With the bracket attached to the E901RF set, you can use the thermostat anywhere in the house and put it on a table, desk, etc. Remove the thermostat cover as shown in the picture. If there are batteries inside, remove them. Mount the bracket on the back of the thermostat with use of the two designed holes. Fix the back cover to the wall using the supplied mounting screws and the holes provided. Place the thermostat in a comfortable and accessible place. Using the hinges, fold the back and front covers by moving as shown in the picture above.
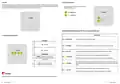
- Page 5: Receiver communicates wirelessly with the thermostat. The receiver should be supplied with 230VAC, with a maximum switching load of 16A. Avoid installing the device in places directly exposed to water, moisture, and air condensation. The receiver can operate in two different modes: AUTO (automatic) and MANUAL (manual). The status of the receiver is indicated by two LEDs: green (upper) and orange (lower). The green LED lights up when the receiver is connected to the 230V power supply. The green LED flashes when the receiver is in pairing mode. The orange LED lights up when the receiver is started in manual mode. The orange LED flashes when the receiver was paired but lost communication with the thermostat. The thermostat will communicate with the receiver only when both are paired together and the receiver’s switches are set to ON and AUTO position.
- Page 6: Connection description The thermostat is powered by two 1.5V AA alkaline batteries. Insert the batteries into the compartment under the front housing, paying attention to their polarity. The thermostat will start up showing the current software version and then go to the main screen. Connection diagram to gas boiler Connection diagram to the pump / actuator Connection diagram to the control box Insert the batteries, paying attention to their polarity! The LCD will turn on when the batteries are inserted.
- Page 7: LCD icon description Time settings are set using the D, H and M buttons. Press any button to highlight the display. Pressing D button sets the day. Pressing H button sets the hour. Pressing M button sets the minutes. Button function includes changing parameter values and setting time. Comfort temperature and economic temperature modes are available. Holiday mode is indicated. Low battery indicator is present. Room/setpoint temperature is displayed.
- Page 8: Operation Economic mode In the economic temperature mode, the thermostat is to maintain a reduced (night) temperature for economical operation when away from home. The economic temperature level is indicated by the moon icon. Manual mode There are two temperature setpoint levels available. In manual mode, the chosen setpoint temperature level is maintained permanently until the user changes the operation mode or sets a different temperature. Comfort mode In the comfort temperature mode, the thermostat maintains a constant day temperature, indicated by the sun icon. Economic mode In this mode, the thermostat maintains a reduced (night) temperature until the user switches to another mode or sets a different temperature. Setting temperatures Press any button to highlight the display and enter the desired temperature mode. Use the buttons to set new temperature values and confirm the selection.
- Page 9: AUTO mode allows the thermostat to maintain the set temperature according to the user's selected schedule. There are two types of schedules available for managing temperature during the week. The first type schedule is represented by a 24-hour timeline with empty boxes indicating Economic setpoint temperature and black boxes indicating Comfort setpoint temperature. Schedule type 1 can be configured in three ways: separate programs for weekdays and weekends, individual programs for each day, or the same program for the whole week. The second type schedule allows programming of six time intervals per day with precision up to 10 minutes. Each of the six time intervals in schedule type 2 can have a different temperature setting. When creating a schedule type 2, you must define both time and temperature setpoint. Schedule type 2 can also be configured in three ways similar to schedule type 1. The thermostat will return to the main screen after confirming the chosen type of schedule. The timeline will disappear if schedule type 2 is selected.
- Page 10: First type schedule programming Default program settings (1-3) Choosing and programming user programs (4-9) To program your own schedule, it is necessary to choose user programs (4-9), as only user programs are editable. Within first type schedule mode, there are 9 programs available. Programs 0 to 3 are factory-defined programs that cannot be changed. By default, program 1 is set for each day of the week. The black squares on the timeline indicate the operating time for the comfort temperature mode, while the absence of them indicates the economy temperature mode. Programming starts from 0:00. Programs should be set for all days of the week.
- Page 11: Frost protection mode protects the heating system against freezing. It is recommended to set this program if you are planning a long winter trip or if you do not heat up for a long time. The thermostat will maintain a constant temperature of 7˚C, thus reducing energy consumption to a minimum. Programs 0, 1, 2, 3 are factory set and cannot be edited. Programs 4 to 9 are user defined and editable. One program can be assigned to several days of the week. If this program is edited, the change affects all days to which the given program is assigned. In frost protection mode, the temperature setpoint can’t be changed and is maintained constantly at 7°C.
- Page 12: Temporary override mode allows for a new setpoint temperature while the thermostat is in automatic mode. There are three different configurations in schedule type 1: two separate programs for working days and weekends, individual programs for each day, or the same program for the whole week. Press any button to highlight the display and use buttons to set the temperature, confirming with the designated button. Select the week period using buttons and confirm by pressing the designated button. Entering programming mode is done by pressing the specific button. The overwritten temperature is maintained until the next scheduled change. Set the hour and minutes for the time period using buttons and confirm with the designated button. The hand symbol indicates the temporary override, which will disappear when returning to automatic mode. The thermostat can proceed to program selection for the next time period, allowing for a maximum of six time periods or switching points.
- Page 13: Temporary override mode allows users to set a new work mode or setpoint temperature while the thermostat is in schedule mode. In party mode, users can override the schedule with a comfort setpoint temperature for a defined number of hours. To activate party mode, press any button to highlight the display and use the temperature setpoint buttons during active AUTO mode. Select the number of hours for the override and hold the button for 3 seconds to confirm. The comfort setpoint temperature will be maintained for the defined number of hours before returning to AUTO mode. The hand icon will indicate that the temperature is being maintained until the next scheduled change. Party mode can last a maximum of 9 hours, and the temperature setpoint remains unchanged during this mode. To disable party mode, press the SUN, MOON, or AUTO button twice. To cancel active party mode, press any button to turn on the backlight and then press the button twice. The thermostat will stop party mode and return to the schedule (AUTO mode).
- Page 14: Holiday mode is a special program temperature setpoint which the thermostat will maintain for specified days. During holiday mode, the thermostat is maintaining frost protection setpoint temperature. To set holiday mode, use the buttons to select the duration of the holiday mode in days and confirm by pressing the button. The thermostat is working in holiday mode, indicated by a plane icon on the display. To lock the thermostat keys, press and hold specific buttons for 3 seconds until a lock icon appears on the screen. The buttons on the thermostat have been locked when the lock icon is displayed. To unlock the thermostat keys, press and hold the same buttons again for 3 seconds until the lock icon disappears. The user has the option to set a PIN code for unlocking the buttons of the thermostat. To stop holiday mode, press the button and confirm by pressing another button. The thermostat will return to the previous mode after stopping holiday mode.
- Page 15: Pairing with the E901RX receiver E901RF thermostat is already paired with the receiver. In order to pair the devices correctly, you must first prepare the receiver for synchronization. The thermostat started to send a signal to find the receiver. The pairing process may take up to 10 minutes. When the green diode on the receiver lights up continuously, the devices have been paired on a new frequency. If you want to re-pair the devices, make sure that the receiver is disconnected from the power supply. The green LED will start blinking to confirm that the receiver has entered the pairing mode. The thermostat will display the message good, which means that the devices are successfully paired. If the green diode on the receiver has not stopped blinking after 10 minutes, repeat the pairing process.
- Page 16: Transmission test It is important to place the receiver and transmitter in places where nothing is interfering with the radio signal. The range of communication between the transmitter and the receiver in an open area is up to 60m. The radio transmission is influenced by many factors that can shorten the working distance, such as thick walls, metal objects, and general radio interference. It is recommended that the radio transmission between devices has to be tested before mounting the thermostat to the wall. The test can be performed by changing the set temperature, activating or deactivating the heating. Check that the orange LED on the receiver is on, which means that the communication between the devices is correct. Set the temperature setpoint a few degrees lower than the room temperature and wait a few seconds. If the orange LED does not turn on/off as indicated by the transmitter flame icon, try moving the transmitter closer to the receiver. The thermostat started sending a heating signal when the screen went blank, which was signaled by the antenna symbol. If it still doesn’t work, try the pairing process again.
- Page 17: Installer settings Key sound Require a PIN to unlock the keys every time You are in the installer mode. Use buttons to move between parameters. Clear settings factory reset Pairing function with RXRT510 receiver Cooling, heating, heating/cooling mode selection Control method temperature Display temperature resolution If the thermostat indicates wrong temperature, you can correct it by offset temperature. Minimum heating/cooling temperature that can be set.
- Page 18: User settings reset There is a small hole to the right of the OK button. This is the reset button. Pressing the reset button will restore the default values in the user settings. The E901RF thermostat requires no special maintenance. Periodically, the outer casing can be wiped clean using a dry cloth. There are no user serviceable parts within the unit; any servicing or repairs could only be carried out by ENGO Controls or their appointed agents. To perform factory reset, use the CLR parameter from installer parameters menu. After confirming the parameter, the thermostat will restore the default settings. Do not use a pencil to press the reset button as the graphite build-up on the stylus can short-circuit and damage the thermostat. In environments with very strong electrostatic discharge, the product may not function as under normal conditions. Temperature range is 5 - 35°C with a display temperature accuracy of 0.1°C or 0.5°C. Control algorithm options include TPI or Hysteresis: 0.25°C and 0.5°C. Communication operates at 868Mhz. Dimensions for the transmitter are 150 x 84 x 22 mm and for the receiver are 96 x 96 x 27 mm.
- Page 19: Warranty ENGO Controls warrants this product to be free from any defects in material or workmanship for five years from the date of installation. ENGO Controls reserves the responsibility for breach of this warranty by repairing or replacing the defective product. This product includes software that matches the distributor’s identification at the time of sale. The manufacturer/distributor provides a guarantee covering all functions and specifics of the product in accordance with this marking. The distributor’s warranty does not cover the correct operation of the functions and features available as a result of a product software update.
- Page 20: Ver. 5 Date of issue: X 2024 Power supply: 2xAA batteries Producer: ENGO CONTROLS Sp z o.o. Sp. k.

Honeywell Home RTH9585WF Smart Color Touchscreen Programmable Thermostat User Guide

HotWire R220 WiFi Thermostat Instruction Manual

STELPRO ST402PFF Programmable Electronic Thermostat Owner’s Manual

Danfoss MBC 8000 Heavy Duty Thermostat Installation Guide

BOSCH 8750000270 Radiator Thermostat II Smart Home Radiator Thermostat Instructions

EMERSON 1F75H-21PR Programmable Heat Pump Thermostat Instruction Manual

SALUS IT800 WIFI Smart Thermostat Installation Guide

Quality Heating Plug In Programmable WiFi Thermostat Instruction Manual

hansgrohe 24240XXX Shower Column Including Thermostat Instruction Manual

GENERAL LIFE SENNA 300 Wired Room Thermostat User Manual