
emos P5684 Capillary Sensor Thermostat User Manual





switched load listed in technical specifications! The manufacturer is
not liable for inexpert installation.
GB | Capillary Sensor Thermostat
Putting the Device into Operation
Connect the thermostat with pump according to instructions.
Connect the thermostat to 230 V power supply.
Short-press the button.
The currently set mode and heating/cooling mode setting will flash
on the display (e.g.: F1/C1).
Properties
•
•
•
capillary sensor thermostat (0.9 m, Ø 6 mm)
5–90 °C temperature range (0.1 °C resolution)
simple electrical connection via screwless terminals
Specifications
Then, the current temperature will be displayed.
Switched load: max. 230 V AC; 5 A for resistive load;
1.5 A for inductive load
Temperature Setting
Set your temperature of choice by repeatedly pressing the up
Power supply: 230 V AC
Temperature control range: 5–90 °C
Temperature measurement: 5 °C to 90 °C with 0.1 °C resolution;
accuracy 1.5 °C
Temperature setting: 5 °C to 90 °C in 0.1 °C increments
Hysteresis setting: 0.1 °C to 15 °C with 0.1 °C resolution
Enclosure: IP40
/down
arrow.
Holding the arrow adjusts value faster.
Once temperature is set, wait several seconds until the value is
automatically saved.
The display will then automatically show the current measured
temperature.
To check your temperature setting, press the up or down arrow once.
Example: with temperature set to 50 °C, press the up or down arrow
once. The display will show C 50.0.
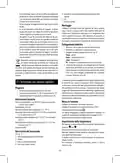
Thermostat Description
(see Fig. 1)
1 – activation indicator LED
2 – display
3 – up arrow (increase value)
4 – down arrow (decrease value)
5 – on/off/function setting button
6 – screws
Selecting Heating or Cooling Mode
Enter settings by long-pressing the down arrow
mately 3 seconds.
for approxi-
Use the arrows to choose between heating mode (C1 on the display)
or cooling mode (C2 on the display).
7 – capillary sensor
Once temperature is set, wait several seconds until the value is
automatically saved.
The display will then automatically show the current measured
temperature.
Installation
Mount the thermostat onto any section of the pipe and secure the
external sensor onto the surface of the water delivery system the
sensor is to measure. Make sure the sensor is in direct and safe
contact with the surface. (Before securing the sensor, it is necessary
to remove all insulation from the spot where it will be installed.)
Differences for cooling mode:
Switching in cooling mode is reversed: The thermostat switches
the system when the measured temperature is higher than the
set temperature.
Electrical Connection
1. Remove the 2 screws on the front housing of the thermostat.
2. Carefully remove the front housing.
Hysteresis
Hysteresis is the difference in temperature required for switching
on and off.
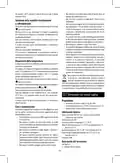
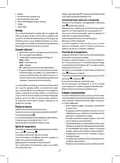
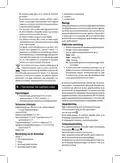
3. Connect in accordance with the following diagram (see Fig. 2):
Pump
Power – 230 V
If, for example, you set the temperature in heating mode to 42.5 °C
and the hysteresis value to 2.5 °C, the thermostat will activate your
system as soon as the measured temperature drops to 40 °C and
deactivate it when temperature reaches 42.5 °C.
Jump – jumper
PE – protective earth, prevents injury by electrical current
4. The thermostat features a screwless conductor connection.
Press downwards onto the top plastic connector with e.g. a
screwdriver. The terminal contact will release. Plug in the
conductor. Repeat the process for all conductors needed for
connection. Replace the screws.
Enter settings by long-pressing the up arrow
3 seconds.
for approximately
Set your hysteresis value of choice by repeatedly pressing the up
/down arrow.
Holding the arrow adjusts value faster.
Once the value of choice is set (e.g. 2.5 °C, displayed as d 2.5) wait a
few seconds until the setting is automatically saved.
The display will then automatically show the current measured
temperature.
The device may only be installed by a professional plumber in
accordance with the connection diagram. In addition, the connection
must meet up-to-date, valid standards and specifications of your
energy provider. Installation must always be performed when power
is turned off; follow safety specifications. Maintain the maximum
3

| General | Details |
|---|---|
| Name | emos P5684 Capillary Sensor Thermostat User Manual |
| Make | EMOS |
| Language | English |
| Filetype | PDF (Download) |
| File size | 0.3 MB |
 (1 votes, average: 5.00 out of 5)
 Loading...

EMOS P56201BUF Floor Heating Thermostat User Guide

emos P56201 Digital Room Thermostat User Manual

EMOS P56201UF Floor Heating Thermostat Instruction Manual

emos P5604 Thermostat Instruction Manual

emos P5686 Immersion Thermostat Instructions

EMOS P56211 Wireless Thermostat Instruction Manual

emos P5616OT Wireless Thermostat Instruction Manual

emos P56201UF GoSmart Digital Room Thermostat Instruction Manual

EMOS P5601UF Floor Heating Thermostat User Manual

emos P56211 Wireless Room Thermostat Instruction Manual


KeepRite TSTATIIEWF-01 Ion Gray Smart Thermostat Owner’s Manual

HEAT DECOR HD-T1000 WIFI Thermostat User Guide

GENERAL LIFE FH100S Underfloor Heating Thermostat User Manual

SALUS CONTROLS IT800 WIFI Smart Thermostat Instruction Manual

Honeywell CT87N The Round Non Programmable Thermostat Owner’s Manual

Honeywell 5000 Series Non Programmable Digital Thermostat Instruction Manual

OJ ELECTRONICS MWD5-1999-R3C3 Voice Thermostat Instructions

nVent RAYCHEM Elexant 3500i Electronic Thermostat Installation Guide

GENERAL HT220S Digital Room Thermostat User Manual

SmartLife ZBHTR20WT Zigbee Radiator Thermostat Installation Guide