
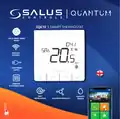
SALUS SQ610 Smart Thermostat User Guide





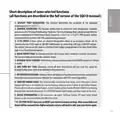


Before you start:
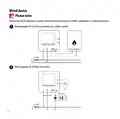
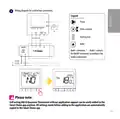
Wiring diagram:
AC 230V
Select correct thermostat location
L
N
COM
NO
L
N
M
M
230V~,50Hz
SQ610
S1
S2
min 20 cm
S
T
Mounting: to mount thermostat you can use included
accessories (mounting screws). Remove plate from
the back to mount it to the wall. After that just put
thermostat on the plate.
Symbols explanation:
S - volt-free contact
T - temperature sensor
L, N - 230V AC pover supply
COM, NO - Voltage free output
Please note:
The ideal position to thermostat mounting is about 1,5m
under floor level far from heating or cooling sources.
Thermostat can’t be exposed to sunlight or any extreme
conditions like for example draft.
S1,S2 Terminals:
- air or floor temperature sensor
- external volt-free contact to connect any ON/
OFF switch or occupancy sensor (Hotel card)
3

| General | Details |
|---|---|
| Name | SALUS SQ610 Smart Thermostat User Guide |
| Make | SALUS |
| Language | English |
| Filetype | PDF (Download) |
| File size | 1.12 MB |
 (1 votes, average: 5.00 out of 5)
 Loading...

SALUS IT800 WIFI Smart Thermostat Installation Guide

SALUS 091FLRF Wireless Room Thermostat User Guide

SALUS Thermostat Sensor TS600 User Guide

SALUS Thermostat and Smart Plug Installation Guide

SALUS Programmable Wired Thermostat VS30W/VS30B Installation Guide

SALUS Wired Thermostat Installation Guide

SALUS Wired Digital Thermostat – Non-programmable HTRS230 User Manual

SALUS RT520 Radiator Thermostat User Guide

SALUS RT310 Thermostat User Manual

SALUS Thermostat RT520 User Manual


heatmiser neoStat Touch-e Touchscreen Electric Floor Heating Thermostat Owner’s Manual

Beca BHT-7000 Smart Knob Thermostat User Manual

ENSTO ECO16BT-EX Floor Heating Thermostat User Guide

BEOK TGP53 China Piano Buttons Underfloor Heating Thermostat User Guide
ENGO CONTROLS E901RF Wireless Programmable Thermostat User Guide

EMERSON 1F75H-21PR Programmable Heat Pump Thermostat Instruction Manual

Raychem Elexant 450c Thermostat Instruction Manual

homematic IP TRV-E-A Monday Radiator Thermostat Instruction Manual

Rayotec Coloursense Wi-Fi Thermostat Instruction Manual

Innova B3V151 Electronic Thermostat User Manual