micro-Air EasyTouch RV 351 Thermostat User Manual


Contents
Removing the old thermostat...................................................................................................................3
Using the push button terminals ..............................................................................................................3
Mounting the thermostat.........................................................................................................................5
Available modes........................................................................................................................................6
Connecting remotely.................................................................................................................................6
Main screen...............................................................................................................................................7
Away screen (Heat and cool set points) ...................................................................................................9
Schedule screen ......................................................................................................................................10
Setting a change event........................................................................................................................10
12- or 24-hour format.........................................................................................................................10
Setting the time ..................................................................................................................................10
Enabling the schedule.........................................................................................................................10
Settings Screen............................................................................................................................................11
Gas Heat Override...............................................................................................................................12
Smart device application only features ......................................................................................................12
Installation Troubleshooting.......................................................................................................................13
WIFI Troubleshooting..................................................................................................................................13
No WIFI Icon........................................................................................................................................13
Red WIFI Icon ......................................................................................................................................13
Fault Messages............................................................................................................................................13
Appendix A: Connecting remotely ..............................................................................................................14
First connection steps.............................................................................................................................14
Adding a control......................................................................................................................................14
Connecting to a new WIFI network ........................................................................................................14
Updating the thermostat ........................................................................................................................14
2
©2022 Micro-Air Corp
June 15, 2022, revision 1.5

The EasyTouch 351 model thermostat was designed to replace certain
Dometic™ single-zone thermostats. Original thermostats replaced by this model are a
square design with a center LCD display and three buttons. If your thermostat is not
to verify the thermostat you received is correct for your application.
Installing the thermostat
There are three steps to installing the thermostat. First remove your old
thermostat. Next disconnect and reconnect the wiring. Finally install the mounting pins to the wall and
mount your new thermostat.
Removing the old thermostat
We recommend you disconnect the DC power from the thermostat circuit in your RV. The power
wires are live and shorting them together could blow a fuse somewhere in the RV. Since these locations
are not well documented, removing power prevents having to find them.
There are two basic styles of three button thermostat. The first has a + and – button to change
temperature and on/off/mode button on the bottom with a small square display in the center. To
remove this style, depress the rectangular locking tab on the bottom of the thermostat with a small
screw driver. Pull the thermostat away from the wall from the bottom.
The second style has up and down arrows to change temperature, a rectangular LCD display and
a power/mode button. Carefully hold the base of the thermostat at the bottom while pulling the cover
plate away from the wall. It is easiest to pull at one of the corners to get the plastic to pop off.
Before removing the wiring, write down the color of the wire and the terminal each wire goes
to. Wires will be labeled +12V, COM or COMMS, and -12V or GND. disconnect the wiring and remove
any wall attachment screws. Remove the back plate from the wall.
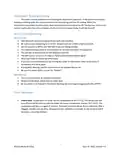
Using the push button terminals
Figure 1 shows a screwdriver depressing the push button
connector. The silver gate is opened for the wire to be inserted.
Releasing the button traps the wire and makes the connection.
Remove approximately 3/8 inch (1cm) of insulation from
the wire to be inserted. Use a small screw driver (not provided) or
similar tool to push down on the square push button. Insert the
wire in the insertion space and release the push button. Verify the
connection by gently pulling on the wire. Do not force excessive
wire down into the connector. If the stripped wire end is longer
Figure 1
than 3/8 inch, cut the end so there is no bare wire sticking out when
properly inserted.
3
©2022 Micro-Air Corp
June 15, 2022, revision 1.5
| General | Details |
|---|---|
| Name | micro-Air EasyTouch RV 351 Thermostat User Manual |
| Make | Micro-Air |
| Language | English |
| Filetype | PDF (Download) |
| File size | 0.27 MB |


micro-air EasyTouch 357 Multi Zone Replacement Thermostat Instruction Manual

Micro-Air EasyTouch RV 353 Touch Screen Thermostat Instruction Manual

Micro-Air 359 Touchscreen Thermostat Instruction Manual

Micro-Air EasyTouch RV 353 Thermostat Instruction Manual

Micro Air ETRV EasyTouch RV Thermostat Instruction Manual

micro-air EasyTouch RV 356 True Air RV Thermostat User Manual

micro-Air ASY-357-X02 EasyTouch 357 Touchscreen Thermostat User Manual

micro-Air EasyTouch 352 Thermostat User Manual

Micro-Air EasyTouch 355 Touch Screen Thermostat User Manual

Micro-Air 351 Air Conditioner Digital Thermostat User Guide


ecobee M5A Smart Wi-Fi Thermostat User Guide

GROHE 26984001 Vitalio Comfort 250 Shower System with Bath Thermostat Installation Guide

Comfortmaker TSTATIIEWF-01 Ion Gray Smart Thermostat Instruction Manual

Honeywell Home T2 Programmable Thermostat Installation Guide

Smartica HY608W 3A Wifi Digital Heating Thermostat User Manual

BOSCH 8750000270 Radiator Thermostat II Smart Home Radiator Thermostat Instructions

BEOK CONTROLS TCR8 IPS Colorful LCD Screen Smart Thermostat Owner’s Manual

DEVIreg 130 Electronic Thermostat Installation Guide

Honeywell PRO 1000 Series Non-Programmable Thermostat Instruction Manual

VIMAR 02971 Smart Automation Rotary Dial Thermostat Instruction Manual