
Home > WHITE RODGERS > White-Rodgers M30 Thermostat Instruction Manual
White-Rodgers M30 Thermostat Instruction Manual


CONTENTS
1
2
3
4
5
6
7
8
Preparations ...........................................
Thermostat Features ..............................
Removing Old Thermostat......................
Mounting and Wiring...............................
Set Heat Anticipator................................
New Thermostat Operation.....................
Specifications .........................................
Troubleshooting ......................................
Installation Instructions for
Model M30
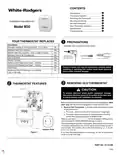
YOUR THERMOSTAT REPLACES
Description
PREPARATIONS
1
Assemble tools required as shown below.
Standard Heating & Cooling Systems - 4 or 5 wires
No
Standard Heat Only Systems
Millivolt Heat Only Systems - Floor or Wall Furnaces
Standard Central Air Conditioning
Gas or Oil Heat
Yes
Yes
No
HAND OR POWER
DRILL WITH 3/16 INCH
Yes
Yes
Yes
No
FLAT BLADE SCREWDRIVER
DRILL BIT, IF NEEDED
WIRE CUTTER/STRIPPER
Electric Furnace
Hydronic (Hot Water) Zone Heat - 2 Wires
Hydronic (Hot Water) Zone Heat - 3 Wires
Heat Pump
Failure to follow and read all instructions carefully before
installing or operating this control could cause personal
injury and/or property damage
No
Baseboard Electric Heating or Line Voltage
(120 or 240 Volt)
No
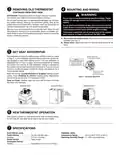
REMOVING OLD THERMOSTAT
3
THERMOSTAT FEATURES
2
ANTICIPATOR
CAUTION
!
To prevent electrical shock and/or equipment damage,
disconnect electrical power to the system at the main fuse
or circuit breaker until installation is complete.
MOUNTING SCREWS
Beforeremovingwiresfromoldthermostat’sswitchingsubbase, label
each wire with the terminal designation it was removed from.
1. Remove OldThermostat: A standard heat thermostat consists
of two basic parts:
a. The cover, which may be either a snap-on or hinge type.
BASE
b. The base, which is removed by unscrewing the mounting
screws that hold it on the wall or adaptor plate.
Make a note here of the anticipator setting on the
old thermostat for future reference and use in step 5.
Theheatanticipatorpointer, ifadjustable, willbesetatoneofaseries
of numbers representing the current rating of the primary control in
your furnace. The number will be one of the following: .2, .4, .8, etc.
or 0.2, 0.4, 0.8, etc.
COVER
Adaptor Plate
Figure 1.
If no heat anticipator/indication is showing, do not be concerned;
move on to the next step.
PART NO. 37-7270B
1546


| General | Details |
|---|---|
| Name | White-Rodgers M30 Thermostat Instruction Manual |
| Make | WHITE RODGERS |
| Language | English |
| Filetype | PDF (Download) |
| File size | 0.18 MB |
 (1 votes, average: 5.00 out of 5)
 Loading...

White-Rodgers 1E78 Non Programmable Heat Only Thermostat User Manual

White-Rodgers 1F97-1277 Big Blue Single Stage Thermostat User Manual

White-Rodgers 1F56N-444 Thermostat User Manual

White-Rodgers 1F83-277 Heating & Air Conditioning Auto Changeover Heat Pump Thermostat User Manual

WHITE-RODGERS 1F51N-619 Low Voltage Evaporative Cooler Thermostat Instruction Manual

White Rodgers 1F78-151 Non Programmable Thermostat Instructions

WHITE RODGERS 1F80-51 Programmable Electronic Digital Thermostat Instruction Manual

WHITE-RODGERS 1F86-0471 Blue Single 1 1 Stage Thermostat Instruction Manual

WHITE-RODGERS 1F90-71 5-Day 2-Day Electronic Digital Thermostat Instruction Manual

WHITE-RODGERS 1F95-1277 Universal Thermostat Owner’s Manual

White-Rodgers M30 Manual: Questions and Answers
Where is the heat anticipator located on this thermostat?
On the base, indicated by a pointer that you rotate to adjust the setting. Instruction Manual, p. 2
How do I install the White-Rodgers M30 and connect it to my heating system?
Mount the base to the wall using the provided screws, then attach one wire to R and the other to W on the base.
- Mount base to wall using screws provided.
- Attach one wire to terminal R.
- Attach the other wire to terminal W. Instruction Manual, p. 2
How do I adjust the heat anticipator on the White-Rodgers M30?
Rotate the contact arm on the base to match your furnace's current rating or your old thermostat's setting.
- Locate the contact arm on the base.
- Rotate counterclockwise to lengthen heating cycles or clockwise to shorten them.
- Align the pointer with the desired current rating number on the base.
- Do not adjust by more than half a marking at a time. Instruction Manual, p. 2
More White-Rodgers thermostat manuals

CLIMATE MC-LR-THERMOS Wireless Thermostat User Manual

terneo bx Smart Thermostat Instruction Manual

Honeywell T4M Programmable Modulating Thermostat Installation Guide

BEOK CONTROLS TGP508 Wi-fi Touch Screen Thermostat Instruction Manual

HITACHI ATW-RTU-11 Compact Wired Thermostat User Manual

Beca BHT-002 Electric Heating Wifi Thermostat User Guide

EPH CONTROLS CRTP2 Room Thermostat Instruction Manual

AIRQUEST TSTATIIEWF ION Gray Smart Thermostat Owner’s Manual

Tio 230v Thermostat User Manual

hansgrohe AXOR CARLTON Thermostat Mixer Instruction Manual