
Home > seitron > seitron TAD022 Digital Room Thermostat for Heating Cooling System Instruction Manual
seitron TAD022 Digital Room Thermostat for Heating Cooling System Instruction Manual
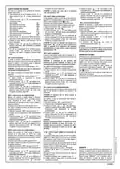


SETTING USER PARAMETERS
To enter the setting mode of the thermostat parameters, proceed
as follows:
‘rEG’ REGULATION SENSOR CHOICE SETTING
‘ dFLt ’ SET DEFAULT DATA
This parameter sets whether the room temperature regulation is
made based on the thermostat internal sensor or the remote
With this parameter it is possible to reset the user parameters in
order to bring back all the parameters to factory defaults.
Proceed as follows:
sensor wired to the connector
of Fig. 8. The device comes
1. Keep pressed for more than 10 seconds the key ‘
‘; the
G
with factory default set on intrenal sensor (Int).
To switch back and forth between these two parameters, perform
these operations:
1. Select the parameter ’dFLt’ and press ‘
automatically sets the default data and the display will show
’-dF-’.
2. To quit the user parameter settings press the ‘ ‘ button or
wait 20 seconds without pressing any key.
3. The display shows the writing ‘ OFF ’.
4. The thermostat is deactivated; to activate the thermostat push
the key ‘ ’.
‘; the device
display shows the icon ‘
’ and the first user parameter
SET
‘ AFr ‘.
2. Press the keys ‘
parameters:
‘ and ’ ’ to scroll among the user
1. Select parameter ‘ rEG ’ then press key ‘ ‘.
2. The display shows ‘ Int ‘ or ‘ EHt ‘
Antifrost Setting
‘ AFr ’
3. Press keys ‘
sensor
‘ and ’
’ to change the value (Int: internal
Internal sensor Offset setting
Remote sensor Offset setting
Regulation sensor setting
Hysteresis setting
‘ OFS1 ’
‘ OFS2 ’
‘ rEG ’
‘ HYS ’
‘ H_C ’
-
EHt: remote sensor); each selection is
automatically stored in memory.
4. Push the key ‘ ‘ to exit from the settings of the selected
parameter. To exit from the programmation of the user
WARNING!
Heating / Cooling setting
Restoring the Default Data will reset all settings made by
the user, such as Heating/Cooling, Set-Points and all other
programmable data.
parameters, push the key ‘
’ or wait 10 seconds without
Minimum relay activation time setup
Reset to default data
‘ t_SA ’
‘ dFLt ’
pushing any key.
WARNING: When the regulation is set according to the
remote sensor ‘ EHt ‘ and in case this sensor is missing or
broken, the temperature regulation will be performed
according to the internal sensor, even if the parameter
remains set on ‘ EHt ‘.
3. Push the key ‘
‘ to enter the settings of the selected
parameter; the display shows the blinking icon ‘ SET ’.
4. Configure the data associated with each individual parameter as
illustrated below.
5. Push the key ‘ ‘ to exit from the settings of the selected
parameter; every change is automatically stored in
memory.
5. To exit the user parameter programming mode, press the ‘
button to confirm the changes made or else wait 10 seconds
without pressing any button.
EXTERNAL NTC SENSOR
The thermostat features an input for connecting an external NTC
sensor (optional) alternatively the the internal one.
The external sensor can be used to measure the room temperature
when the thermostat is installed in a position which does not
allow a correct measurement of the room temperature.
When the installation requires to be set with a remote sensor, it is
necessary to regulate correctly the parameter ‘ rEG ‘ and connect
an NTC 10 KOhm at 25°C sensor to the connector JST 2 poles
‘HYS’ HYSTERESIS SETTING
’
This parameter sets the hysteresis, in °C, used in the temperature
regulation. The device comes with factory default with the
differential set at 0,2°C.
of Fig. 8.
G
WARNING: The regulation of this parameter must be
absolutely made by qualified personnel, because setting an
inappropriate value might result in a wrong operation of the
whole regulation system.
If in doubt about the type of sensor to be connected, please
consult the manufacturer.
The thermostat comes with factory default already set for the
operation with the internal sensor.
‘AFr’ ANTIFROST SETTING
The Antifrost function allows you to select
a
minimum
temperature to be maintained when the thermostat is off, so as to
protect both the room and the equipment when the room
temperature falls below the set value.
The device comes with a factory default with the Antifrost
function set on 6°C.
To set the hysteresis follow these steps:
1. Select the parameter ‘ HYS ’ and press the ‘ ‘ button.
2. The display shows the hysteresis value previuosly set.
3. Press buttons ‘
‘ and ’
’ to change the setting (inside
0.0°C..5.0°C interval); every change will be automatically
stored in memory.
4. Push the key ‘ ‘ to exit from the settings of the selected
parameter. To exit from the programmation of the user
IMPORTANT: this function is active only when the device
has been set in the heating mode.
To set the Antifrost temperature, carry out the following steps:
1. Select the parameter ‘ AFr ’ and press the ‘ ‘ button.
2. The display will show the previously set Antifrost temperature.
parameters, push the key ‘
’ or wait 10 seconds without
pushing any key.
3. Press buttons ‘
‘ and ’
’ to change the setting (between
OFF, 0.5°C..25°C); every change will be automatically
stored in memory.
4. Push the key ‘ ‘ to exit from the settings of the selected
parameter. To exit from the programmation of the user
‘H_C’ HEATING / COOLING SETTING
This setting is used to invert the operating logic of the relay
according to which kind of unit is being controlled (heating or air
conditioning).
parameters, push the key ‘
’ or wait 10 seconds without
IMPORTANT: The thermostat comes by factory default in
heating mode.
pushing any key.
To modify the operating logic, perform the following operations:
1. Select the parameter ‘ H_C ’ and press the ‘ ‘ button.
2. The display shows the current control mode.
‘OFS1’ INTERNAL SENSOR OFFSET SETTING
With this parameter it is possible to correct the temperature
reading of the internal sensor by ±9.9°C in order to correct any
systematic reading errors due to the placement of the thermostat
in areas unsuitable for measuring the room temperature.
The device leaves the factory with the Offset set at 0.0°C.
To set the Offset value for the internal sensor, perform the
following steps:
3. Push the keys ‘
‘ and ’
’ to select the desired regulation
(HEAt: Heating
- COOL: Cooling); each change is
automatically saved.
4. Push the key ‘ ‘ to exit from the settings of the selected
parameter. To exit from the programmation of the user
parameters, push the key ‘
’ or wait 10 seconds without
1. Select the ‘ OFS1 ’ parameter and press the ‘ ‘ button.
2. The display will show the previously set Offset temperature.
pushing any key.
WARNING
3. Press buttons ‘
‘ and ’
’ to modify the setting
During normal operation, the activation of the relay in
Heating mode is showed by the lit icon ‘ ‘ while, on the
opposite, the activation of the relay in Cooling mode is
(range: -9.9°C .. +9.9°C); every change will be
automatically stored in memory.
4. Push the key ‘ ‘ to exit from the settings of the selected
parameter. To exit from the programmation of the user
showed by the lit icon ‘
‘.
parameters, push the key ‘
’ or wait 10 seconds without
‘ t_SA ’ MINIMUM RELAY ACTIVATION TIME SETUP
This parameter allows to reduce the number of ON/OFF cycles of
the output. This function is useful in case the thermostat drives a
pellet stove which cannot be switched ON and OFF for a too short
time.
Once the relay is switched ON according to a heating (or cooling)
need of the room, it will not be switched OFF until the ‘minimum
time’ is expired.
The parameter can be set in the 2 .. 240 seconds range.
The device comes with a factory default with the parameter set
on 2 seconds.
To set the minimum relay activation time, perform the following
operations:
pushing any key.
‘OFS2’ REMOTE SENSOR OFFSET SETTING
With this parameter it is possible to correct the temperature
reading of the remote sensor by ±9.9°C in order to correct any
systematic reading errors due to the positioning of the remote
sensor in areas unsuitable for measuring the room temperature.
The device comes with a factory default Offset at 0.0°C.
To regulate the Offset value for the remote sensor, perform the
following steps:
1. Select the ‘ OFS2 ’ parameter and press the ‘ ‘ button.
2. The display will show the previously set Offset temperature.
3. Press buttons ‘
(range: -9.9°C .. +9.9°C); every change will be
automatically stored in memory.
4. Push the key ‘ ‘ to exit from the settings of the selected
parameter. To exit from the programmation of the user
‘ and ’
’ to modify the setting
1. Select the parameter ‘ t_SA ’ and press ‘ ‘ button.
2. The display shows the sampling time previously set.
WARRANTY
3. Press buttons ‘
‘ and ’
’ to change the setting (between
In the view of a constant development of their products, the
manufacturer reserves the right for changing technical data and
features without prior notice. The consumer is guaranteed against
any lack of conformity according to the European Directive
1999/44/EC as well as to the manufacturer’s document about the
warranty policy. The full text of warranty is available on request
from the seller.
0 .. 240 seconds); every change will be automatically
stored in memory.
4. Push the key ‘ ‘ to exit from the settings of the selected
parameter. To exit from the programmation of the user
parameters, push the key ‘
pushing any key.
’ or wait 10 seconds without
WARNING: The function is active only if the parameter
parameters, push the key ‘
’ or wait 10 seconds without
‘ rEG ’ is set on ‘ EHt ‘.
pushing any key.
6
- ENGLISH -

| General | Details |
|---|---|
| Name | seitron TAD022 Digital Room Thermostat for Heating Cooling System Instruction Manual |
| Make | seitron |
| Language | English |
| Filetype | PDF (Download) |
| File size | 0.48 MB |
 (1 votes, average: 5.00 out of 5)
 Loading...

seitron Wi-Time Wall Wi-Fi Programmable Thermostat Instruction Manual

seitron TM 00-M Electro Mechanical Room Thermostat Instructions

seitron 039790 WiFi WiTime Wall Programmable Thermostat User Guide

seitron DR R02M Thermostat Wireless Kit Instruction Manual

seitron KTY003 Hygge Kit Class 5 WiFi Battery Powered Programmable Thermostat User Guide

seitron TR D02B Wireless Digital Thermostat User Manual


heatmiser DS1-V2 Thermostat Owner’s Manual

SALUS CONTROLS RT200 Electronic Room Thermostat Instruction Manual

STELPRO STCP MULTIPLE PROGRAMMING ELECTRONIC THERMOSTAT User Guide

SALUS CONTROLS SQ610 Quantum Smart Thermostat User Guide

Danfoss ECtemp 610 Electronic Thermostat Installation Guide

SALUS DT500 Thermostat User Guide

Honeywell evohome Smart Thermostat User Guide

ROLBIT C124W Under Floor Thermostat Instructions

INKBIRD C216T Plug In Timer Thermostat User Manual

Day and Night TSTATIIEWF-01 Gray Smart Thermostat Owner’s Manual