
×
- 1. Smart Wireless Thermostat
- 2. Contents
- 3. Main Functions (Technical Specifications)
- 4. Receiver Unit Command (Range Of The Set Temperature → Range Of The Measured Temperature → Accuracy → Control Unit Dimensions → Receiver Unit Dimensions → Protection Grade)
- 5. Control Unit Overview (Day Of The Week → Current Program (1 - 4) → Time → Signal Level (appears After Pairing) → Heating On → Cooling On)
- 6. Locked Keys (child Protection Function Active) (Heating Mode → Vacation Mode → Anti-freeze Mode → Open Window Function Active → Manual Mode → Receiver Unit Overview)
- 7. Basic Instructions For The First Use (Pairing The Two Units)
- 8. Delete Paired Units
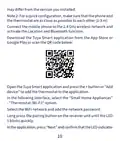
- 9. Weak Or Lost Signal (Control From The Tuya Smart Application)
- 10. May Differ From The Version You Installed.
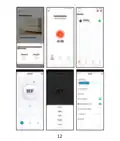
- 11. The Application Will Start Scanning Nearby Devices.
- 12.
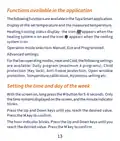
- 13. Functions Available In The Application (Operation Mode Selection → Advanced Settings → Setting The Time And Day Of The Week)
- 14. Open Window Detection Function (Daily Program Configuration Via Thermostat)
- 15. Example Of Daily Programs
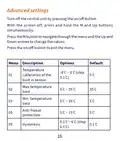
- 16. Advanced Settings (Menu Description → Options → Temperature → Max.temperature Limit → Min. Temperature Limit → Anti-freeze Protection)
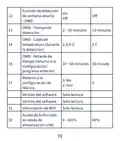
- 17. Key Lock Function (Open Window Detection Function → Owd - Detection Time → Owd - Temperature Drop (during Detection) → Owd - Time Delay → Return To Factory Settings → Software Version)
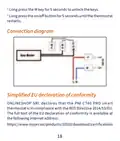
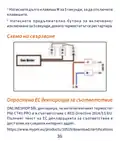
- 18. Connection Diagram (Simplified Eu Declaration Of Conformity → Onlineshop Srl Declares That The Pni Ct40 Pro Smart Thermostat Is In Compliance With The Red Directive 2014/53/eu.)
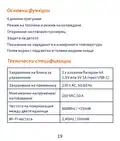
- 19. Основни Функции (Дневни Програми → Режим На Топлина И Режим На Охлаждане → Откриване На Отворен Прозорец → Защита На Детето → Показване На Зададената И Измерената Температура → Технически Спецификации)
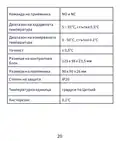
- 20. Команда На Приемника (Диапазон На Зададената Температура → Диапазон На Измерваната Температура → Размери На Контролния Блок → Размери На Приемника → Степен На Защита → Температурна Единица)
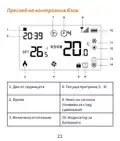
- 21. Преглед На Контролния Блок (Ден От Седмицата → Време → Текуща Програма (1 - 4) → Включено Отопление → Ниво На Сигнала → Индикатор За Батерията)
- 22. Охлаждането Е (Режим На Охлаждане → Режим На Отопление → Заключени Клавиши → Функцията За Отваряне На Прозореца Е Активна → Режим На Почивка → Ръчен Режим)
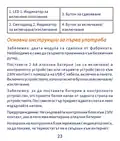
- 23. Основни Инструкции За Първа Употреба (Забележка: Двата Модула Са Сдвоени От Фабриката. → Предупреждение: Не Свързвайте Контролния Блок Към 230v Контакт, Ако В Него Има Монтирани Алкални Батерии.)
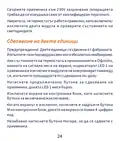
- 24. Свържете Приемника Към 230v Захранване (Уверете Се, Че Термостатът Работи Правилно → Сдвояване На Двете Единици → Предупреждение)
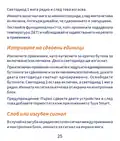
- 25. Светодиод 1 Мига Рядко И След Това Изгасва.
- 26. Управление От Приложението Tuya Smart
- 27. Play Или Сканирайте Qr Кода По-долу:
- 28. Интернет Връзка Е Успешна. Ако Светодиодът Продължава Да Мига Бавно, Връзката Е Неуспешна, Повторете Процедурата.
- 29.
- 30. Функции, Налични В Приложението (Дисплей На Зададената Температура И Измерената → Избор На Режим На Работа → Разширени Настройки → Задаване На Час И Ден От Седмицата)
- 31. Индикатор За Час (Функция За Откриване На Отворен Прозорец)
- 32. Деактивира Тази Функция, Връщайки Системата В Предишния
- 33. Меню Описание Опции Default
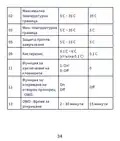
- 34. Максимална Температурна Граница (Мин. Температурна Граница → Защита Против Замръзване → Хистерезис → Функция За Заключване На Клавишите → Функция За Откриване На Отворен Прозорец)
- 35. Температурен Спад (Owd - Закъснение Във Времето → Върнете Се Към Фабричните Настройки → Версия На Софтуера → Wifi Информация → Регулиране На Яркостта)
- 36. Натиснете Дълго Клавиша M За 5 Секунди, За Да Отключите Клавишите. Натиснете Продължително Бутона За Включване/изключване За 5 Секунди, Дока…
- 37. Hauptfunktionen (Tagesprogramme → Heizmodus Und Kaltmodus → Erkennung Offener Fenster → Kindersicherung → Anzeige Der Eingestellten Und Gemessenen Temperatur → Technische Daten)
- 38. Wlan-frequenz (Befehl Der Empfängereinheit → Bereich Der Eingestellten Temperatur → Bereich Der Gemessenen Temperatur → Genauigkeit → Abmessungen Der Steuereinheit → Abmessungen Der Empfängereinheit)
- 39. Übersicht Der Steuereinheit (Wochentag → Uhrzeit → Heizung Ein → Kühlung Ein → Aktuelles Programm (1 - 4) → Signalpegel (erscheint Nach Dem Pairing) → Batterieanzeige)
- 40. Tastensperre (Heizmodus → Fenster-auf-funktion Aktiv → Urlaubsmodus → Manueller Modus → Frostschutzmodus → Übersicht Der Empfängereinheit)
- 41. Grundlegende Hinweise Zur Ersten Inbetriebnahme (Achtung: Schließen Sie Die Steuereinheit Nicht An Die 230-v-steckdose An, Wenn Sie Darin Alkalibatterien Eingelegt Haben. → Schließen Sie Die Empfängereinheit An Eine 230-v-stromversorgung An.)
- 42. Koppeln Der Beiden Geräte
- 43. Gekoppelte Einheiten Löschen (Schwaches Oder Verlorenes Signal)
- 44. Steuerung Über Die Tuya Smart-anwendung
- 45. Laden Sie Die Tuya Smart-anwendung Aus Dem App Store Oder
- 46. Die Anwendung Beginnt Mit Dem Scannen Von Geräten In Der Nähe. Nachdem Ihr Thermostat Identifiziert Wurde, Drücken Sie Fertig', Um Den Vorga…
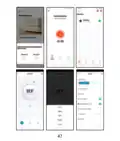
- 47.
- 48. In Der Anwendung Verfügbare Funktionen (Folgende Funktionen Sind In Der Tuya Smart-anwendung Verfügbar: → Heiz-/kühlstatusanzeige → Betriebsmodusauswahl → Erweiterte Einstellungen → Uhrzeit Und Wochentag Einstellen)
- 49. Die Stundenanzeige Blinkt. Drücken Sie Die Auf- Und Ab-tasten, Bis Sie Den Gewünschten Wert Erreicht Haben. Drücken Sie Zur Bestätigung Die …
- 50. Tagesprogramm-konfiguration Über Thermostat (Beispiele Für Tagesprogramme)
- 51. Erweiterte Einstellungen (Menu Beschreibung → Temperatur → Kalibrierung Des Eingebauten Sensors → Max. Temperaturgrenze → Min. Temperaturgrenze → Frostschutz)
- 52. Hysterese (Tastensperrfunktion → Fensteröffnungserkennung → Owd - Erkennungszeit → Owd - Temperaturabfall → Owd - Zeitverzögerung → Zurück Zu Den Werkseinstellungen)
- 53. Helligkeitsanpassung (Stromversorgungsmodus → Anschlussplan)
- 54. Vereinfachte Eu-konformitätserklärung (Onlineshop Srl Erklärt, Dass Der Intelligente Thermostat Pni Ct40 Pro Der Red-richtlinie 2014/53/eu Entspricht.)
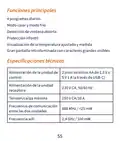
- 55. Funciones Principales (Especificaciones Técnicas)
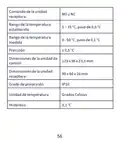
- 56. Comando De La Unidad Receptora (Rango De La Temperatura Establecida → Rango De La Temperatura Medida → Precisión → Dimensiones De La Unidad De Control → Dimensiones De La Unidad Receptora → Grado De Protección)
- 57. Descripción General De La Unidad De Control (Día De La Semana → Programa Actual (1 - 4) → Hora → Nivel De Señal (aparece Después Del Emparejamiento) → Calefacción Activada → Refrigeración Activada)
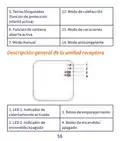
- 58. Teclas Bloqueadas (Modo De Calefacción → Función De Ventana Abierta Activa → Modo De Vacaciones → Modo Anticongelante → Modo Manual → Descripción General De La Unidad Receptora)
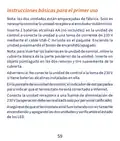
- 59. Instrucciones Básicas Para El Primer Uso (Nota Sobre La Conexión De La Unidad Receptora → Inserción De Baterías En La Unidad De Control → Advertencia Sobre La Conexión A La Toma De 230 V → Conexión A Internet Del Termostato → Verificación Del Funcionamiento Del Termostato)
- 60. Emparejamiento De Las Dos Unidades
- 61. Eliminar Unidades Emparejadas (Señal Débil O Perdida)
- 62. Control Desde La Aplicación Tuya Smart
- 63. Abra La Aplicación Tuya Smart Y Presione El Botón + O 'agregar Dispositivo' Para Agregar El Termostato A La Aplicación.
- 64.
- 65. Funciones Disponibles En La Aplicación (Smart → Visualización De La Temperatura Establecida Y La Temperatura Medida → Visualización Del Estado De Calefacción/refrigeración → Selección Del Modo De Funcionamiento)
- 66. Configuración Avanzada (Configuración De La Hora Y El Día De La Semana → Función De Detección De Ventana Abierta)
- 67. Configuración Del Programa Diario A Través Del (Termostato)
- 68. Ejemplo De Programas Diarios (Configuración Avanzada)
- 69. Menú Descripción (Opciones → Calibración De Temperatura Del Sensor Incorporado → Límite De Temperatura Máxima → Límite De Temperatura Mínima → Protección Anticongelante → Función De Bloqueo De Teclas)
- 70. Función De Detección (Owd → Owd - Tiempo De Detección → Owd - Caída De Temperatura (durante La Detección) → Owd - Retardo De Tiempo (retorno A La Configuración/programa Anterior) → Retorno A La Configuración De Fábrica → Versión Del Software)
- 71. Diagrama De Conexión (Declaración De Conformidad Ue Simplificada)
- 72. Fonctions Principales (Programmes Journaliers → Mode Chaud Et Mode Froid → Détection De Fenêtre Ouverte → Protection Enfant → Affichage De La Température Réglée Et Mesurée → Grand Écran Rétroéclairé Avec De Grands Caractères Visibles)
- 73. Commande De L'unité (Plage De La Température De Consigne → Plage De La Température Mesurée → Précision → Dimensions De L'unité De Commande → Dimensions De L'unité Réceptrice → Degré De Protection)
- 74. Présentation De Lunité De Contrôle (Jour De La Semaine → Heure → Chauffage Activé → Climatisation Activée → Programme Actuel (1 - 4) → Niveau Du Signal (apparaît Après L'appairage))
- 75. Touches Verrouillées (Mode Chauffage → Fonction D'ouverture De Fenêtre Active → Mode Vacances → Mode Antigel → Mode Manuel → Présentation De Lunité Réceptrice)
- 76. Instructions De Base Pour La Première Utilisation (Appairage Des Deux Unités)
- 77. Supprimer Les Unités Appairées
- 78. Signal Faible Ou Perdu
- 79. Contrôle Depuis L’application Tuya Smart
- 80. Dans Linterface Suivante, Sélectionnez Loption Petits Appareils Électroménagers - Thermostat (wi-fi) . Sélectionnez Le Réseau Wifi Et Ajoute…
- 81.
- 82. Fonctions Disponibles Dans Lapplication (Smart → Affichage De La Température De Consigne Et De La Température Mesurée → Affichage De Létat De Chauffage/refroidissement → Sélection Du Mode De Fonctionnement)
- 83. Réglages Avancés (Réglage De Lheure Et Du Jour De La Semaine)
- 84. Fonction De Détection De Fenêtre Ouverte (Configuration Du Programme Quotidien Via Le → Thermostat)
- 85. Exemple De Programmes Quotidiens
- 86. Paramètres Avancés (Menu Description → Options → Calibrage De La Température Du Capteur Intégré → Limite De Température Max. → Limite De Température Min. → Protection Antigel)
- 87. Fonction De Verrouillage Des Touches (Fonction De Détection De Fenêtre Ouverte - Owd → Owd - Temps De Détection → Owd - Chute De Température (pendant La Détection) → Owd - Temporisation (retour Au Réglage/programme Précédent) → Retour Aux Paramètres D'usine → Version Du Logiciel)
- 88. Réglage De La Luminosité (uniquement En Mode D'alimentation Usb) (Appuyez Longuement Sur La Touche M Pendant 5 Secondes Pour Déverrouiller Les Touches. → Schéma De Connexion)
- 89. Déclaration De Conformité Simplifiée De Lue (Onlineshop Srl Déclare Que Le Thermostat Intelligent Pni Ct40 Pro Est Conforme À La Directive Red 2014/53/ue.)
- 90. Fő Funkciók (Műszaki Előírások)
- 91. Vevő Egység Parancs (No És Nc → A Beállított Hőmérséklet Tartománya → A Mért Hőmérséklet Tartománya → A Vezérlőegység Méretei → A Vevőegység Méretei → Védelmi Fokozat)
- 92. Vezérlőegység Áttekintése (A Hét Napja → Idő → Fűtés Bekapcsolva → Hűtés Bekapcsolva → Akkumulátor Jelző → Hűtés Üzemmód)
- 93. Zárt Kulcsok (a Gyermekvédelmi Funkció Aktív) (Fűtési Mód → Az Ablak Megnyitása Funkció Aktív → Vakáció Mód → Kézi Üzemmód → Fagyálló Üzemmód → A Vevőegység Áttekintése)
- 94. Alapvető Utasítások Az Első Használathoz (A Két Egység Párosítása)
- 95. Párosított Egységek Törlése
- 96. Gyenge Vagy Elveszett Jel
- 97. Vezérlés A Tuya Smart Alkalmazásból
- 98. Termosztát (wi-fi) Opció (Wifi Hálózat Kiválasztása → Párosítás Gomb Megnyomása → Led Jelző Ellenőrzése → Közeli Eszközök Vizsgálata → Eljárás Befejezése → Vezeték Nélküli Internetkapcsolat Sikeressége)
- 99.
- 100. Az Alkalmazásban Elérhető Funkciók (Fűtés/hűtés Állapotának Kijelzése → Üzemmód Kiválasztása → Speciális Beállítások)
- 101. Beállítások Állnak Rendelkezésre: Napi Program, Gyermekvédelem, Fagyvédelem, Nyitott Ablakvédelem, Hőmérséklet Kalibrálás, Hiszterézis Beáll…
- 102. Napi Program Konfigurálása Termosztáton (Keresztül)
- 103. Példa A Napi Programokra (Speciális Beállítások)
- 104. Menü Leírás (A Beépített Érzékelő → Opciók → Default → Fagyálló Védelem → Billentyűzár Funkció → Nyitott Ablak Észlelési Funkció - Owd)
- 105. Owd - Időkésleltetés (Visszatérés A Gyári Beállításokhoz → Szoftver Verzió → Wifi Információ → Fényerő Beállítása)
- 106. Csatlakozási Diagram (Egyszerűsített Eu Megfelelőségi Nyilatkozat → Az Onlineshop Srl Kijelenti, Hogy A Pni Ct40 Pro Intelligens Termosztát Megfelel A 2014/53/eu Red Irányelvnek.)
- 107. Funzioni Principali (Programmi Giornalieri → Modalità Caldo E Freddo → Rilevamento Finestra Aperta → Protezione Bambini → Visualizzazione Della Temperatura Impostata E Misurata → Ampio Schermo Retroilluminato Con Caratteri Grandi E Visibili)
- 108. Comando Unità Ricevente (Range Della Temperatura Impostata → Range Della Temperatura Misurata → Precisione → Dimensioni Unità Di Controllo → Dimensioni Unità Ricevente → Grado Di Protezione)
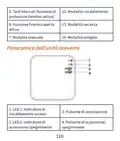
- 109. Panoramica Dellunità Di Controllo (Giorno Della Settimana → Ora → Riscaldamento Acceso → Raffreddamento Acceso → Programma Corrente (1 - 4) → Livello Del Segnale (appare Dopo L'associazione))
- 110. Tasti Bloccati (funzione Di Protezione Bambini Attiva) (Modalità Riscaldamento → Modalità Vacanza → Modalità Antigelo → Funzione Finestra Aperta Attiva → Modalità Manuale → Panoramica Dellunità Ricevente)
- 111. Istruzioni Di Base Per Il Primo Utilizzo (Associazione Delle Due Unità)
- 112. Eliminare Le Unità Associate
- 113. Segnale Debole O Perso
- 114. Controllo Dall’applicazione Tuya Smart
- 115. Premi A Lungo Il Pulsante Di Associazione Sullunità Ricevente (Nellapplicazione, Premi 'avanti' E Conferma Che Lindicatore → Lapplicazione Inizierà A Scansionare I Dispositivi Nelle Vicinanze → Dopo Che Il Termostato È Stato Identificato, Premi 'fatto' → Il Led 1 Sul Ricevitore Smetterà Di Lampeggiare → Se Il Led Continua A Lampeggiare Lentamente, La Connessione Non È Riuscita)
- 116.
- 117. Funzioni Disponibili Nellapplicazione (Visualizzazione Della Temperatura Impostata E Della Temperatura Misurata → Visualizzazione Dello Stato Di Riscaldamento/raffreddamento → Selezione Della Modalità Di Funzionamento → Impostazioni Avanzate → Impostazione Dellora E Del Giorno Della Settimana)
- 118. Funzione Di Rilevamento Finestra Aperta
- 119. Configurazione Del Programma Giornaliero (Tramite Termostato)
- 120. Esempio Di Programmi Giornalieri (Impostazioni Avanzate → Menu Descrizione Opzioni Default)
- 121. Limite Di Temperatura (Protezione Antigelo → Isteresi → Funzione Di Blocco Tasti → Funzione Di Rilevamento Finestra Aperta - Owd → Owd - Tempo Di Rilevamento → Owd - Calo Della Temperatura (durante Il Rilevamento))
- 122. Ritorno Alle Impostazioni Di Fabbrica (Versione Software → Informazioni Wifi → Regolazione Della Luminosità (solo In Modalità Di Alimentazione Usb))
- 123. Schema Di Collegamento (Dichiarazione Di Conformità Ue Semplificata → Onlineshop Srl Dichiara Che Il Termostato Intelligente Pni Ct40)
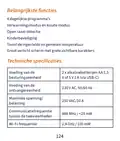
- 124. Belangrijkste Functies (Dagelijkse Programmas → Verwarmingsmodus En Koude Modus → Open Raam Detectie → Kinderbeveiliging → Toont De Ingestelde En Gemeten Temperatuur → Groot Verlicht Scherm Met Grote Zichtbare Karakters)
- 125. Opdracht Van De Ontvangereenheid (Bereik Van De Ingestelde Temperatuur → Bereik Van De Gemeten Temperatuur → Nauwkeurigheid → Afmetingen Van De Besturingseenheid → Afmetingen Van De Ontvangereenheid → Beschermingsgraad)
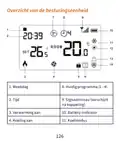
- 126. Overzicht Van De Besturingseenheid (Weekdag → Huidig Programma (1 - 4) → Tijd → Verwarming Aan → Koeling Aan → Batterij-indicator)
- 127. Vergrendelde Toetsen (Verwarmingsmodus → Open Raamfunctie Actief → Vakantiemodus → Antivriesmodus → Handmatige Modus → Overzicht Van De Ontvangereenheid)
- 128. Basisinstructies Voor Het Eerste Gebruik (Let Op: De Twee Units Zijn Af-fabriek Gekoppeld. → Waarschuwing: Sluit De Bedieningseenheid Niet Aan Op Het 230v-stopcontact Als Er Alkalinebatterijen In Zijn Geplaatst. → Controleer Of De Thermostaat Goed Werkt Door De Twee Units Aan/uit Te Zetten En De Status Van De Leds Te Controleren.)
- 129. De Twee Units Koppelen
- 130. Gekoppelde Units Verwijderen (Zwak Of Verloren Signaal)
- 131. Bediening Vanuit De Tuya Smart-applicatie
- 132. Thermostaat Aan De Applicatie Toevoegen (Kleine Huishoudelijke Apparaten → Wifi-netwerk En Netwerkwachtwoord → Koppelingsknop Op De Ontvangereenheid → Led-indicator Bevestigen → Apparaten Scannen In De Buurt → Draadloze Internetverbinding Succesvol)
- 133.
- 134. Functies Beschikbaar In De Applicatie (Weergave Van De Ingestelde Temperatuur En De Gemeten Temperatuur → Weergave Van De Verwarmings-/koelstatus → Selectie Van De Bedrijfsmodus)
- 135. Geavanceerde Instellingen (Bedrijfsmodi → Dagelijks Programma → Kinderbeveiliging → Antivriesbeveiliging → Open Raambeveiliging → Temperatuurkalibratie)
- 136. Open Raamdetectiefunctie (Configuratie Van Het Dagelijkse Programma Via → De Thermostaat)
- 137. Voorbeeld Van Dagprogramma’s
- 138. Geavanceerde Instellingen (Menu Beschrijving → Opties → Temperatuur → Kalibratie Van De Ingebouwde Sensor → Max. Temperatuurlimiet → Min.temperatuurlimiet)
- 139. Sleutelvergrendelings (Open Raamdetectie Functie - Owd → Owd - Detectietijd → Owd - Temperatuurdaling → Owd - Tijdvertraging → Terug Naar Fabrieksinstellingen → Softwareversie)
- 140. Aansluitschema (Vereenvoudigde Eu-conformiteitsverklaring)
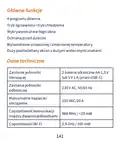
- 141. Główne Funkcje (Programy Dzienne → Tryb Ogrzewania I Tryb Chłodzenia → Wykrywanie Otwartego Okna → Ochrona Przed Dziećmi → Wyświetlanie Ustawionej I Zmierzonej Temperatury → Duży Podświetlany Ekran Z Dużymi Widocznymi Znakami)
- 142. Komenda Jednostki (Zakres Ustawionej Temperatury → Zakres Mierzonej Temperatury → Dokładność → Wymiary Jednostki Sterującej → Wymiary Jednostki Odbiorczej → Stopień Ochrony)
- 143. Przegląd Jednostki Sterującej (Dzień Tygodnia → Godzina → Ogrzewanie Włączone → Chłodzenie Włączone → Wskaźnik Baterii → Tryb Chłodzenia)
- 144. Zablokowane Klawisze (Tryb Ogrzewania → Tryb Wakacyjny → Aktywna Funkcja Otwartego Okna → Tryb Ręczny → Tryb Przeciwzamrożeniowy → Przegląd Jednostki Odbiorczej)
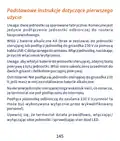
- 145. Podstawowe Instrukcje Dotyczące Pierwszego Użycia (Uwaga → Ostrzeżenie → Upewnij Się, Że Termostat Działa Prawidłowo)
- 146. Parowanie Dwóch Jednostek
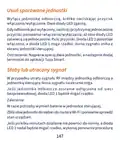
- 147. Usuń Sparowane Jednostki (Słaby Lub Utracony Sygnał)
- 148. Sterowanie Z Aplikacji Tuya Smart
- 149. Wybierz Opcję Małe Urządzenia Domowe' (Termostat (wi-fi) → Dodaj Hasło Sieciowe → Naciśnij I Przytrzymaj Przycisk Parowania → Aplikacja Rozpocznie Skanowanie Pobliskich Urządzeń → Połączenie Bezprzewodowe Z Internetem)
- 150.
- 151. Funkcje Dostępne W Aplikacji (Wyświetlanie Ustawionej Temperatury I Zmierzonej Temperatury → Wyświetlanie Statusu Ogrzewania/chłodzenia → Wybór Trybu Pracy → Ustawienia Zaawansowane)
- 152. Ustawienia (Ustawianie Godziny I Dnia Tygodnia → Funkcja Wykrywania Otwartego Okna)
- 153. Konfiguracja Programu Dziennego Za Pomocą (Termostatu)
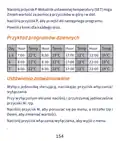
- 154. Przykład Programów Dziennych (Ustawienia Zaawansowane)
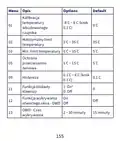
- 155. Kalibracja (Options → Default → Ochrona → Histereza → Funkcja Blokady Klawiszy → Funkcja Wykrywania Otwartego Okna - Owd)
- 156. Owd - Spadek Temperatury (podczas Wykrywania) (Owd - Opóźnienie Czasowe (powrót Do Poprzedniego Ustawienia/programu) → Powrót Do Ustawień Fabrycznych → Wersja Oprogramowania → Informacje O Wifi → Regulacja Jasności (tylko W Trybie Zasilania Usb))
- 157. Schemat Połączeń (Uproszczona Deklaracja Zgodności Ue → Onlineshop Srl Oświadcza, Że Inteligentny Termostat Pni Ct40 Pro Jest Zgodny Z Dyrektywą Red 2014/53/ue.)
- 158. Functii Principale (Programe Zilnice → Mod Incalzire Si Mod Racire → Detectie Geam Deschis → Protectie Copii → Afisare Temperatura Setata Si Masurata → Ecran Mare Retroiluminat Cu Caractere Mari Vizibile)
- 159. Interval Temperatura Setata (Interval Temperatura Masurata → Precizie → Dimensiuni Unitate Control → Dimensiuni Unitate Receptor → Clasa De Protectie La Apa → Unitate De Masura)
- 160. Prezentare Unitate De Comanda (Ziua Saptamanii → Ora → Incalzire Pornita → Racire Pornita → Nivel Semnal → Indicator Baterie)
- 161. Taste Blocata (functia 12. (Mod Incalzire → Functia Geam Deschis → Mod Vacanta → Mod Manual → Mod Anti-inghet → Prezentare Unitate Receptor)
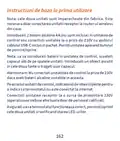
- 162. Instructiuni De Baza La Prima Utilizare (Atentionare → Nota)
- 163. Imperechere Unitate De Control Cu Unitate (Receptor)
- 164. Stergere Imperechere Unitati (Semnal Slab Sau Pierdut)
- 165. Control Din Aplicatia Tuya Smart
- 166. Deschideti Aplicatia Tuya Smart Si Apasati Pe Butonul + Sau Pe 'add Device' Pentru A Adauga Termostatul In Aplicatie.
- 167.
- 168. Functii Disponibile In Aplicatie (Afisare Temperatura Setata Si Temperatura Masurata. → Afisare Stare Incalzire/racire. → Selectare Mod De Lucru. → Setari Avansate.)
- 169. Setare Program Zilnic (Setare Ora Si Ziua Saptamanii → Functia Detectie Geam Deschis)
- 170. Configurare Program Zilnic Prin Termostat
- 171. Exemplu De Programare Temperatura Pe Zile (Setari Avansate)
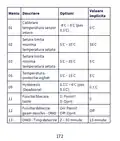
- 172. Valoare (Meniu Descriere → Optiuni → Calibrare → Setare Limita Maxima Temperatura Setata → Setare Limita Minima Temperatura Setata → Temperatura Protectie Inghet)
- 173. Owd - Scadere Temperatura (Owd - Timp Intarziere → Revenire La Setarile Din Fabrica → Versiune Software → Informatii Wifi → Reglare Luminozitate)
- 174. Diagrama Conexiuni (Declaratie Ue De Conformitate Simplificata → Termostat Inteligent Pni Ct Pro)
- 175.
- 176.
×
PNI-CT40 Smart Wireless Thermostat User Manual














































PNI-CT40
Smart wireless thermostat


| General | Details |
|---|---|
| Name | PNI-CT40 Smart Wireless Thermostat User Manual |
| Make | PNI |
| Language | English |
| Filetype | PDF (Download) |
| File size | 0.74 MB |
 (1 votes, average: 5.00 out of 5)
 Loading...

PNi CT36PRO Smart Thermostat Instruction Manual

PNI CT25PW WIFI Smart Thermostat User Manual

PNi ACRF8508 Wireless Programmable Room Thermostat Instruction Manual

PNI PNI-CT40 Manual: Questions and Answers
PNI PNI-CT40 specifications
| Accuracy | 0.5°C |
| IP rating | IP20 |
| Wi-Fi | 2.4GHz / 100mW |
What does the open window icon mean on PNI PNI-CT40 display?
The open window icon appears when the thermostat detects a sudden temperature drop of 2°C in 15 minutes, triggering automatic heating shutdown for ventilation. User Manual, p. 14
How long does PNI PNI-CT40 stay in open window mode before resuming normal operation?
30 minutes. Pressing any button during this period disables the function and returns the thermostat to its previous mode. User Manual, p. 14
How do I know the PNI PNI-CT40 is connected to Wi-Fi?
The signal icon on the control unit screen remains on instead of blinking. User Manual, p. 8
What is the maximum temperature setting for PNI PNI-CT40?
35°C is the maximum temperature limit. User Manual, p. 16
Does the PNI PNI-CT40 have an open window detection feature and how long does it wait before resuming?
Open window detection is available and can be enabled. When active, it waits 30 minutes before returning to the previous setting or program. User Manual, p. 17
More PNI thermostat manuals

Honeywell TH8321WF02 Vision Pro WiFi Programmable Thermostat User Manual

Wengart TP808-3 Heat Pump Thermostat User Guide

micro-Air EasyTouch 352 Thermostat User Manual

Honeywell D1-528 Inncom Direct Thermostat User Guide

Goodman GTST Connected Thermostat User Guide

INTIEL TD-3.1.1 Programmable Differential Thermostat User Manual

Jung FTR231 Floor Thermostat Instruction Manual

SASWELL T11FHL Heated Floor Thermostat User Manual

homematic IP IP HmIP-eTRV-CL Radiator Thermostat Instruction Manual

GENERALLIFE MITRA 220 RF Wireless Room Thermostat User Manual
Table of Contents
- 1. Smart Wireless Thermostat →
- 2. Contents →
- 3. Main Functions - Technical Specifications →
- 4. Receiver Unit Command - Range Of The Set Temperature →
- 5. Control Unit Overview - Day Of The Week →
- 6. Locked Keys (child Protection Function Active) - Heating Mod... →
- 7. Basic Instructions For The First Use - Pairing The Two Units →
- 8. Delete Paired Units →
- 9. Weak Or Lost Signal - Control From The Tuya Smart Applicatio... →
- 10. May Differ From The Version You Installed. →
- 11. The Application Will Start Scanning Nearby Devices. →
- 12. Page 12 →
- 13. Functions Available In The Application - Operation Mode Sele... →
- 14. Open Window Detection Function - Daily Program Configuration... →
- 15. Example Of Daily Programs →
- 16. Advanced Settings - Menu Description →
- 17. Key Lock Function - Open Window Detection Function →
- 18. Connection Diagram - Simplified Eu Declaration Of Conformity →
- 19. Основни Функции - Дневни Програми →
- 20. Команда На Приемника - Диапазон На Зададената Температура →
- 21. Преглед На Контролния Блок - Ден От Седмицата →
- 22. Охлаждането Е - Режим На Охлаждане →
- 23. Основни Инструкции За Първа Употреба - Забележка: Двата Моду... →
- 24. Свържете Приемника Към 230v Захранване - Уверете Се, Че Терм... →
- 25. Светодиод 1 Мига Рядко И След Това Изгасва. →
- 26. Управление От Приложението Tuya Smart →
- 27. Play Или Сканирайте Qr Кода По-долу: →
- 28. Интернет Връзка Е Успешна. Ако Светодиодът Продължава Да Миг... →
- 29. Page 29 →
- 30. Функции, Налични В Приложението - Дисплей На Зададената Темп... →
- 31. Индикатор За Час - Функция За Откриване На Отворен Прозорец →
- 32. Деактивира Тази Функция, Връщайки Системата В Предишния →
- 33. Меню Описание Опции Default →
- 34. Максимална Температурна Граница - Мин. Температурна Граница →
- 35. Температурен Спад - Owd - Закъснение Във Времето →
- 36. Натиснете Дълго Клавиша M За 5 Секунди, За Да Отключите Клав... →
- 37. Hauptfunktionen - Tagesprogramme →
- 38. Wlan-frequenz - Befehl Der Empfängereinheit →
- 39. Übersicht Der Steuereinheit - Wochentag →
- 40. Tastensperre - Heizmodus →
- 41. Grundlegende Hinweise Zur Ersten Inbetriebnahme - Achtung: S... →
- 42. Koppeln Der Beiden Geräte →
- 43. Gekoppelte Einheiten Löschen - Schwaches Oder Verlorenes Sig... →
- 44. Steuerung Über Die Tuya Smart-anwendung →
- 45. Laden Sie Die Tuya Smart-anwendung Aus Dem App Store Oder →
- 46. Die Anwendung Beginnt Mit Dem Scannen Von Geräten In Der Näh... →
- 47. Page 47 →
- 48. In Der Anwendung Verfügbare Funktionen - Folgende Funktionen... →
- 49. Die Stundenanzeige Blinkt. Drücken Sie Die Auf- Und Ab-taste... →
- 50. Tagesprogramm-konfiguration Über Thermostat - Beispiele Für ... →
- 51. Erweiterte Einstellungen - Menu Beschreibung →
- 52. Hysterese - Tastensperrfunktion →
- 53. Helligkeitsanpassung - Stromversorgungsmodu... →
- 54. Vereinfachte Eu-konformitätserklärung - Onlineshop Srl Erklä... →
- 55. Funciones Principales - Especificaciones Técnicas →
- 56. Comando De La Unidad Receptora - Rango De La Temperatura Est... →
- 57. Descripción General De La Unidad De Control - Día De La Sema... →
- 58. Teclas Bloqueadas - Modo De Calefacción →
- 59. Instrucciones Básicas Para El Primer Uso - Nota Sobre La Con... →
- 60. Emparejamiento De Las Dos Unidades →
- 61. Eliminar Unidades Emparejadas - Señal Débil O Perdida →
- 62. Control Desde La Aplicación Tuya Smart →
- 63. Abra La Aplicación Tuya Smart Y Presione El Botón + O 'agreg... →
- 64. Page 64 →
- 65. Funciones Disponibles En La Aplicación - Smart →
- 66. Configuración Avanzada - Configuración De La Hora Y El Día D... →
- 67. Configuración Del Programa Diario A Través Del - Termostato →
- 68. Ejemplo De Programas Diarios - Configuración Avanzada →
- 69. Menú Descripción - Opciones →
- 70. Función De Detección - Owd →
- 71. Diagrama De Conexión - Declaración De Conformidad Ue Simplif... →
- 72. Fonctions Principales - Programmes Journaliers →
- 73. Commande De L'unité - Plage De La Température De Consigne →
- 74. Présentation De Lunité De Contrôle - Jour De La Semaine →
- 75. Touches Verrouillées - Mode Chauffage →
- 76. Instructions De Base Pour La Première Utilisation - Appairag... →
- 77. Supprimer Les Unités Appairées →
- 78. Signal Faible Ou Perdu →
- 79. Contrôle Depuis L’application Tuya Smart →
- 80. Dans Linterface Suivante, Sélectionnez Loption Petits Appare... →
- 81. Page 81 →
- 82. Fonctions Disponibles Dans Lapplication - Smart →
- 83. Réglages Avancés - Réglage De Lheure Et Du Jour De La Semain... →
- 84. Fonction De Détection De Fenêtre Ouverte - Configuration Du ... →
- 85. Exemple De Programmes Quotidiens →
- 86. Paramètres Avancés - Menu Description →
- 87. Fonction De Verrouillage Des Touches - Fonction De Détection... →
- 88. Réglage De La Luminosité (uniquement En Mode D'alimentation ... →
- 89. Déclaration De Conformité Simplifiée De Lue - Onlineshop Srl... →
- 90. Fő Funkciók - Műszaki Előírások →
- 91. Vevő Egység Parancs - No És Nc →
- 92. Vezérlőegység Áttekintése - A Hét Napja →
- 93. Zárt Kulcsok (a Gyermekvédelmi Funkció Aktív) - Fűtési Mód →
- 94. Alapvető Utasítások Az Első Használathoz - A Két Egység Páro... →
- 95. Párosított Egységek Törlése →
- 96. Gyenge Vagy Elveszett Jel →
- 97. Vezérlés A Tuya Smart Alkalmazásból →
- 98. Termosztát (wi-fi) Opció - Wifi Hálózat Kiválasztása →
- 99. Page 99 →
- 100. Az Alkalmazásban Elérhető Funkciók - Fűtés/hűtés Állapotának... →
- 101. Beállítások Állnak Rendelkezésre: Napi Program, Gyermekvédel... →
- 102. Napi Program Konfigurálása Termosztáton - Keresztül →
- 103. Példa A Napi Programokra - Speciális Beállítások →
- 104. Menü Leírás - A Beépített Érzékelő →
- 105. Owd - Időkésleltetés - Visszatérés A Gyári Beállításokhoz →
- 106. Csatlakozási Diagram - Egyszerűsített Eu Megfelelőségi Nyila... →
- 107. Funzioni Principali - Programmi Giornalieri →
- 108. Comando Unità Ricevente - Range Della Temperatura Impostata →
- 109. Panoramica Dellunità Di Controllo - Giorno Della Settimana →
- 110. Tasti Bloccati (funzione Di Protezione Bambini Attiva) - Mod... →
- 111. Istruzioni Di Base Per Il Primo Utilizzo - Associazione Dell... →
- 112. Eliminare Le Unità Associate →
- 113. Segnale Debole O Perso →
- 114. Controllo Dall’applicazione Tuya Smart →
- 115. Premi A Lungo Il Pulsante Di Associazione Sullunità Ricevent... →
- 116. Page 116 →
- 117. Funzioni Disponibili Nellapplicazione - Visualizzazione Dell... →
- 118. Funzione Di Rilevamento Finestra Aperta →
- 119. Configurazione Del Programma Giornaliero - Tramite Termostat... →
- 120. Esempio Di Programmi Giornalieri - Impostazioni Avanzate →
- 121. Limite Di Temperatura - Protezione Antigelo →
- 122. Ritorno Alle Impostazioni Di Fabbrica - Versione Software →
- 123. Schema Di Collegamento - Dichiarazione Di Conformità Ue Semp... →
- 124. Belangrijkste Functies - Dagelijkse Programmas →
- 125. Opdracht Van De Ontvangereenheid - Bereik Van De Ingestelde ... →
- 126. Overzicht Van De Besturingseenheid - Weekdag →
- 127. Vergrendelde Toetsen - Verwarmingsmodus →
- 128. Basisinstructies Voor Het Eerste Gebruik - Let Op: De Twee U... →
- 129. De Twee Units Koppelen →
- 130. Gekoppelde Units Verwijderen - Zwak Of Verloren Signaal →
- 131. Bediening Vanuit De Tuya Smart-applicatie →
- 132. Thermostaat Aan De Applicatie Toevoegen - Kleine Huishoudeli... →
- 133. Page 133 →
- 134. Functies Beschikbaar In De Applicatie - Weergave Van De Inge... →
- 135. Geavanceerde Instellingen - Bedrijfsmodi →
- 136. Open Raamdetectiefunctie - Configuratie Van Het Dagelijkse P... →
- 137. Voorbeeld Van Dagprogramma’s →
- 138. Geavanceerde Instellingen - Menu Beschrijving →
- 139. Sleutelvergrendeling... - Open Raamdetectie Functie - Owd →
- 140. Aansluitschema - Vereenvoudigde Eu-conformiteitsverk... →
- 141. Główne Funkcje - Programy Dzienne →
- 142. Komenda Jednostki - Zakres Ustawionej Temperatury →
- 143. Przegląd Jednostki Sterującej - Dzień Tygodnia →
- 144. Zablokowane Klawisze - Tryb Ogrzewania →
- 145. Podstawowe Instrukcje Dotyczące Pierwszego Użycia - Uwaga →
- 146. Parowanie Dwóch Jednostek →
- 147. Usuń Sparowane Jednostki - Słaby Lub Utracony Sygnał →
- 148. Sterowanie Z Aplikacji Tuya Smart →
- 149. Wybierz Opcję Małe Urządzenia Domowe' - Termostat (wi-fi) →
- 150. Page 150 →
- 151. Funkcje Dostępne W Aplikacji - Wyświetlanie Ustawionej Tempe... →
- 152. Ustawienia - Ustawianie Godziny I Dnia Tygodnia →
- 153. Konfiguracja Programu Dziennego Za Pomocą - Termostatu →
- 154. Przykład Programów Dziennych - Ustawienia Zaawansowane →
- 155. Kalibracja - Options →
- 156. Owd - Spadek Temperatury (podczas Wykrywania) - Owd - Opóźni... →
- 157. Schemat Połączeń - Uproszczona Deklaracja Zgodności Ue →
- 158. Functii Principale - Programe Zilnice →
- 159. Interval Temperatura Setata - Interval Temperatura Masurata →
- 160. Prezentare Unitate De Comanda - Ziua Saptamanii →
- 161. Taste Blocata (functia 12. - Mod Incalzire →
- 162. Instructiuni De Baza La Prima Utilizare - Atentionare →
- 163. Imperechere Unitate De Control Cu Unitate - Receptor →
- 164. Stergere Imperechere Unitati - Semnal Slab Sau Pierdut →
- 165. Control Din Aplicatia Tuya Smart →
- 166. Deschideti Aplicatia Tuya Smart Si Apasati Pe Butonul + Sau ... →
- 167. Page 167 →
- 168. Functii Disponibile In Aplicatie - Afisare Temperatura Setat... →
- 169. Setare Program Zilnic - Setare Ora Si Ziua Saptamanii →
- 170. Configurare Program Zilnic Prin Termostat →
- 171. Exemplu De Programare Temperatura Pe Zile - Setari Avansate →
- 172. Valoare - Meniu Descriere →
- 173. Owd - Scadere Temperatura - Owd - Timp Intarziere →
- 174. Diagrama Conexiuni - Declaratie Ue De Conformitate Simplific... →
- 175. Page 175 →
- 176. Page 176 →