
PNI-CT40 Smart Wireless Thermostat User Manual







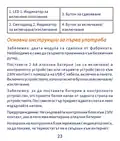
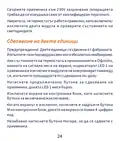
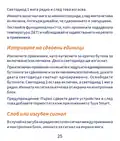


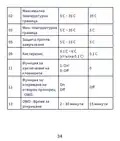





































Basic instructions for the first use
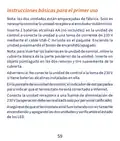
Note: the two units are paired from the factory. It is only necessary
to connect the receiver unit to the wireless router.
Insert 2 AA alkaline batteries (not included) into the control unit
or connect the unit to a 230V outlet using the USB-C cable included
in the package. Turn on the unit by pressing the on/off button.
Note: to insert batteries into the control unit, remove the white
cover from the back of the unit. Insert a pointed object into the
two slots and gently pull the cover.
Warning: Do not connect the control unit to the 230V socket if
you have alkaline batteries installed in it.
On the screen of the control unit, the network indicator blinks to
indicate that the thermostat is not connected to the Internet.
Connect the receiver unit to a 230V power supply (the operation
must be performed by qualified personnel only).
Make sure the thermostat is working properly by turning the two
units on/off and checking the status of the LEDs.
Pairing the two units
Warning: The two units are paired from the factory. Perform this
procedure only if absolutely necessary.
7
If the thermostat status in the application is Offline, the signal
icon blinks on the screen, the LED 1 indicator on the receiver unit
is off and the units do not communicate with each other, perform
the pairing procedure below:
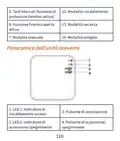
Long press the pairing button on the receiver unit until LED 1
blinks quickly.
Turn off the screen of the control unit by pressing the on/off
button.
When the screen is off, press and hold the M button on the control
unit until a 4-digit code appears on the screen.
Immediately press the Up button to pair with the receiver unit.
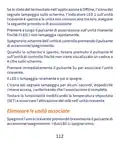
LED 1 blinks rarely and then goes out.
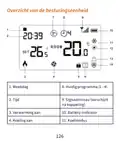
The signal icon blinks for a few seconds aſter which it remains on
confirming that the pairing is complete.
Test the functionality by changing the set temperature (SET) and
watch the triggering of the relay in the receiver unit.
Delete paired units
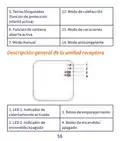
Turn off the receiver unit by briefly pressing the on/off button.
The two LEDs will turn off.
With the receiver off, press and hold the pairing and on/off buttons
simultaneously until the two LEDs light up at once. Release the
8
buttons. LED 2 stays on, and LED 1 blinks rarely. The signal icon
disappears from the control unit screen.
Warning: First pair the two units and then add the thermostat to
the Tuya Smart application.
Weak or lost signal
In case of RF signal loss between the receiver unit and the control
unit, the signal icon on the screen blinks.
If the receiver unit is disconnected from the wireless, LED 1 will
blink rarely.
Recommendations:
Change the batteries of the control unit if necessary.
Bring the two units closer to each other and to the Wi-Fi router
and check the status of the devices again.
If in a few minutes the operation does not return to normal and
LED 1 continues to blink rarely, perform the pairing procedure
again: first of the control unit with the receiver unit and then the
pairing with the wireless router (via the mobile application).
Control from the Tuya Smart application
Note 1: Due to the numerous updates of the Tuya Smart
application, the images and information described in this manual
9

may differ from the version you installed.
Note 2: For a quick configuration, make sure that the phone and
the thermostat are as close as possible to each other (1-3 m).
Connect the mobile phone to the 2.4 GHz wireless network and
activate the Location and Bluetooth function.
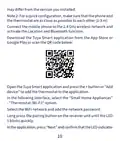
Download the Tuya Smart application from the App Store or
Google Play or scan the QR code below:
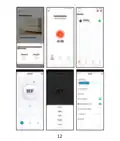
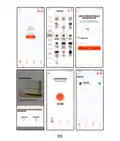
Open the Tuya Smart application and press the + button or “Add
device” to add the thermostat to the application.
In the following interface, select the “Small Home Appliances”
- “Thermostat (Wi-Fi)” option.
Select the WiFi network and add the network password.
Long press the pairing button on the receiver unit until the LED
1 blinks quickly.
In the application, press “Next” and confirm that the LED indicator
10

| General | Details |
|---|---|
| Name | PNI-CT40 Smart Wireless Thermostat User Manual |
| Make | PNI |
| Language | English |
| Filetype | PDF (Download) |
| File size | 0.74 MB |
 (1 votes, average: 5.00 out of 5)
 Loading...

PNi CT36PRO Smart Thermostat Instruction Manual

PNI CT25PW WIFI Smart Thermostat User Manual

PNi ACRF8508 Wireless Programmable Room Thermostat Instruction Manual


Honeywell T4 Lockout Change Thermostat User Manual

meitav-tec FMH24-PD-1S-IR Thermostat Owner’s Manual

Zhongjin STN731RF Thermostat Instruction Manual

sygonix 2997033 Wi-Fi Radiator Thermostat Instruction Manual

FC610 Bandary Smart Thermostat Owner’s Manual

Cielo Smart Thermostat Eco Owner’s Manual

heatmiser neoStat-e Electric Floor Heating Thermostat Instructions

GENERAL SOLARA 330S SMART Smart Room Thermostat User Manual

vtech W960 E-Smart Thermostat Instruction Manual

DIGITEN DTC-310 Electronic Temperature Controller Thermostat User Manual