PNI CT25PW WIFI Smart Thermostat User Manual


PNI CT25PW
Smart thermostat / Интелигентен термостат
Intelligenter Thermostat / Termostato inteligente /
Thermostat intelligent / Intelligens termosztát / Termostato
intelligente / Slimme thermostaat / Inteligentny termostat
Termostat inteligent incastrabil

| General | Details |
|---|---|
| Name | PNI CT25PW WIFI Smart Thermostat User Manual |
| Make | PNI |
| Language | English |
| Filetype | PDF (Download) |
| File size | 1.18 MB |


PNi CT36PRO Smart Thermostat Instruction Manual

PNI-CT40 Smart Wireless Thermostat User Manual

PNi ACRF8508 Wireless Programmable Room Thermostat Instruction Manual

PNI CT25PW WIFI Smart Thermostat User Manual Overview
Summary of Contents
- Page 1: Smart thermostat Intelligent thermostat Intelligenter Thermostat Termostato inteligente Thermostat intelligent Intelligens termosztát Termostato intelligente Slimme thermostaat Inteligentny termostat Termostat inteligent incastrabil
- Page 2: User manual Ръководство за употреба Benutzerhandbuch Manual de usuario Manuel utilisateur Használati utasítás Manuale utente Handleiding Instrukcja obsługi Manual de utilizare
- Page 3: Introduction PNI CT25PW is a programmable built-in thermostat for underfloor heating with water. You can set different temperatures for different time periods and days. The thermostat can work and display the temperature in three ways: according to the floor sensor, according to the built-in air sensor, or according to both sensors. How quickly the air in the room heats up does not depend on the settings of the thermostat, but on the size and design of the heating system. The thermostat has a non-energized relay output that sends an On/Off command to the boiler or other water heating systems.
- Page 4: Connecting the thermostat to the WiFi network and adding it to the Tuya Smart application requires your mobile phone to be connected to the 2.4GHz WiFi network with GPS location enabled. For a quick setup, keep the phone and thermostat close to each other. Ensure you have a 2.4 GHz wireless network available, as the thermostat cannot connect to a 5 GHz network. If needed, consult a specialist to configure the router and the 2.4 GHz wireless network.
- Page 5: The password. Click Next. In the next interface, select the option EZ Mode from the upper right corner. Long press the key from the thermostat to enter the pairing mode. Then check Confirm the indicator is blinking rapidly. The application will start scanning nearby devices. After you identify your device, you will receive the Added Successfully confirmation. To finish, click the Done button. From the application, you can turn the thermostat on and off. You can change the operation mode of the thermostat (Manual, Eco, Auto) or you can set the weekly program.
- Page 6: Page 6
- Page 7: Setting the thermostat involves setting the time and day of the week. To set the time, long press the key for about 5 seconds until the minutes icon flashes. Use the keys to reach the desired value and short press the key to confirm. The hours indicator will then flash on the screen for further adjustments. After setting the hours, the day indicator will flash for you to set the day. Wait a few seconds for the screen to return to normal display mode. To set the working mode, shortly press the key to switch between Eco (Holiday), Scheduled, or Manual mode.
- Page 8: Scheduled mode After setting the time and day of the week, you will enter the programming mode of the 4 periods for each day of the week. The start time and temperature will flash on the screen in turn. Each time you press the key, the selected value will be confirmed and you will move to the next setting. After setting the time and temperature for the first period, it automatically switches to the second period, then to the third and fourth. This will continue with the setting of the 4 periods for each day of the week (1 - 7). The time can be changed from quarter to quarter of an hour, and the temperature from half to half a degree.
- Page 9: Default settings Period Hour Temp. 22°C 19°C
- Page 10: Manual mode allows for setting the operation mode with a short press of the key. Only the time, day of the week, and temperature will be displayed on the screen. The desired temperature can be set using the ˄ and ˅ keys. The heating system will operate to maintain this temperature for 24 hours. Eco mode is activated by a short press of the key, displaying a suitcase icon on the screen. The desired temperature can also be set using the ˄ and ˅ keys in this mode.
- Page 11: Keylock function If child protection has been activated in the advanced settings menu, the thermostat keys will lock as soon as the screen backlight turns off. Long press the key ˄ and ˅ for about 5 seconds to temporarily unlock the keys. Open window detection function (OWD) If the function has been activated from the advanced settings menu, the thermostat will switch off the heating if the room temperature drops suddenly. This sudden drop of temperature occurs when a window or door is opened while the heating system is operating. The device will return to its original operating mode after 30 minutes. By pressing any key, you will exit OWD mode.
- Page 12: Advanced settings Switch off the thermostat by briefly pressing the key. Press the keys and ˄ simultaneously for about 6 seconds. Use the keys ˄ and ˅ to change the settings and the key to move to the next setting. Menu description Internal sensor calibration range is -8°C to 8°C with a default of 0°C. Setting the maximum temperature limit range is 5°C to 35°C with a default of 35°C. Setting the minimum temperature limit range is 5°C to 35°C. Sensor selection options are 0: Air, 1: Floor, 2: Air&Floor.
- Page 13: Antifreeze settings range from 5°C to 15°C and -8°C to 8°C. External sensor calibration is mentioned. Display floor temperature settings are provided. The overheating limit for floor temperature is between 20°C and 80°C, with a specific threshold at 32°C. Hysteresis settings are included. Child protection features are available with options for locked and unlocked keys. Open window detection can be turned on or off. Menus 07 and 08 are accessible only if option 2 (Air and floor sensor) is selected in menu 04.
- Page 14: The time interval in which the sudden drop in temperature is detected is 2~30 min. Degrees lost in the time interval set at menu 13 are 2°C, 3°C, and 4°C. The time after which the device returns to its original mode of operation is 10~60 min. Reset options include 0: No and 1: Yes. To reset, press for 5 seconds and wait for the device to restart. Software version is indicated in section 18.
- Page 15: Page 15
- Page 16: Installation instructions Install the thermostat at eye level. Before installing the thermostat, carefully read the instructions in this manual. The thermostat was designed to be recessed and requires a dose with side mounting screws.
- Page 17: Simplified EU declaration of conformity SC ONLINESHOP SRL declares that the PNI CT25PW flush-mounted smart thermostat is in accordance with the RED Directive 2014/53/EU. The full text of the EU Declaration of Conformity is available at the following internet address.
- Page 18: Въведение PNI CT25PW е програмируем вграден термостат за подово отопление с вода. Термостатът включва и изключва отоплителната система в зависимост от зададената температура. Можете да задавате различни температури за различни периоди от време и дни. Термостатът може да работи и показва температурата по 3 начина: според подовия сензор, според вградения сензор за въздух, според двата сензора. Колко бързо се нагрява въздухът в помещението не зависи от настройките на термостата. Термостатът има невключен релеен изход, който изпраща команда за включване/изключване към котела или други системи за нагряване на вода.
- Page 19: Свързване на термостата към WiFi мрежата и добавяне към приложението Tuya Smart. Уверете се, че вашият мобилен телефон е свързан към 2,4GHz WiFi мрежа и GPS местоположението е активирано. За бърза настройка се уверете, че телефонът и термостатът са възможно най-близо един до друг (1-3 м). Уверете се, че имате налична безжична мрежа 2,4 Ghz и че сте свързали телефона си към нея. Термостатът не може да бъде свързан към 5 Ghz безжична мрежа, защото работи само на честота 2,4 Ghz. За да конфигурирате рутера и безжичната мрежа 2,4 Ghz, обадете се на специалист.
- Page 20: Изберете WiFi мрежата, към която искате да се свържете, и добавете паролата. В следващия интерфейс изберете опцията EZ Mode от горния десен ъгъл. Натиснете дълго клавиша, за да влезете в режим на сдвояване. Проверете, че индикаторът мига бързо. Кликнете върху Next. Приложението ще започне да сканира устройства в близост. След като идентифицирате вашето устройство, ще получите потвърждението Added Successfully. За да завършите, щракнете върху бутона Done. От приложението можете да включвате и изключвате термостата. Можете да промените режима на работа на термостата или да зададете седмичната програма.
- Page 21: Page 21
- Page 22: Настройка на термостата Задайте часа и деня от седмицата Натиснете дълго клавиша за около 5 секунди. Иконата на минутите ще мига на екрана. Натиснете клавишите ˄ и ˅ за да достигне желаната стойност. Кратко натискане на клавиша за да потвърдите. Индикаторът за часове ще мига на екрана. Индикаторът за деня ще мига на екрана. Изчакайте няколко секунди, екранът ще се върне към нормален режим на показване. Задаване на режим на работа
- Page 23: Eco (Празник), планиран или ръчен режим. Режим по график. След като зададете часа и деня от седмицата, ще влезете в режим на програмиране на 4-те периода за всеки ден от седмицата. Започва с настройка на първия ден от седмицата и първия период. Началното време и температурата ще мигат на екрана последователно. Всеки път, когато натиснете клавиша, избраната стойност ще бъде потвърдена. След като настроите времето и температурата за първия период, той автоматично превключва към втория период. Това ще продължи с настройката на 4-те периода за всеки ден от седмицата.
- Page 24: Времето може да се променя от четвърт на четвърт час, а температурата от половин до половин градус. Можете да зададете времето на 07:15 или 07:30 или 07:45 и температурата на 22,0°C или 22,5°C или 23,0°C. Настройките по подразбиране. Период 1: 07:00, 22°C. Период 2: 08:30, 19°C. Период 3: 08:00, 22°C. Период 4: 08:30, 22°C. (пн-пет) 12345. (сб) 6. (нд) 7.
- Page 25: Ръчно управление Натиснете кратко клавиша за да зададете ръчен режим на работа. На екрана ще се показват само часът, денят от седмицата и температурата. Натиснете клавишите ˄ и ˅ за да зададете желаната температура. Отоплителната система ще се включва и изключва, за да поддържа тази температура за 24 часа. Еко режим (празник)
- Page 26: Натиснете кратко клавиша за да зададете режима на работа Eco. На екрана ще се появи икона на куфар. Натиснете клавишите ˄ и ˅ за да зададете желаната температура. Функция за заключване на клавишите. Ако Защитата на детето е активирана в менюто за разширени настройки, клавишите на термостата ще се заключат веднага щом подсветката на екрана се изключи. Натиснете дълго клавиша ˄ и ˅ за около 5 секунди, за да отключите временно ключовете. Функция за откриване на отворен прозорец (OWD). Ако функцията е активирана от менюто за разширени настройки, термостатът ще изключи отоплението.
- Page 27: Стайната температура спадне внезапно при отваряне на прозорец или врата. Настройка по подразбиране е 2°C за 15 минути. Устройството ще се върне в работен режим след 30 минути. Иконата изчезва от екрана. С натискане на произволен клавиш ще излезете от режима OWD. Изключете термостата с кратко натискане на бутона. Натиснете клавишите ˄ и ˅ едновременно за около 6 секунди. Използвайте ключовете ˄ и ˅ за промяна на настройките. Натиснете клавиша за преминаване към следващата настройка.
- Page 28: Меню описание Обхват Неявна Вътрешно калибриране на сензора -8°C~8°C Задаване на границата на максималната температура 5°C ~35°C Задаване на минимална температурна граница Избор на сензор 0: Air 1: Floor 2: Air&Floor Температура на антифриза 5°C~15°C
- Page 29: Калибриране на външен сензор -8°C~8°C Показва температурата на пода Граница за прегряване на подовата температура 20°C~80°C Хистерезис 0.2°C~6°C Защита на детето Ключовете са отключени Ключовете са заключени
- Page 30: Откриване на отворен прозорец (OWD) Интервалът от време, в който се засича внезапният спад на температурата Градуси, загубени в интервала от време, зададен в меню 13 Времето, след което устройството се връща към първоначалния си режим на работа Менюта 07 и 08 се появяват само ако опция 2 (Сензор за въздух и под) е избрана в меню 04.
- Page 31: Нулиране Натиснете за 5 сек. Изчакайте устройството да се рестартира. Софтуерна версия Схеми на свързване
- Page 32: Инструкции за инсталация Монтирайте термостата на нивото на очите. Преди да инсталирате термостата, прочетете внимателно инструкциите в това ръководство. Термостатът е проектиран да бъде вдлъбнат и изисква доза със странични монтажни винтове. Минимална дълбочина 35 мм.
- Page 33: Опростена ЕС декларация за съответствие SC ONLINESHOP SRL декларира, че интелигентният термостат PNI CT25PW за вграден монтаж е в съответствие с декларацията за съответствие Директивата RED 2014/53/EU. Пълният текст на ЕС е достъпен на следния интернет адрес.
- Page 34: Intelligenter Thermostat Benutzerhandbuch
- Page 35: Einführung PNI CT25PW ist ein programmierbarer eingebauter Thermostat für die Fußbodenheizung mit Wasser, der das Heizsystem je nach eingestellter Temperatur ein- und ausschaltet. Sie können unterschiedliche Temperaturen für unterschiedliche Zeiträume und Tage einstellen. Der Thermostat kann auf drei Arten arbeiten und die Temperatur anzeigen: entsprechend dem Bodensensor, entsprechend dem eingebauten Luftsensor, nach beiden Sensoren. Wie schnell sich die Luft im Raum erwärmt, hängt nicht von den Einstellungen des Thermostats ab, sondern von der Größe und dem Design des Heizungssystems. Der Thermostat verfügt über einen nicht erregten Relaisausgang, der einen Ein/Aus-Befehl an den Kessel oder andere Wasserheizungssysteme sendet.
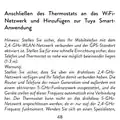
- Page 36: Anschließen des Thermostats an das WiFi-Netzwerk und Hinzufügen zur Tuya Smart-Anwendung Hinweis: Stellen Sie sicher, dass Ihr Mobiltelefon mit dem 2,4-GHz-WLAN-Netzwerk verbunden und der GPS-Standort aktiviert ist. Stellen Sie für eine schnelle Einrichtung sicher, dass Telefon und Thermostat so nahe wie möglich beieinander liegen (1-3 m). Warnung: Stellen Sie sicher, dass Sie über ein drahtloses 2,4-GHz-Netzwerk verfügen und Ihr Telefon damit verbunden haben. Der Thermostat kann nicht an das drahtlose 5-GHz-Netzwerk angeschlossen werden, da er nur auf der 2,4-GHz-Frequenz funktioniert.
- Page 37: Wählen Sie aus der Liste der Geräte die Option Thermostat (Wi-Fi). Wählen Sie das WiFi-Netzwerk aus und fügen Sie das Kennwort hinzu. Wählen Sie in der nächsten Oberfläche die Option EZ Mode. Drücken Sie lange die Taste, um in den Pairing-Modus zu gelangen. Aktivieren Sie die Option Confirm the indicator is blinking rapidly. Die Anwendung wird in der Nähe befindliche Geräte scannen. Nachdem Sie Ihr Gerät identifiziert haben, erhalten Sie die Bestätigung Added Successfully. Klicken Sie zum Abschluss auf die Schaltfläche Done. In der Anwendung können Sie den Thermostat ein- und ausschalten. Ändern Sie den Betriebsmodus des Thermostats oder stellen Sie das Wochenprogramm ein.
- Page 38: Page 38
- Page 39: Thermostat einstellen Stellen Sie die Uhrzeit und den Wochentag ein. Drücken Sie lange die Taste für ca. 5 Sekunden. Das Minuten-Symbol blinkt auf dem Bildschirm. Drücken Sie die Tasten ˄ und ˅ um den gewünschten Wert zu erreichen. Drücken Sie kurz die Taste, um zu bestätigen. Die Stundenanzeige blinkt auf dem Bildschirm. Drücken Sie die Tasten ˄ und ˅ um den gewünschten Wert zu erreichen. Drücken Sie kurz die Taste, um zu bestätigen. Die Tagesanzeige blinkt auf dem Bildschirm. Warten Sie einige Sekunden, bis der Bildschirm wieder in den normalen Anzeigemodus zurückkehrt.
- Page 40: Geplanter Modus Nachdem Sie die Uhrzeit und den Wochentag eingestellt haben, rufen Sie den Programmiermodus der 4 Perioden für jeden Wochentag auf. Es beginnt mit der Einstellung des ersten Wochentags und der ersten Periode. Die Startzeit und die Temperatur blinken nacheinander auf dem Bildschirm. Nach dem Einstellen von Zeit und Temperatur für die erste Periode wird automatisch zur zweiten Periode und dann zur dritten und vierten Periode umgeschaltet. Dies wird mit der Einstellung der 4 Perioden für jeden Wochentag fortgesetzt. Die Zeit kann von einer Viertelstunde auf eine Viertelstunde und die Temperatur von einem halben auf einen halben Grad geändert werden.
- Page 41: Standardeinstellungen Zeitraum Stunde Temp. 22°C 08:30 19°C 17:00 22°C 19°C
- Page 42: Manueller Modus Drücken Sie kurz die Taste, um den manuellen Betriebsmodus einzustellen. Auf dem Bildschirm werden nur Uhrzeit, Wochentag und Temperatur angezeigt. Drücken Sie die Tasten ˄ und ˅ um die gewünschte Temperatur einzustellen. Das Heizsystem wird ein- und ausgeschaltet, um diese Temperatur 24 Stunden lang zu halten. Eco-Modus (Urlaub) Drücken Sie kurz die Taste, um den Eco-Betriebsmodus einzustellen. Auf dem Bildschirm wird ein Koffersymbol angezeigt. Drücken Sie die Tasten ˄ und ˅ um die gewünschte Temperatur einzustellen.
- Page 43: Funktionen Tastensperrfunktion Wenn im erweiterten Einstellungsmenü der Kinderschutz aktiviert wurde, werden die Thermostat-Tasten gesperrt, sobald die Hintergrundbeleuchtung des Bildschirms ausgeschaltet wird. Drücken Sie lange die Taste ˄ und ˅ für ca. 5 Sekunden, um die Schlüssel zu entsperren. Fenstererkennungsfunktion öffnen (OWD) Wenn die Funktion über das Menü für erweiterte Einstellungen aktiviert wurde, schaltet der Thermostat die Heizung aus, wenn die Raumtemperatur plötzlich abfällt. Dieser plötzliche Temperaturabfall tritt auf, wenn ein Fenster oder eine Tür geöffnet wird, während das Heizsystem in Betrieb ist. Das Symbol erscheint auf dem Bildschirm. Das Gerät kehrt nach 30 Minuten in den ursprünglichen Zustand zurück.
- Page 44: Betriebsmodus zurück. Das Symbol verschwindet vom Bildschirm. Durch Drücken einer beliebigen Taste verlassen Sie den OWD-Modus. Erweiterte Einstellungen. Schalten Sie den Thermostat durch kurzes Drücken der Taste aus. Verwenden Sie die Tasten ˄ und ˅, um die Einstellungen zu ändern. Drücken Sie die Tasten ˄ und ˅ gleichzeitig für ca. 6 Sekunden, um zur nächsten Menu Beschreibung zu gelangen. Interne Sensorkalibrierung.
- Page 45: Einstellen der maximalen Temperaturgrenze Einstellen der minimalen Temperaturgrenze Sensorauswahl Frostschutz- temperaturen Externe Sensorkalibrierung Bodentemperatur anzeigen Schreib- geschützt
- Page 46: Überhitzungsgrenze für Bodentemperatur 20°C~80°C Hysteresis Kinderschutz Fenstererkennung öffnen (OWD) Das Zeitintervall, in dem der plötzliche Temperaturabfall erkannt wird 2~30 min. Gradverlust in dem in Menü 13 eingestellten Zeitintervall
- Page 47: Die Zeit, nach der das Gerät in seinen ursprünglichen Betriebsmodus zurückkehrt, beträgt 10~60 min, standardmäßig 30 min. Um einen Reset durchzuführen, drücken Sie für 5 Sekunden. Warten Sie, bis das Gerät neu gestartet wurde. Die Softwareversion wird angezeigt. Die Menüs 07 und 08 werden nur angezeigt, wenn in Menü 04 Option 2 (Luft- und Bodensensor) ausgewählt wurde.
- Page 48: Page 48
- Page 49: Installieren Sie den Thermostat auf Augenhöhe. Lesen Sie vor der Installation des Thermostats die Anweisungen in diesem Handbuch sorgfältig durch. Der Thermostat wurde für die Aussparung entwickelt und erfordert eine Dosis mit seitlichen Befestigungsschrauben.
- Page 50: Vereinfachte EU-Konformitätserklärung SC ONLINESHOP SRL erklärt, dass der Unterputz-Smart-Thermostat PNI CT25PW der ROTEN Richtlinie 2014/53/EU entspricht. Der vollständige Text der EU-Konformitätserklärung ist unter folgender Internetadresse verfügbar.
- Page 51: Introducción PNI CT25PW es un termostato integrado programable para suelo radiante con agua, que enciende y apaga el sistema de calefacción en función de la temperatura programada. Puede establecer diferentes temperaturas para diferentes períodos de tiempo y días. El termostato puede funcionar y mostrar la temperatura de 3 formas: según el sensor de suelo, según el sensor de aire incorporado, según ambos sensores. La rapidez con que se calienta el aire en la habitación no depende de la configuración del termostato, sino del tamaño y el diseño del sistema de calefacción. El termostato tiene una salida de relé sin energía que envía un comando de encendido/apagado a la caldera u otros sistemas de calentamiento de agua.
- Page 52: Conectar el termostato a la red WiFi y agregarlo a la aplicación Tuya Smart. Asegúrese de tener su teléfono móvil conectado a la red WiFi de 2.4GHz y la ubicación GPS habilitada. Para una configuración rápida, asegúrese de que el teléfono y el termostato estén lo más cerca posible el uno del otro (1-3 m). Asegúrese de tener una red inalámbrica de 2,4 GHz disponible y de haber conectado su teléfono a ella. Los enrutadores y teléfonos de nueva generación también vienen equipados con una red inalámbrica de 5 GHz activada. El termostato no se puede conectar a la red inalámbrica de 5 GHz porque solo funciona en la frecuencia de 2.4 GHz. Para configurar el enrutador y la red inalámbrica de 2,4 GHz, llame a un especialista.
- Page 53: Seleccione la red WiFi a la que desea conectarse y agregue la contraseña. En la siguiente interfaz, seleccione la opción EZ Mode en la esquina superior derecha. Mantenga presionada la tecla para ingresar al modo de emparejamiento. Marque la opción Confirm the indicator is blinking rapidly. La aplicación comenzará a escanear dispositivos cercanos. Después de identificar su dispositivo, recibirá la confirmación de Added Successfully. Para terminar, haga clic en el botón Done. Desde la aplicación, puede encender y apagar el termostato. Puede cambiar el modo de funcionamiento del termostato (Manual, ECO, Auto). Puede configurar el programa semanal.
- Page 54: Page 54
- Page 55: Ajuste del termostato Establecer la hora y el día de la semana Mantenga presionada la tecla durante unos 5 segundos. El icono de minutos parpadeará en la pantalla. Pulse las teclas ˄ y ˅ para alcanzar el valor deseado. Presione brevemente la tecla para confirmar. El indicador de horas parpadeará en la pantalla. Pulse las teclas ˄ y ˅ para alcanzar el valor deseado. Presione brevemente la tecla para confirmar. El indicador de día parpadeará en la pantalla. Pulse las teclas ˄ y ˅ para alcanzar el valor deseado. Espere unos segundos, la pantalla volverá al modo de visualización normal. Configurar el modo de trabajo Presione brevemente la tecla (Holiday), Scheduled o Manual para cambiar entre Eco.
- Page 56: Modo programado Después de configurar la hora y el día de la semana, ingresará al modo de programación de los 4 períodos para cada día de la semana. Comienza configurando el primer día de la semana y el primer período. La hora de inicio y la temperatura parpadearán sucesivamente en la pantalla. Cada vez que presiona la tecla se confirmará el valor seleccionado y pasará al siguiente ajuste. Después de configurar la hora y la temperatura para el primer período, cambia automáticamente al segundo período, luego al tercero y cuarto. Esto continuará con la configuración de los 4 períodos para cada día de la semana (1 - 7). El tiempo se puede cambiar de un cuarto a un cuarto de hora y la temperatura de medio a medio grado.
- Page 57: Configuración por defecto Período Hora Temp. 22°C 19°C 6 (S) 7 (D)
- Page 58: Modo manual Presione brevemente la tecla para configurar el modo de funcionamiento manual. En la pantalla solo se mostrarán la hora, el día de la semana y la temperatura. Presione las teclas ˄ y ˅ para configurar la temperatura deseada. El sistema de calefacción se encenderá y apagará para mantener esta temperatura durante 24 horas. Modo ecológico (vacaciones) Presione brevemente la tecla para configurar el modo de funcionamiento Eco. Aparecerá un icono de maleta en la pantalla. Presione las teclas ˄ y ˅ para configurar la temperatura deseada.
- Page 59: Funciones Función de bloqueo de teclas: Si se ha activado la protección infantil, las teclas del termostato se bloquearán al apagarse la luz de fondo. Mantenga presionada la tecla ˄ y ˅ durante unos 5 segundos para desbloquear. Función de detección de ventana abierta (OWD): Si está activada, el termostato apagará la calefacción si la temperatura ambiente desciende repentinamente. Esta caída ocurre al abrir una ventana o puerta mientras el sistema de calefacción está funcionando. El dispositivo volverá a su modo original después de 30 minutos. Al presionar cualquier tecla, saldrá del modo OWD.
- Page 60: Ajustes avanzados Apague el termostato presionando brevemente la tecla. Presione simultáneamente las teclas durante unos 6 segundos. Usa las teclas para cambiar la configuración y la tecla para pasar a la siguiente configuración. Calibración del sensor -8°C~8°C interno. Establecer el límite máximo de temperatura 5°C ~35°C. Configuración del límite de temperatura mínima 5°C ~35°C.
- Page 61: Selección de sensor Aire Suelo Temperatura 5°C~15°C Calibración de sensor -8°C~8°C Muestra la temperatura del suelo Límite de sobrecalentamiento de la temperatura del suelo Protección infantil
- Page 62: Detección de ventana abierta (OWD) se puede activar o desactivar. El intervalo de tiempo para detectar la caída repentina de temperatura es de 2 a 30 minutos. El tiempo predeterminado para la detección de caída de temperatura es de 15 minutos. Se pueden perder hasta 4 grados en el intervalo de tiempo establecido. El tiempo después del cual el dispositivo vuelve a su modo de funcionamiento original es de 10 a 60 minutos. El tiempo predeterminado para volver al modo original es de 30 minutos. Los menús 07 y 08 solo aparecen si se ha seleccionado la opción 2 en el menú 04.
- Page 63: Reset the device by pressing for 5 seconds. Wait for the device to restart. Software version 81.
- Page 64: Diagramas de conexión
- Page 65: Instrucciones de instalación Instale el termostato a la altura de los ojos. Antes de instalar el termostato, lea atentamente las instrucciones de este manual. El termostato fue diseñado para empotrarse y requiere una dosis (profundidad mínima de 35 mm) con tornillos de montaje laterales.
- Page 66: Declaración de conformidad de la UE simplificada SC ONLINESHOP SRL declara que el termostato inteligente empotrado PNI CT25PW cumple con la Directiva RED 2014/53/EU. El texto completo de la Declaración de conformidad de la UE está disponible en la siguiente dirección de Internet.
- Page 67: Introduction PNI CT25PW est un thermostat intégré programmable pour chauffage par le sol avec eau, qui allume et éteint le système de chauffage en fonction de la température réglée. Vous pouvez régler différentes températures pour différentes périodes et jours. Le thermostat peut fonctionner et afficher la température de trois façons : selon le capteur de sol, selon le capteur d’air intégré, ou selon les deux capteurs. La vitesse à laquelle l’air de la pièce se réchauffe ne dépend pas des réglages du thermostat, mais de la taille et de la conception du système de chauffage. Le thermostat a une sortie de relais non alimentée qui envoie une commande marche/arrêt à la chaudière ou à d’autres systèmes de chauffage de l’eau.
- Page 68: Connecter le thermostat au réseau WiFi et l’ajouter à l’application Tuya Smart. Assurez-vous que votre téléphone mobile est connecté au réseau WiFi 2,4 GHz et que la localisation GPS est activée. Pour une configuration rapide, assurez-vous que le téléphone et le thermostat sont aussi proches que possible (1 à 3 m). Assurez-vous que vous disposez d’un réseau sans fil 2,4 GHz et que vous y avez connecté votre téléphone. Les appareils se connectent automatiquement sur la fréquence 5 GHz, mais le thermostat ne peut pas être connecté à ce réseau. Le thermostat fonctionne uniquement sur la fréquence 2,4 GHz. Pour configurer le routeur et le réseau sans fil 2,4 GHz, appelez un spécialiste.
- Page 69: Sélectionnez le réseau WiFi auquel vous souhaitez vous connecter et ajoutez le mot de passe. Dans l’interface suivante, sélectionnez l’option EZ Mode dans le coin supérieur droit. Appuyez longuement sur la touche pour accéder au mode de couplage. Cochez l’option Confirm the indicator is blinking rapidly. L’application commencera à scanner les appareils à proximité. Après avoir identifié votre appareil, vous recevrez la confirmation Added Successfully. Pour terminer, cliquez sur le bouton Done. Depuis l’application, vous pouvez allumer et éteindre le thermostat. Vous pouvez changer le mode de fonctionnement du thermostat (Manuel, ECO, Auto). Vous pouvez régler le programme hebdomadaire.
- Page 70: Page 70
- Page 71: Réglage du thermostat Réglez l’heure et le jour de la semaine Appuyez longuement sur la touche pendant environ 5 secondes. L’icône des minutes clignotera sur l’écran. Appuyez sur les touches ˄ et ˅ pour atteindre la valeur souhaitée. Appuyez brièvement sur la touche pour confirmer. L’indicateur des heures clignotera sur l’écran. Appuyez sur les touches ˄ et ˅ pour atteindre la valeur souhaitée. L’indicateur du jour clignotera sur l’écran. Attendez quelques secondes, l’écran reviendra en mode d’affichage normal.
- Page 72: Réglage du mode de travail Appuyez brièvement sur la touche pour basculer entre le mode Eco (vacances), programmé ou manuel. Mode programmé Après avoir réglé l’heure et le jour de la semaine, vous entrerez dans le mode de programmation des 4 périodes pour chaque jour de la semaine. Cela commence par le réglage du premier jour de la semaine et des premières règles. L’heure de démarrage et la température clignoteront à l’écran à tour de rôle. Chaque fois que vous appuyez sur la touche, la valeur sélectionnée sera confirmée et vous passerez au paramètre suivant. Après avoir réglé l’heure et la température pour la première période, il passe automatiquement à la deuxième période, puis aux troisième et quatrième. Cela se poursuivra avec le réglage des 4 périodes.
- Page 73: Chaque jour de la semaine (1 - 7). L’heure peut être modifiée d’un quart à un quart d’heure et la température d’un demi-degré à un demi-degré. Vous pouvez régler l’heure sur 07:15 ou 07:30 ou 07:45 et la température sur 22,0°C ou 22,5°C ou 23,0°C. Paramètres par défaut. Heure: 07:00, Température: 22°C. Heure: 08:30, Température: 19°C. Heure: 08:00, Température: 22°C. Heure: 08:30, Température: 22°C.
- Page 74: Mode manuel Appuyez brièvement sur la touche pour régler le mode de fonctionnement manuel. Seuls l’heure, le jour de la semaine et la température seront affichés à l’écran. Appuyez sur les touches ˄ et ˅ pour régler la température souhaitée. Le système de chauffage s’allumera et s’éteindra pour maintenir cette température pendant 24 heures.
- Page 75: Mode éco (vacances) Appuyez brièvement sur la touche pour régler le mode de fonctionnement Eco. Une icône de valise apparaîtra à l’écran. Appuyez sur les touches ˄ et ˅ pour régler la température souhaitée. Fonction de verrouillage des touches Si la protection enfant a été activée dans le menu des paramètres avancés, les touches du thermostat se verrouillent dès que le rétroéclairage de l’écran s’éteint. Appuyez longuement sur la touche ˄ et ˅ pendant environ 5 secondes pour déverrouiller les touches.
- Page 76: Menu description includes various settings for temperature calibration and limits. Calibration of the internal sensor ranges from -8°C to 8°C, with a default setting of 0°C. The maximum temperature limit can be set between 5°C and 35°C, with a default of 35°C. The minimum temperature limit is also adjustable between 5°C and 35°C. Sensor selection options include air, floor, or both air and floor. Antifreeze temperature settings range from 5°C to 15°C and -8°C to 8°C, with a default of 5°C. Calibration of the external sensor is also mentioned. Menus 07 and 08 are only available if option 2 (air and floor sensor) is selected in menu 04.
- Page 77: Affichage de la température du sol seulement. Limite de surchauffe de la température du sol 20°C~80°C 32°C. Hystérésis 0.2°C~6°C 0.3°C. Protection de l’enfance 0: Off 1: On. Détection de fenêtre ouverte (OWD) 0: Off. L'intervalle de temps dans lequel la baisse soudaine de température est détectée 2~30 min. 15 min.
- Page 78: Degrés perdus dans l’intervalle de temps défini au menu. Le temps après lequel l’appareil revient à son mode de fonctionnement d’origine. Reset: 0: No, 1: Oui. Appuyer pendant 5 s. Attendez que l’appareil redémarre. Version de logiciel 102.
- Page 79: Page 79
- Page 80: Instructions d’installation Installez le thermostat au niveau des yeux. Avant d’installer le thermostat, lisez attentivement les instructions de ce manuel. Le thermostat a été conçu pour être encastré et nécessite une dose (profondeur minimum 35 mm) avec des vis de montage latérales.
- Page 81: Déclaration de conformité UE simplifiée. SC ONLINESHOP SRL déclare que le thermostat intelligent encastré PNI CT25PW est conforme à la directive RED 2014/53/EU. Le texte complet de la déclaration de conformité UE est disponible à l’adresse Internet suivante.
- Page 82: Bevezetés A PNI CT25PW egy programozható beépített termosztát vízzel történő padlófűtéshez. A termosztát a fűtési rendszert a beállított hőmérséklettől függően ki- és bekapcsolja. Különböző hőmérsékleteket állíthat be különböző időszakokra és napokra. A termosztát 3 módon képes működni és megjeleníteni a hőmérsékletet. A helyiség levegőjének felmelegedési sebessége nem a termosztát beállításaitól, hanem a fűtési rendszer méretétől és kialakításától függ. A termosztát feszültség nélküli relékimenettel rendelkezik.
- Page 83: A termosztát csatlakoztatása a WiFi hálózathoz és hozzáadása a Tuya Smart alkalmazáshoz. Győződjön meg arról, hogy mobiltelefonja csatlakozik a 2,4 GHz-es WiFi hálózathoz, és engedélyezve van a GPS helymeghatározás. A gyors beállítás érdekében győződjön meg arról, hogy a telefon és a termosztát a lehető legközelebb van egymáshoz (1-3 m). Győződjön meg arról, hogy rendelkezésre áll egy 2,4 Ghz-es vezeték nélküli hálózat, és csatlakoztatta-e hozzá a telefonját. Az új generációs útválasztók és telefonok szintén aktiválva vannak egy 5 Ghz-es vezeték nélküli hálózattal. Az eszközök ezen a frekvencián automatikusan csatlakoznak. A termosztát nem csatlakoztatható az 5 Ghz vezeték nélküli hálózathoz, mert csak a 2,4 Ghz frekvencián működik. Az útválasztó és a 2,4 Ghz vezeték nélküli hálózat konfigurálásához hívjon szakembert.
- Page 84: Válassza ki a csatlakozni kívánt WiFi hálózatot, és adja meg a jelszót. A következő felületen válassza a jobb felső sarokban az EZ Mode lehetőséget. Hosszan nyomja meg a gombot párosítás módba való belépéshez. Ellenőrizze az opciót Confirm the indicator is blinking rapidly. Az alkalmazás elkezdi vizsgálni a közeli eszközöket. Miután azonosította készülékét, megkapja a Added Successfully megerősítést. A befejezéshez kattintson a Done gombra. Az alkalmazásból be- és kikapcsolhatja a termosztátot. Megváltoztathatja a termosztát üzemmódját (kézi, ECO, automatikus) vagy beállíthatja a heti programot.
- Page 85: Page 85
- Page 86: A termosztát beállítása Állítsa be az időt és a hét napját Hosszan nyomja meg a gombot körülbelül 5 másodpercig. A perc ikon villogni kezd a képernyőn. Nyomja meg a gombokat ˄ és ˅ hogy elérje a kívánt értéket. Röviden nyomja meg a gombot a megerősítéshez. Az órák jelzője villogni kezd a képernyőn. A munkamód beállítása Röviden nyomja meg a gombot Eco (Üdülési), Ütemezett vagy Kézi mód közötti váltáshoz.
- Page 87: Ütemezett mód A hét időpontjának és napjának beállítása után belép a periódus programozási módjába a hét perceken napjára. A kezdési idő és a hőmérséklet felváltva villog a képernyőn. A gomb perceken egyes megnyomásakor a kiválasztott érték megerősítést nyer, és a következő beállításra lép. Az első periódus időtartamának és hőmérsékletének beállítása után automatikusan átvált a második, majd a harmadik és a negyedik időszakra. Ez folytatódik a 4 időszak beállításával a hét perceken napjára. Az idő negyedóráról negyedórára, a hőmérséklet pedig fél fokról fél fokra változtatható.
- Page 88: Alapbeállítások Időszak Óra Hőfok 22°C 19°C (H-P) 17:00 22:00
- Page 89: Manuális mód Röviden nyomja meg a gombot a kézi üzemmód beállításához. Csak az idő, a hét napja és a hőmérséklet jelenik meg a képernyőn. Nyomja meg a gombokat ˄ és ˅ a kívánt hőmérséklet beállításához. A fűtési rendszer be- és kikapcsol, hogy ezt a hőmérsékletet 24 órán keresztül tartsa. Öko mód (Ünnep) Röviden nyomja meg a gombot az Eco üzemmód beállításához. Egy bőrönd ikon jelenik meg a képernyőn. Nyomja meg a gombokat ˄ és ˅ a kívánt hőmérséklet beállításához.
- Page 90: Billentyűzár funkció A termosztát gombjai azonnal lezáródnak, ha a gyermekvédelmet aktiválják. Hosszan nyomja meg a gombot ˄ és ˅ a billentyűk feloldásához. Nyitott ablak észlelési funkció (OWD) A termosztát kikapcsolja a fűtést, ha a helyiség hőmérséklete hirtelen lecsökken. Ez a hirtelen hőmérséklet-csökkenés akkor következik be, amikor ablakot vagy ajtót nyitnak. Az ikonra megjelenik a képernyőn. A készülék 30 perc múlva visszatér eredeti üzemmódjába. Bármely gomb megnyomásával kilép az OWD módból.
- Page 91: További beállítások Kapcsolja ki a termosztátot a gomb rövid megnyomásával Nyomja meg a gombokat és ˄ egyidejűleg körülbelül 6 másodpercig. Használja a gombokat ˄ és ˅ a beállítások megváltoztatásához. Menu Leírás Intervallum Default Belső érzékelő kalibrálása -8°C~8°C A maximális hőmérsékleti határ beállítása 5°C ~35°C A percekmális hőmérsékleti határ beállítása 5°C ~35°C
- Page 92: Az érzékelő kiválasztása Fagyálló hőmérséklet 5°C~15°C Külső érzékelő kalibrálása -8°C~8°C Kijelzi a padló hőmérsékletét A padló hőmérsékletének túlmelegedési határa 20°C~80°C Hysteresis 0.2°C~6°C Gyermekvédelem 0: Off 1: On Nyitott ablak észlelése (OWD) 1: On 0: Off
- Page 93: Az az időintervallum, amelyben a hirtelen hőmérséklet-csökkenést észlelik. A 13. menüben beállított időintervallumban elvesztett fokok. Az az idő, amely után a készülék visszatér eredeti működési módjához. 2~30 percek. 10~60 percek. 2°C, 3°C, 4°C. A készülék visszatér eredeti működési módjához.
- Page 94: Reset options include Nem (No) and Igen (Yes). Press and hold for 5 seconds. Wait for the device to restart. Software version details are provided. Menus 07 and 08 appear only if option 2 (Air and floor sensor) is selected in menu 04.
- Page 95: Page 95
- Page 96: Telepítési útmutató Helyezze a termosztátot szemmagasságba. A termosztát felszerelése előtt figyelmesen olvassa el a kézikönyv utasításait. A termosztátot süllyesztésre tervezték, és adagot igényel oldalsó rögzítőcsavarokkal.
- Page 97: Egyszerűsített EU-megfelelőségi nyilatkozat Az SC ONLINESHOP SRL kijelenti, hogy a PNI CT25PW süllyesztett intelligens termosztát megfelel a 2014/53/EU RED irányelvnek. Az EU-megfelelőségi nyilatkozat teljes szövege a következő internetes címen érhető el.
- Page 98: Introduzione PNI CT25PW è un termostato da incasso programmabile per i sistemi di riscaldamento con acqua. Può impostare temperature diverse per diversi periodi orari e giorni della settimana. Il termostato può funzionare in 3 modi: a seconda del sensore per pavimento, a seconda del sensore per l’aria, a seconda di entrambi i sensori. La velocità con cui l’aria nella stanza si riscalda non dipende dalle impostazioni del termostato. Il termostato ha una uscita tipo relè non energizzata che invia un comando On/Off verso la caldaia o altri impianti di riscaldamento con acqua.
- Page 99: Connessione termostato alla rete WiFi e aggiunta nella app mobile Tuya Smart. Assicurarsi che il telefono cellulare sia connesso alla rete WiFi a 2,4 GHz e che la posizione GPS sia abilitata. Per una configurazione rapida, assicurarsi che il telefono e il termostato siano il più vicino possibile (1-3 m). Assicurarsi di avere a disposizione una rete wireless da 2,4 GHz e di aver collegato il telefono ad essa. Il termostato non può essere connesso alla rete wireless 5 GHz perché funziona solo sulla frequenza 2.4 GHz. Per configurare il router e la rete wireless da 2,4 GHz, chiamare uno specialista.
- Page 100: Aggiungere la password. Clicca su Next. Selezionare l’opzione EZ Mode nell’angolo in alto a destra. Premere a lungo il tasto sul termostato per accedere alla modalità di abbinamento. L'icona lampeggerà sullo schermo. Spunta l’opzione Confirm the indicator is blinking rapidly. Clicca su Next. L’applicazione inizierà la scansione dei dispositivi nelle vicinanze. Dopo aver identificato il tuo dispositivo, riceverai la conferma Added Successfully. Per finalizzare, fare clic sul pulsante Done. Dall’applicazione è possibile spegnere e accendere il termostato. Modificare il funzionamento del termostato oppure impostare il programma settimanale.
- Page 101: Page 101
- Page 102: Impostare il termostato. Impostazione ora e giorno della settimana. Tenere premuto il tasto per 5 secondi. Premere i tasti ˄ e ˅ per raggiungere il valore desiderato. Premere brevemente il tasto per confermare. L’indicatore dell’ora lampeggerà. Impostazione modalità di funzionamento. Premere il tasto per passare da una modalità all’altra: Eco (Vacanza), Programmato oppure Manuale.
- Page 103: Modalità programmata Dopo aver impostato l’ora e il giorno della settimana, accederà la modalità di programmazione dei quattro periodi per ogni giorno della settimana. Inizia con l’impostazione del primo giorno della settimana e del primo periodo. L’ora di inizio e la temperatura lampeggeranno sullo schermo. Ogni volta che si preme il tasto, il valore selezionato verrà confermato e si passerà all’impostazione successiva. Dopo aver impostato l’ora e la temperatura per la prima fascia oraria, si passa automaticamente alla seconda fascia oraria, quindi alla terza e quarta. Questo continuerà con l’impostazione dei 4 periodi per ogni giorno della settimana (1 - 7). Nota: l’ora può essere modificata da un quarto a un quarto d’ora e la temperatura da mezzo grado a mezzo grado.
- Page 104: Impostazioni predefinite Periodo 1 Temp. 22°C Temp. 19°C Periodo 2 Temp. 22°C Temp. 19°C Periodo 3 Temp. 22°C Temp. 19°C Periodo 4
- Page 105: Modalità manuale Premere brevemente il tasto per impostare la modalità di funzionamento manuale. Sullo schermo sarà visualizzata solo l’ora, il giorno della settimana e la temperatura. Premere i tasti ˄ e ˅ per impostare la temperatura desiderata. Il sistema di riscaldamento si avvierà e si spegnerà per mantenere questa temperatura per 24 ore. Modalità Eco (Vacanza) Premere brevemente il tasto per impostare la modalità di funzionamento vacanza (economico). Sullo schermo apparirà l’icona di una valigia. Premere i tasti ˄ e ˅ per impostare la temperatura desiderata.
- Page 106: Funzioni Blocco tasti Se la funzione protezione bambini è stata attivata, i tasti del termostato si bloccheranno non appena la retroilluminazione dello schermo si spegne. Premere il tasto ˄ e ˅ per 5 secondi per sbloccare temporaneamente i tasti. Rilevamento finestra aperta (OWD) Se la funzione è stata attivata, il termostato interromperà il riscaldamento se la temperatura ambiente scende bruscamente. Questo calo di temperatura si verifica quando una finestra o una porta viene aperta mentre il sistema di riscaldamento è in funzione.
- Page 107: Premendo un tasto qualsiasi uscirà dalla modalità OWD. Spegnere il termostato premendo brevemente il tasto. Usare i tasti ˄ e ˅ per cambiare le impostazioni ed il tasto per passare all’impostazione successiva. Menu Descrizione. Taratura sensore interno -8°C~8°C. Impostazione del limite massimo di temperatura 5°C ~35°C.
- Page 108: Impostazione del limite minimo di temperatura 5°C ~35°C Selezione sensore: 0: Aria, 1: Pavimento, 2: Aria e Pavimento Temperatura antigelo 5°C~15°C Taratura sensore esterno -8°C~8°C Visualizza la temperatura del pavimento Limite surriscaldamento temp. del pavimento 20°C~80°C
- Page 109: Histerezis 0.2°C~6°C 0.3°C Protezione bambini Rilevamento finestra aperta (OWD) attivo Rilevamento finestra aperta (OWD) inattivo Intervallo di tempo per il calo improvviso della temperatura 2~30 min. Gradi persi 2°C, 3°C, 4°C Gradi persi nell’intervallo di tempo impostato Tasti sbloccati Tasti bloccati
- Page 110: Il tempo dopo il quale il dispositivo torna alla modalità di funzionamento originale è di 10~60 min, con un'impostazione predefinita di 30 min. Per il reset, premere il tasto per 5 secondi e attendere il riavvio del termostato. La versione software è indicata nei menu. I menu 07 e 08 compaiono solo se nel menu 04 è stata selezionata l’opzione 2 (sensore aria e pavimento).
- Page 111: Page 111
- Page 112: Istruzioni di installazione Installa il termostato al livello degli occhi. Prima di installare il termostato, leggere attentamente le istruzioni di questo manuale. Il termostato è stato progettato per essere ad incasso e necessita di una dose interrata con viti di fissaggio laterali.
- Page 113: Dichiarazione di conformità UE semplificata SC ONLINESHOP SRL dichiara che il termostato intelligente da incasso PNI CT25PW è conforme alla Direttiva RED 2014/53/UE. Il testo completo della Dichiarazione di conformità UE è disponibile sul seguente sito Web.
- Page 114: Invoering PNI CT25PW is een programmeerbare ingebouwde thermostaat voor vloerverwarming met water. De thermostaat schakelt het verwarmingssysteem in en uit afhankelijk van de ingestelde temperatuur. U kunt verschillende temperaturen instellen voor verschillende tijdsperioden en dagen. De thermostaat kan de temperatuur op drie manieren weergeven: volgens de vloersensor, volgens de ingebouwde luchtsensor, of volgens beide sensoren. Hoe snel de lucht in de kamer opwarmt, hangt af van de grootte en het ontwerp van het verwarmingssysteem. De thermostaat heeft een niet-bekrachtigde relaisuitgang die een aan/uit-commando naar de ketel of andere waterverwarmingssystemen stuurt.
- Page 115: De thermostaat verbinden met het wifi-netwerk en deze toevoegen aan de Tuya Smart-applicatie. Zorg ervoor dat uw mobiele telefoon is verbonden met het 2,4 GHz wifi-netwerk en dat de GPS-locatie is ingeschakeld. Voor een snelle installatie zorgt u ervoor dat de telefoon en de thermostaat zo dicht mogelijk bij elkaar staan (1-3 m). Zorg ervoor dat je over een 2,4 GHz draadloos netwerk beschikt en dat je je telefoon hierop hebt aangesloten. De thermostaat kan niet worden aangesloten op het 5 GHz draadloze netwerk omdat hij alleen werkt op de 2,4 GHz frequentie. Bel een specialist om de router en het 2,4 GHz draadloze netwerk te configureren.
- Page 116: Selecteer het wifi-netwerk waarmee u verbinding wilt maken en voeg het wachtwoord toe. Klik Next. Selecteer de optie in de volgende interface EZ Mode vanuit de rechterbovenhoek. Druk lang op de toets koppelingsmodus te openen. Vink de optie aan Confirm the indicator is blinking rapidly. Klik Next. De applicatie begint met het scannen van apparaten in de buurt. Nadat u uw apparaat heeft geïdentificeerd, ontvangt u de bevestiging Added Successfully. Om te eindigen, klikt u op de knop Done. Vanuit de applicatie kun je de thermostaat aan en uit zetten. Je kunt de werkingsmodus van de thermostaat wijzigen (Manual, ECO, Auto). Of je kunt het weekprogramma instellen.
- Page 117: Page 117
- Page 118: De thermostaat instellen Stel de tijd en de dag van de week in Druk lang op de toets ongeveer 5 seconden ingedrukt. Het minutenpictogram knippert op het scherm. Druk op de toetsen ˄ en ˅ om de gewenste waarde te bereiken. Druk kort op de toets bevestigen. De urenindicator knippert op het scherm. Druk op de toetsen ˄ en ˅ om de gewenste waarde te bereiken. De werkmodus instellen Druk kort op de toets om te schakelen tussen Eco (Vakantie), Geplande of Handmatige modus.
- Page 119: Geplande modus Na het instellen van de tijd en de dag van de week, komt u in de programmeermodus van de 4 periodes voor elke dag van de week. Het begint met het instellen van de eerste dag van de week en de eerste periode. De starttijd en temperatuur knipperen beurtelings op het scherm. Elke keer dat u op de toets drukt, wordt de geselecteerde waarde bevestigd en gaat u naar de volgende instelling. Na het instellen van de tijd en temperatuur voor de eerste periode, schakelt het automatisch over naar de tweede periode en vervolgens naar de derde en vierde periode. Dit gaat door met het instellen van de 4 periodes voor elke dag van de week (1 - 7). De tijd kan worden gewijzigd van kwartier tot kwartier, en de temperatuur van een halve graad tot een halve graad.
- Page 120: Standaard instellingen Periode 1: Uur 07:00, Temp. 22°C Periode 2: Uur 08:30, Temp. 19°C Periode 3: Uur 17:00, Temp. 22°C Periode 4: Uur 22:00, Temp. 19°C
- Page 121: Handmatige modus Druk op de toets om de handmatige bedieningsmodus in te stellen. Alleen de tijd, dag van de week en temperatuur worden op het scherm weergegeven. Druk op de toetsen ˄ en ˅ om de gewenste temperatuur in te stellen. Het verwarmingssysteem wordt in- en uitgeschakeld om deze temperatuur 24 uur vast te houden. Eco-modus (vakantie) Druk kort op de toets om de Eco-bedieningsmodus in te stellen. Er verschijnt een kofferpictogram op het scherm. Druk op de toetsen ˄ en ˅ om de gewenste temperatuur in te stellen.
- Page 122: Keylock-functie Als kinderbeveiliging is geactiveerd in het menu met geavanceerde instellingen, worden de thermostaattoetsen vergrendeld zodra de achtergrondverlichting van het scherm uitgaat. Druk lang op de toets ˄ en ˅ ongeveer 5 seconden ingedrukt om de toetsen te ontgrendelen. Open raam detectie functie (OWD) Als de functie is geactiveerd vanuit het geavanceerde instellingenmenu, zal de thermostaat de verwarming uitschakelen als de kamertemperatuur plotseling daalt. Deze plotselinge temperatuurdaling treedt op wanneer een raam of deur wordt geopend terwijl het verwarmingssysteem in werking is. Het icoon verschijnt op het scherm. Het apparaat keert na 30 minuten terug naar de oorspronkelijke instelling.
- Page 123: Bedrijfsmodus. Door op een willekeurige toets te drukken, verlaat u de OWD-modus. Geavanceerde instellingen. Schakel de thermostaat uit door kort op de toets te drukken. Druk op de toetsen ongeveer 6 seconden ingedrukt. Gebruik de sleutels om de instellingen en de sleutel te wijzigen. Menu Omschrijving. Interne sensorkalibratie -8°C~8°C. Default 0°C. Interval 01.
- Page 124: Instellen van de maximale temperatuurgrens Instellen van de minimum temperatuurgrens Sensor selectie Antivries temperatuur Kalibratie externe sensor Vloertemperatuur weergeven Oververhittingslimiet
- Page 125: Hysteresis range is 0.2°C to 6°C with a default of 0.3°C. Kinderbescherming settings include Off (0) and On (1). Open raam detectie (OWD) can be set to On (1) or Off (0). The time interval for detecting sudden temperature drops is between 2 to 30 minutes, with a default of 15 minutes. Lost degrees in the set time interval can be 2°C, 3°C, or 4°C. The time after which the device returns to the original operating mode is between 10 to 60 minutes, with a default of 30 minutes.
- Page 126: Reset options include 0 for no and 1 for yes. To reset, press 0 for 5 seconds. Wait for the device to restart. Software version details are provided. Menus 07 and 08 appear only if option 2 (air and floor sensor) is selected in menu 04.
- Page 127: Page 127
- Page 128: Installatie instructies Installeer de thermostaat op ooghoogte. Lees de instructies in deze handleiding zorgvuldig door voordat u de thermostaat installeert. De thermostaat is ontworpen om verzonken te worden en vereist een dosis met zijmontageschroeven.
- Page 129: Vereenvoudigde EU-conformiteitsverklaring SC ONLINESHOP SRL verklaart dat de slimme inbouwthermostaat PNICT25PW in overeenstemming is met de RED-richtlijn 2014/53/EU. De volledige tekst van de EU-conformiteitsverklaring is beschikbaar.
- Page 130: Wprowadzenie PNI CT25PW to programowalny, wbudowany termostat do ogrzewania podłogowego wodą, który włącza i wyłącza instalację grzewczą w zależności od zadanej temperatury. Możesz ustawić różne temperatury dla różnych okresów czasu i dni. Termostat może pracować i wyświetlać temperaturę na 3 sposoby: zgodnie z czujnikiem podłogowym, zgodnie z wbudowanym czujnikiem powietrza, według obu czujników. Szybkość nagrzewania się powietrza w pomieszczeniu nie zależy od ustawień termostatu, ale od wielkości i konstrukcji systemu grzewczego. Termostat ma niezasilane wyjście przekaźnikowe, które wysyła polecenie Zał./Wył. do kotła lub innych systemów podgrzewania wody.
- Page 131: Podłączenie termostatu do sieci WiFi i dodanie go do aplikacji Tuya Smart. Upewnij się, że masz telefon komórkowy podłączony do sieci WiFi 2,4 GHz i włączoną lokalizację GPS. W celu szybkiej konfiguracji upewnij się, że telefon i termostat znajdują się jak najbliżej siebie (1-3 m). Upewnij się, że masz dostępną sieć bezprzewodową 2,4 GHz i podłączono do niej telefon. Termostatu nie można podłączyć do sieci bezprzewodowej 5 GHz, ponieważ działa tylko na częstotliwości 2,4 GHz. Aby skonfigurować router i sieć bezprzewodową 2,4 GHz, zadzwoń do specjalisty.
- Page 132: Wybierz opcję EZ Mode z prawego górnego rogu. Długo naciśnij klawisz z termostatu, aby przejść do trybu parowania. Ikona zacznie migać na ekranie. Zaznacz opcję Confirm the indicator is blinking rapidly. Aplikacja rozpocznie skanowanie pobliskich urządzeń. Otrzymasz potwierdzenie Added Successfully. Aby zakończyć, kliknij przycisk Done. Z poziomu aplikacji można włączać i wyłączać termostat. Można zmieniać tryb pracy termostatu (Ręczny, ECO, Auto). Można ustawić program tygodniowy.
- Page 133: Page 133
- Page 134: Ustawianie termostatu Ustaw godzinę i dzień tygodnia Długo naciśnij klawisz przez około 5 sekund. Ikona minut zacznie migać na ekranie. Naciśnij klawisze ˄ i ˅ aby osiągnąć żądaną wartość. Krótko naciśnij klawisz potwierdzać. Wskaźnik dnia zacznie migać na ekranie. Poczekaj kilka sekund, ekran powróci do normalnego trybu wyświetlania. Ustawienie trybu pracy Krótko naciśnij klawisz aby przełączać się między trybem Eco, harmonogramem lub ręcznym.
- Page 135: Tryb zaplanowany Po ustawieniu godziny i dnia tygodnia przejdziesz do trybu programowania 4 okresów dla każdego dnia tygodnia. Rozpoczyna się ustawieniem pierwszego dnia tygodnia i pierwszego okresu. Czas rozpoczęcia i temperatura będą migać kolejno na ekranie. Za każdym naciśnięciem klawisza wybrana wartość zostanie potwierdzona i przejdziesz do następnego ustawienia. Po ustawieniu czasu i temperatury dla pierwszego okresu następuje automatyczne przełączenie na drugi okres, następnie na trzeci i czwarty okres. Będzie to kontynuowane przez ustawienie 4 okresów dla każdego dnia tygodnia (1 - 7). Czas można zmieniać z kwadransa na kwadrans, a temperaturę z pół do pół stopnia.
- Page 136: Ustawienia domyślne Godzina Temp. 22°C 08:30 19°C 07:00 (Pn-Pt) 6 (Sob) 17:00 19°C
- Page 137: Tryb ręczny Krótko naciśnij klawisz, aby ustawić tryb pracy ręcznej. Na ekranie zostanie wyświetlona tylko godzina, dzień tygodnia i temperatura. Naciśnij klawisze ˄ i ˅ ustawić żądaną temperaturę. System ogrzewania włącza się i wyłącza, aby utrzymać tę temperaturę przez 24 godziny. Tryb Eco (wakacje) Krótko naciśnij klawisz, aby ustawić tryb pracy Eco. Na ekranie pojawi się ikona walizki. Naciśnij klawisze ˄ i ˅ ustawić żądaną temperaturę.
- Page 138: Funkcja blokady klawiatury Jeśli w menu ustawień zaawansowanych została aktywowana ochrona przed dziećmi, przyciski termostatu zostaną zablokowane, gdy tylko wyłączy się podświetlenie ekranu. Długo naciśnij klawisz ˄ i ˅ przez około 5 sekund, aby odblokować klucze. Funkcja wykrywania otwartego okna (OWD) Jeśli funkcja została aktywowana z menu ustawień zaawansowanych, termostat wyłączy ogrzewanie, jeśli temperatura w pomieszczeniu gwałtownie spadnie. Ten nagły spadek temperatury występuje w przypadku otwarcia okna lub drzwi podczas pracy systemu ogrzewania. Ikona pojawia się na ekranie. Urządzenie powróci do pierwotnego trybu pracy po 30 minutach. Ikona zniknie z ekranu. Naciśnięcie dowolnego klawisza spowoduje wyjście z trybu.
- Page 139: Zaawansowane ustawienia Wyłączyć termostat przez krótkie naciśnięcie klawisza Naciśnij klawisze i ˄ jednocześnie przez około 6 sekund. Użyj kluczy ˄ i ˅ aby zmienić ustawienia i klawisz przejść do następnego ustawienia. Menu Opis Interwał Kalibracja czujnika wewnętrznego -8°C~8°C Ustawianie maksymalnego limitu temperatury 5°C ~35°C
- Page 140: Ustawianie minimalnego ograniczenia temperatury 5°C ~35°C Wybór czujnika: Powietrze, Podłoga, Powietrze & Podłoga Temperatura przeciwzamrożeniowa 5°C~15°C Kalibracja czujnika zewnętrznego -8°C~8°C Wyświetl temperaturę podłogi tylko czytać Limit przegrzania temperatury podłogi 20°C~80°C Hysteresis 0.2°C~6°C
- Page 141: Ochrona dziecka Wykrywanie otwartego okna (OWD) Przedział czasu, w którym wykrywany jest nagły spadek temperatury Czas, po którym urządzenie powraca do pierwotnego trybu pracy
- Page 142: Reset the device by pressing for 5 seconds. Wait for the device to restart. Software version - Menu 07 and 08 appear only when option 2 (air and floor sensor) is selected in menu 04.
- Page 143: Page 143
- Page 144: Instrukcje instalacji Zainstaluj termostat na wysokości oczu. Przed zainstalowaniem termostatu należy uważnie przeczytać instrukcje zawarte w niniejszej instrukcji. Termostat został zaprojektowany do wbudowania i wymaga dozowania (minimalna głębokość 35 mm) z bocznymi śrubami montażowymi.
- Page 145: Uproszczona deklaracja zgodności UE SC ONLINESHOP SRL oświadcza, że inteligentny termostat podtynkowy PNI CT25PW jest zgodny z dyrektywą RED 2014/53/UE. Pełny tekst deklaracji zgodności UE jest dostępny pod następującym adresem internetowym.
- Page 146: Introducere PNI CT25PW este un termostat incastrat programabil pentru incalzire in pardoseala cu agent termic. Termostatul porneste si opreste sistemul de incalzire in functie de nivelul de temperatura setat. Puteti seta temperaturi diferite pentru perioade orare si zile diferite. Termostatul poate functiona si afisa temperatura in 3 moduri: in functie de senzorul de pardoseala, in functie de senzorul de aer incorporat, in functie de ambii senzori. Cat de repede se incalzeste aerul in incapere nu depinde de setarile termostatului. Termostatul are o iesire tip releu neenergizata care trimite o comanda On/Off catre centrala termica sau alte sisteme de incalzire cu agent termic.
- Page 147: Conectare termostat la reteaua WiFi si adaugare in aplicatia Tuya Smart Asigurati-va ca aveti telefonul mobil conectat la reteaua WiFi 2.4GHz si locatia GPS activata. Pentru o configurare rapida, asigurati-va ca telefonul si termostatul se afla cat mai aproape unul de celalalt (1-3 m). Asigurati-va ca aveti disponibila o retea wireless pe frecventa 2.4 Ghz si ca ati conectat telefonul la aceasta. Termostatul nu poate fi conectat la reteaua wireless de 5 Ghz deoarece el functioneaza doar pe frecventa 2.4 Ghz. Pentru configurarea router-ului si a retelei wireless de 2.4 Ghz apelati la un specialist.
- Page 148: In the next interface, select the EZ Mode option. Press and hold the button on the thermostat to enter pairing mode. Then, press the ˄ button. The icon will blink on the screen. Check in the app that the indicator is blinking rapidly. Click Next. The app will start scanning for nearby devices. After identifying your device, you will receive confirmation Added Successfully. To finalize, click the Done button. From the app, you can turn the thermostat on and off, change the operating mode (Manual, ECO, Auto), or set the weekly schedule.
- Page 149: Page 149
- Page 150: Programare termostat Setare ora si zi din saptamana Tineti apasata tasta timp de 5 secunde. Pe ecran va clipi indicatorul minutelor. Apasati tastele ˄ si ˅ pentru a ajunge la valoarea dorita. Apasati scurt tasta pentru a confirma. Indicatorul orei va clipi. Apasati tastele ˄ si ˅ pentru a ajunge la valoarea dorita. Apasati scurt tasta pentru a confirma. Indicatorul zilei saptamanii va clipi. Apasati tastele ˄ si ˅ pentru a ajunge la valoarea dorita. Asteptati cateva secunde, ecranul se va intoarce la modul normal de afisare. Setare mod de functionare Apasati tasta pentru a schimba intre modul Eco (Vacanta), Programat sau Manual.
- Page 151: Modul programat Dupa ce ati setat ora si ziua saptamanii, veti intra in modul de programare a celor 4 perioade pentru fiecare zi a saptamanii. Se incepe cu setarea primei zile a saptamanii si a primei perioade. Pe ecran vor clipi pe rand ora de start si temperatura. La fiecare apasare a tastei va fi confirmata valoarea aleasa si se va trece la setarea urmatoare. Dupa ce s-a setat ora si temperatura pentru prima perioada, se trece automat la perioada a doua, apoi la a treia si la a patra. Se va continua astfel cu setarea celor 4 perioade pentru fiecare zi a saptamanii (1 - 7). Nota: Ora poate fi schimbata din sfert in sfert de ora, iar temperatura din jumatate in jumatate de grad.
- Page 152: Setari implicite Perioada Temp. 22°C 19°C
- Page 153: Modul manual Apasati scurt tasta pentru a seta modul de functionare. Pe ecran va fi afisata doar ora, ziua saptamanii si temperatura. Apasati tastele ˄ si ˅ pentru a seta temperatura dorita. Sistemul de incalzire va porni si se va opri pentru a mentine aceasta temperatura pe durata a 24 de ore. Modul economic (vacanta) Apasati scurt tasta pentru a seta modul de functionare: Vacanta (Economic). Pe ecran va aparea o pictograma sub forma de valiza. Apasati tastele ˄ si ˅ pentru a seta temperatura dorita.
- Page 154: Blocare taste Daca functia Protectie copii a fost activata, tastele termostatului se vor bloca imediat ce lumina de fundal a ecranului se va stinge. Apasati tasta ˄ si ˅ timp de 5 secunde pentru a debloca temporar tastele. Detectie fereastra deschisa (OWD) Termostatul va opri incalzirea daca temperatura din camera va scadea brusc. Aceasta scadere brusca a temperaturii se intampla atunci cand este deschis un geam sau o usa. Pe ecran apare pictograma. Dispozitivul se va intoarce la modul initial de functionare dupa 30 minute. Pictograma dispare de pe ecran. Apasand orice tasta, veti iesi din modul OWD.
- Page 155: Setări avansate Opriți termostatul apăsând scurt tasta. Folosiți tastele pentru a schimba setările. Meniu descriere Calibrare senzor intern -8°C~8°C. Setare limită maximă temperatură 5°C ~35°C. Setare limită minimă temperatură 5°C ~35°C.
- Page 156: Selectare senzor Aer Pardoseala Aer si pardoseala Temperatura anti-inghet 5°C~15°C -8°C~8°C Doar afisare Calibrare senzor extern Afisare temperatura pardoseala Limita supraincalzire temperatura pardoseala 20°C~80°C 0.2°C~6°C
- Page 157: Protectie copii Detectie fereastra deschisa (OWD) Intervalul de timp in care se detecteaza scaderea brusca a temperaturii Grade pierdute in intervalul de timp setat Intervalul de timp dupa care dispozitivul se intoarce la modul initial de functionare
- Page 158: Resetare Apasati tasta timp de 5 secunde. Asteptati repornirea termost. Versiune software Meniurile 07 si 08 apar doar daca la meniul 04 a fost selectata optiunea 2 (Senzor aer si pardoseala).
- Page 159: Page 159
- Page 160: Instructiuni de instalare Instalati termostatul la nivelul ochilor. Inainte de instalarea termostatului, cititi cu atentie instructiunile din acest manual. Termostatul a fost conceput pentru a fi montat incastrat si necesita o doza ingropata cu suruburi de prindere laterale.

Honeywell VisionPRO Series 7 Day Programmable Thermostat User Guide

GENERAL LIFE HT220 Smart Room Thermostat User Manual

Zehnder ComfoControl Ease Installation Guide

telethings TELESWITCH – 2L Smart LoRaWAN Thermostat User Manual

Aprilaire S86N MUPR Multi Stage Universal Thermostat Owner’s Manual

KeepRite TSTATIIEWF-01 Ion Gray Smart Thermostat Owner’s Manual

Honeywell TH3110D1008 Non-Programmable Thermostat Instruction Manual

hager 75643134 KNX Glass Sensor 3g Thermostat Owner’s Manual

HBX THM-0100 Programmable Thermostat Instruction Manual

hama 00176592 Smart Radiator Thermostat Instruction Manual