Home > Emerson > Emerson ST55 Sensi Wi-Fi Programmable Thermostat Installation Guide

Emerson ST55 Sensi Wi-Fi Programmable Thermostat Installation Guide

TM  
Sensi Wi-Fi Thermostat  
INSTALLATION GUIDE  
Models: 1F86U-42WF, UP500W  
Version: October 2017  
© 2017 Emerson Electric Co. All rights reserved.  
GeneralDetails
NameEmerson ST55 Sensi Wi-Fi Programmable Thermostat Installation Guide
MakeEmerson
LanguageEnglish
FiletypePDF (Download)
File size0.25 MB
Download PDF
1 Star2 Stars3 Stars4 Stars5 Stars (1 votes, average: 5.00 out of 5)
Loading...
EMERSON ST75W Sensi Touch Wi-Fi Smart Thermostat Installation Guide
EMERSON Thermostat Common Wire Kit SA11 Instruction Manual
EMERSON 1F75H-21PR Programmable Heat Pump Thermostat Instruction Manual
EMERSON 1F75C-11PR Programmable Thermostat Installation Guide
EMERSON 1D56-310 White-Rodgers Low Voltage Horizontal Mounting Thermostat Instruction Manual
EMERSON Programmable Touchscreen Thermostat Setup in E2 and Site Supervisor User Guide
EMERSON 1F76U-22WFB Series Sensi Lite Smart Thermostat Installation Guide
EMERSON 1F87U-42WF Sensi Smart Thermostat User Guide
EMERSON 1F83C-11NP Single Stage Thermostat Owner’s Manual
EMERSON 1F75P-21PR Display Thermostat Instruction Manual

Emerson ST55 Sensi Wi-Fi Programmable Thermostat Installation Guide
Get the free PDF manual for the Emerson ST55 Sensi Wi-Fi Programmable Thermostat Installation Guide and access setup steps, usage instructions, and troubleshooting tips. 👉 View online or download now to keep your thermostat running smoothly!
Emerson ST55 Sensi Wi-Fi Programmable Thermostat Installation Guide Overview
Summary of Contents

  • Page 1: Sensi Wi-Fi thermostat installation guide. Models: 1F86U-42WF, UP500W. Version: October 2017. © 2017 Emerson Electric Co. All rights reserved.
  • Page 2: Contents Installation guide Downloading the Sensi app Creating a Sensi account Installing the Sensi thermostat Connecting the Sensi thermostat Notes
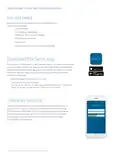
  • Page 3: Installing the Sensi thermostat involves downloading the Sensi app and creating an account. You need to install the thermostat to your wall and connect it to Wi-Fi. If no thermostats are registered, the app will prompt you to add one. Choose the appropriate thermostat model from the options provided. You can check your model number on the back of the thermostat faceplate. The app will ask if the thermostat is already on the wall. Select “No, it needs to be installed” for the full installation process. If professionally installed, choose “Yes, it is on the wall” to connect to Wi-Fi only. Gather all necessary tools for installation before proceeding. The Sensi app provides a step-by-step process for installation.
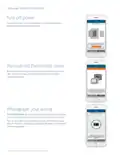
  • Page 4: Installing the Sensi thermostat requires turning off the power to your heating and air conditioning system before handling the thermostat wires. Remove the old thermostat cover using a screwdriver or by pushing the pressure latch. Some covers pull off while others need to be released using a screwdriver. It is important to photograph your wiring. The Sensi app will prompt you to take a picture of your existing thermostat and old wiring for troubleshooting purposes. The picture you take will be saved to your camera roll or photo gallery.
  • Page 5: Installing the Sensi thermostat involves discarding any jumper wires from your old unit. Sensi has a built-in jumper wire. Choose the terminal labels that have wires attached to them on your old thermostat. The app will inform you if you have a valid configuration. If you receive an invalid configuration message, you can check compatibility online. You need to select the type of system you have.
  • Page 6: Installing the Sensi thermostat involves several key steps. Label your wires using the provided wire label stickers, removing one wire at a time. Disconnect wires and remove the old thermostat base from the wall. Use the provided mounting screws to secure the Sensi base to the wall. Once the Sensi base is mounted, insert the wires into the terminals and secure each wire in place with a screwdriver. Push the front display onto the thermostat base to attach the cover. Finally, turn the power to your system back on.
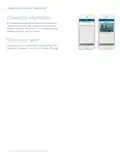
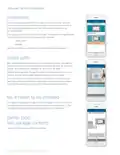
  • Page 7: Connecting to Wi-Fi This portion of the installation guide covers how to connect your thermostat to Wi-Fi. If you chose the first option, “No, it needs to be installed,” the app will provide instructions for installing and wiring your thermostat before you connect to Wi-Fi. If you chose, “Yes, it is on the wall,” the app will jump right into connecting your thermostat to Wi-Fi. Press menu, then connect. The Wi-Fi signal will flash in the upper left hand corner of the thermostat. In the app, press “Next” to continue. Select what option your thermostat displays. Go into your iPhone’s/iPad’s Wi-Fi Settings, and you’ll see a list of available networks. Input the Sensi password that came in the packaging as the Sensi PIN. If you lost the card, this code can be found on the back of the thermostat face plate.
  • Page 8: Connecting using an Android device involves tapping the Connect my Sensi to Wi-Fi button in the app. You will see a Sensi network in the list of available networks. After connecting to the network, return to the Sensi app and press the Next button to continue. Input the Sensi password as the 8-digit PIN found on the welcome guide or thermostat faceplate. Select your home Wi-Fi network from a list of available networks, ensuring it is 2.4GHz. If your network is hidden, make it visible for installation purposes. Type in the password for your home Wi-Fi network and press Next to continue. You can select a name or choose a custom name for your thermostat. After connecting Sensi, the app will prompt you to register the thermostat. You can choose the Locate Me option or fill in your address manually.
  • Page 9: Connecting the Sensi thermostat If a contractor professionally installed your thermostat and registered as a Sensi partner, they have the option to input their phone number here. Congratulations on successfully installing Sensi. Press “Start Using Sensi Thermostat” to open the main screen of the app.
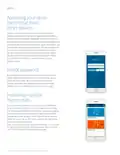
  • Page 10: Accessing your Sensi thermostat from other devices allows control of all registered thermostats with your account credentials. Sharing your email and password grants others access to your thermostats. You can change your credentials within the app or on the Sensi website. There is no limit to the number of devices that can access the thermostat. If you forget your password, you can reset it through the app or website, and a temporary password will be sent to your email. When installing multiple thermostats, follow the same installation process in the Sensi app. Use the plus sign in the app to add additional thermostats to your account. To reconnect a registered thermostat to a new router, select the appropriate option in the app and follow the connection steps.
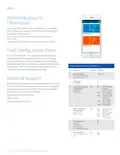
  • Page 11: Accessing account information allows you to change your account details and email preferences associated with your Sensi. For iOS, tap the person icon in the upper right corner. For Android, tap the three dots in the upper right corner. The HVAC configuration menu is accessible if you chose the installation option in the Sensi app. You can check your system configurations by accessing the menu on the physical thermostat. The configuration menu includes wireless setup, temperature unit selection, and outdoor equipment configuration. For problems connecting your Sensi thermostat, contact the Sensi Technical Support team for assistance. The configuration options include settings for cooling, heat pumps, and indoor equipment. The reversing valve position setting is for heat pumps only. The wireless radio setting allows you to turn the Wi-Fi radio on or off.
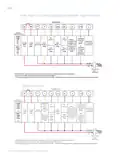
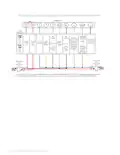
  • Page 12: Single stage or multi-stage conventional system with single transformer. Thermostat wiring does not follow a standardized color code. Label thermostat wires before removing old thermostat from the wall. Heat pump systems configuration includes single stage heat and cool. Blower/circulator fan energized on call for cool and heat if configured for electric heat. Multi-stage AC configuration includes energized constantly in heat mode. Dual fuel option de-energizes heat mode first stage. Internal jumper between RC and RH located on back of thermostat above battery compartment. Common connection required for heat only, cool only, or heat pump systems. Dots indicate phase relationship.
  • Page 13: Single stage or multi-stage system (no heat pump) with two transformers Thermostat System configuration Single stage AC1 Energized constantly in Cool Mode Blower/circulator fan energized on call for cool Heat pump “L” terminal connection Multi-stage AC2 Energized constantly in Heat Mode Thermostat wiring does not follow a standardized color code.