Home > Emerson > EMERSON Programmable Touchscreen Thermostat Setup in E2 and Site Supervisor User Guide
EMERSON Programmable Touchscreen Thermostat Setup in E2 and Site Supervisor User Guide


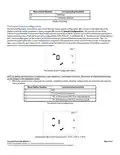


Programmable Touchscreen Thermostat
Setup in E2 and Site Supervisor
Quick Start Guide
The Emerson Programmable Touchscreen Thermostat (P/N 810-1600) is a configurable
device intended for light commercial applications. The thermostat is a communicating,
intelligent sensor and controller combination with built-in temperature and humidity
sensors used to control systems such as conventional Rooftop Units (RTU) and Heat Pumps
(HP). The thermostat communicates over a Modbus RTU network that easily integrates
with a building management system (BMS). For more information, download the full user
manual (P/N 026-1739) here:
thermostat-installation-operation-manual-en-5390496.pdf
Thermostat Installation and Mounting
To open the thermostat enclosure, grip the top and the bottom edge of the front part of
the device and pull straight. A certain physical resistance is normal from the 24x contacts pins
(terminal strips and terminal blocks) that have to be separated during the operation.
To close the thermostat enclosure, make sure to align the top and the bottom tabs
between the front part and the baseplate, and then push the front part firmly toward the wall.
Again, some force is required to mate both parts.
Note that both top and bottom securing screws are optional and normally not installed on the
units.
To fix the baseplate on a wall, pass the wires through the opening of the baseplate, and use either
2x self-taping screws and dry-wall anchors, or regular 6-32 machine screws to attach on a
standard single-gang electrical junction box (2” x 4”).
CAUTION! Do not over-tighten the screws when attaching the baseplate on a wall as physical
damage may occur.
Keep the thermostat housing and vents clean and free of any debris to avoid malfunction of the
device.
The thermostat should be mounted:
> About 5 ft (1.5 m) from the floor.
> On a part of wall without hidden pipes or ductwork.
> In a room that operating limits are within 32°F to 122°F (0°C to 50°C).
> In a room that humidity operating range is within 0% to 95% relative humidity, non-condensing.
The thermostat should not be mounted:
> Nearby a window, on an outside wall, or next to a door leading to the outside.
> Where exposed to direct light and heat from any heat source, such as a lamp, the sun, a fireplace, or any heating element which may
cause a false reading (temperature measurement offset).
> Nearby a direct airflow from supply registers (air vent or duct outlet).
> In areas and locations with poor air circulation such as behind a door.
Document Part # 026-4850 Rev 1
Page 1 of 10
©2020 Emerson Retail Solutions, Inc. This document may be photocopied for personal use.

| General | Details |
|---|---|
| Name | EMERSON Programmable Touchscreen Thermostat Setup in E2 and Site Supervisor User Guide |
| Make | Emerson |
| Language | English |
| Filetype | PDF (Download) |
| File size | 0.23 MB |


EMERSON ST75W Sensi Touch Wi-Fi Smart Thermostat Installation Guide

EMERSON Thermostat Common Wire Kit SA11 Instruction Manual

EMERSON 1F75H-21PR Programmable Heat Pump Thermostat Instruction Manual

EMERSON 1F75C-11PR Programmable Thermostat Installation Guide

EMERSON 1D56-310 White-Rodgers Low Voltage Horizontal Mounting Thermostat Instruction Manual

EMERSON 1F76U-22WFB Series Sensi Lite Smart Thermostat Installation Guide

EMERSON 1F87U-42WF Sensi Smart Thermostat User Guide

EMERSON 1F83C-11NP Single Stage Thermostat Owner’s Manual

EMERSON 1F75P-21PR Display Thermostat Instruction Manual

EMERSON 1F75H-21NP Non Programmable Heat Pump Thermostat Instruction Manual

EMERSON Programmable Touchscreen Thermostat Setup in E2 and Site Supervisor User Guide Overview
Summary of Contents
- Page 1: Programmable Touchscreen Thermostat is a configurable device intended for light commercial applications. The thermostat is a communicating, intelligent sensor and controller combination with built-in temperature and humidity sensors. The thermostat communicates over a Modbus RTU network that easily integrates with a building management system. To open the thermostat enclosure, grip the top and bottom edge of the front part of the device and pull straight. To close the thermostat enclosure, align the top and bottom tabs between the front part and the baseplate, then push the front part firmly toward the wall. To fix the baseplate on a wall, pass the wires through the opening of the baseplate and use either self-taping screws or regular machine screws. Do not over-tighten the screws when attaching the baseplate on a wall as physical damage may occur. The thermostat should be mounted about 5 ft from the floor and in a room with operating limits within 32°F to 122°F. The thermostat should not be mounted nearby a window, on an outside wall, or next to a door leading to the outside. Keep the thermostat housing and vents clean and free of any debris to avoid malfunction of the device.
- Page 2: Thermostat wiring and connections involve connecting the terminal block after affixing the baseplate on the wall. The thermostat power and communication matrix outlines connections for various systems, including 2H/2C systems and heat pump systems. For systems with only one stage, the second stage terminals can be left floating open. On the first start-up, the default system configuration is idle, requiring configuration for operation. To access the configuration menu, press the technician icon for 10 seconds. If previously configured, the technician icon must be displayed by touching the right-bottom corner of the screen. The document includes a part number and revision information. The content is intended for personal use and may be photocopied. For the latest technical documentation and updates, a website is referenced.
- Page 3: Configuration menu access allows users to change the Modbus device address. The first configuration menu shows Ad on the display to indicate the address parameter being changed. To change the value, press the up or down arrow and then the check icon to proceed. Press CA to cancel and exit the configuration menu without saving changes. The Modbus device address range is from 1 to 247. The second configuration menu allows users to change the Modbus device baud rate. “br” is displayed to indicate the baud rate parameter being changed. To change the baud rate value, use the up or down arrow and then the check icon to proceed. Press CA to cancel and exit the baud rate configuration menu without saving changes. Document part number is 026-4850 Rev 1.
- Page 4: Thermostat system configuration allows users to set the thermostat system configuration. The current revision of the Emerson Programmable Touchscreen Thermostat supports conventional HVAC systems such as RTU and heat-pump systems using a reversing valve. There are four possible configurations: IDLE, RTU, HP_O, and HP_B. In the IDLE configuration, all outputs of the thermostats are open and the thermostat controls are inactive. To change the value, press either the up or down arrow, and then press the check icon to go to the next parameter. Press CA to cancel and return to the normal display without saving any changes. By default, the thermostat is configured as a 2 heat-stages and 2 cool-stages thermostat. The number of heating/cooling stages can be changed in the subsequent menus. When the system is not configured, all other configurations are accessible through the menu. Configuration menu options include IDLE, RTU, HP_O, and HP_B.
- Page 5: When the system is already configured in RTU, HP_O or HP_B, only the IDLE and the current configuration are accessible through the menu. In order to change the thermostat’s configuration from a functional configuration to another one, the thermostat must be set to IDLE configuration first. A factory reset of all parameters will occur when the system is set to the IDLE configuration, except current date and time that are kept with the use of a Real-Time Clock (RTC). The number of heating stages can be modified inside this menu. The letters “HS” stands for Heating Stages. Possible values for heating stages are 1 heating stage, 2 heating stages. The number of cooling stages can be modified inside this menu. The letters “CS” stands for Cooling Stages. Possible values for cooling stages are 1 cooling stage, 2 cooling stages. Values will not be saved until the last configuration menu is reached.
- Page 6: Thermostat display when restarting occurs (rebooting) System configuration menu (new system configuration mode after idle) Full segments display test The fourth configuration menu allows users to test the full display segments. This allows a complete review of the display segments and to inform the user of all possible segments in the current Emerson Programmable Touchscreen Thermostat revision. System revision display The fifth and last configuration menu provides the current system revision number. This number is shown with three digits. Note that there is no decimal after the first digit, but the revision number contains a decimal. The software revision will be updated for the latest official release.
- Page 7: System revision display If at least one of those parameters has been changed, the thermostat will reboot. Prior to device restart, the display will show “- -” to indicate that the device is about to reboot. The programmable touchscreen thermostat requires adding a description file to E2. Ultrasite32 software must be installed to perform a description file upload. Connect to E2 using UltraSite32. Right-click on Site Level and click Connect. Select the appropriate description (*.dsc) file for Touch T-Stat.dsc from the computer. Once completed, disconnect from the E2 and reboot the E2 controller. Do not omit the step of rebooting the controller.
- Page 8: Device and COM port setup in E2 Modbus device setup E2 COM port setup Log into the E2 by pressing @. Press I then ꢀ, ꢁ and to access General controller Info. Press B twice to move to C3: Serial tab. Select the COM port that the device is wired to (COM2, COM4 or COM6). Press D for LOOK UP and select MODBUS-1, MODBUS-2 or MODBUS-3. Set the MODBUS connection with the specified baud rate, data size, parity, and stop bits. Press J to save changes. Press H to return to the Home screen.
- Page 9: Installing the thermostat in E2 involves entering the connected I/O boards and controllers. To install the thermostat application, highlight the Tch T-Stat and enter the desired number of devices under Quantity up to 6. Commissioning the thermostat requires accessing the network summary screen and selecting the appropriate Modbus number. The default address for the device is 1, and a confirmation will indicate that the Modbus device address is set. The polarity of the Modbus connection between Site Supervisor and Touchscreen Thermostat is reversed. For device and COM port setup in Site Supervisor, select the Com Port the device is wired to and the available Modbus. Set the Com Port Baud to 19.2 Kbaud, data size to 8, parity to None, and stop bits to 1. Click Save to save the changes made in the Site Supervisor settings. Document Part # 026-4850 Rev 1 is noted on the page. This document may be photocopied for personal use.
- Page 10: Installing the thermostat in site supervisor Installing the thermostat application Expand the HVAC category and go to the Add Control drop-down list and select Touch T-Stat. Commissioning the thermostat Select Modbus assigned to the Com Port selected. Select the Modbus Address (default address is 1). Select the HVACZone to associate with the thermostat. Click Update to save settings. Wait a few seconds and the device should appear Online. Scan the QR code to download the full user manual P/N 026-1739.

Danfoss RET-MD Electronic Intelligent Dial Setting Thermostat Installation Guide

BlueLink 8205 Smart Wi-Fi Thermostat User Manual

Danfoss RET230 HCW-1 Electronic Heat Cool Thermostat User Manual

STELPRO ASMC402 Maestro Zigbee Smart Programmable Thermostat User Guide
Danfoss VICUX40F Icon Dial 230V Room Thermostat Installation Guide

HERSCHEL MD2 Wi-fi Enabled Wired Thermostat Instruction Manual

Google G953-01573-01-A Nest 4th Gen Smart Wi-Fi Thermostat Owner’s Manual

HERSCHEL iQ T2 Wireless Thermostat Instruction Manual

Danfoss ECtemp 130 Electronic Thermostat Installation Guide

EPH CONTROLS HRT Battery Operated Non Programmable Thermostat Installation Guide