
COPELAND 1F95G-1235GC Humidity Universal Thermostat Instruction Manual


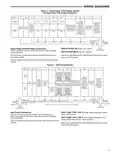






OPERATINGYOUR THERMOSTAT
ride the temperature setting for a (default) four hour override
period. The override period can be shortened by pressing
or lengthened by pressing . Program Override period can
range from 15 minutes to 7 days.
Manual Operation (Bypassing the Program)
Programmable Mode
Manual operation will bypass the program and allow you to
adjust the temperature as you desire. The temperature you
Example: If you turn up the heat during the morning program,
it will be automatically lowered later, when the temporary hold
period ends. To cancel the temporary setting at any time and
return to the program, press Run Schedule.
set in Hold will be maintained indefinitely. Press
or
to
adjust the temperature. The HOLD key will appear. Press the
HOLD key. "Hold At" will appear next to the setpoint tem-
perature and the thermostat will maintain the new setpoint
temperature until Run Schedule is pressed to resume pro-
gram operation.
If the SYSTEM key is pressed to select AUTO the
thermostat will change to "Heat" or "Cool", whichever
ran last. If it switches to "Heat", but you want "Cool", or it
changes to "Cool", but you want "Heat", press both keys
simultaneously to change to the other mode.
Program Override (Temporary Override)
Press
or
keys to adjust the temperature. This will over-
PROGRAMMING
Sat and Sun or either Sat or Sun.
Set Current Time and Day
To copy a program from one day to another:
1. Press Menu key to enter installer menu. Then press
Set Time once to indicate hour & AM or PM designation
in clock display.
1. In Set Schedule mode, enter the program for the day or
select the day you wish to copy by pressing Advance Day.
2. Press and hold either the
reach the correct hour and AM or PM designation.
or
touch key until you
2. Press Copy. The display will show “Copy” next to the
SYSTEM key and the day of the week that will be copied.
3. Press Set Time again to display minutes only in clock
display.
3. Press Advance Day. The day being copied will be indi-
cated and the other days will be flashing.
4. Press and hold either the
reach the correct minutes.
or
touch keys until you
4. If you wish to copy to all days skip to next step or press
Advance Day until the day you wish to copy to is flashing.
5. Press Set Time once again to display year.
5. Press Copy. “Copy” will disappear, the day you copied
from will disappear and the day(s) you copied to will be on.
6. Press either the
correct year.
or
touch key until you reach the
6. If you wish to copy this same program into other days,
press Copy and repeat steps 3, 4 and 5.
7. Press Set Time once again to display month.
7. Press Run Schedule to return to normal operation.
8. Press either the
correct month.
or
touch key until you reach the
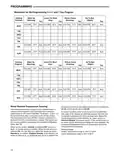
Fill in the blank schedule on the next page then:
9. Press Set Time once again to display date of the month
along with day of the week at top row (which is automatic).
Enter the Heating Program
1. Press the Menu key and then press Set Schedule. Press
SYSTEM key to select "Heat" in the system switch area
indicating the active mode being programmed.You can
switch to the other mode by pressing the system switch at
any time.
2. The top of the display will show the day(s) being pro-
grammed. The time and set at temperature are also
displayed. "Morning" will also be displayed to indicate
the period.
10. Press and hold either the
or
touch key until you
reach the correct day of the month and day of the week
displayed at the top row.
11. Press Run Schedule once or twice to remove the key.
Now the display will show the correct time and room tem-
perature.
Automatic Daylight Saving Calculation
The Real Time Clock will adjust automatically for daylight sav-
ings time, in the following manner:
3. Press
or
selected temperature for the 1st heating period (Morning).
key to change the temperature to your
Increment one hour at 2 AM on the second Sunday of March
and decrement one hour at 2 AM on the first Sunday of
November.
4. Press or key to adjust the start time for period.
The time will change in 15 minute increments.
5. Press FAN to select Auto or Prog.
The daylight saving feature can be enabled or disabled in
installer configuration menu. Default is DS ON (enabled).
After entering installer configuration mode, momentarily
press touch key until the display indicates dS (in actual tem-
6. After you have set the time and the temperature for the
period to begin, press Set Schedule to advance to the
next program period.
7. Repeat steps 2 through 6 until all of the program times
and temperatures are set for all program periods on
that day.
perature digits) and on (default – in clock digits).
keys will toggle display and operation from on to OFF.
and
Programming Tip: Copy Program
8. Press "Advance Day" to change to the next day and
repeat steps 2 through 8.
When programming your thermostat, you may copy the pro-
gram from one day to another day or group of days using the
Copy key. In 7 day programming mode, a day can be copied
to another day or all six other days. In 5/1/1 day programming
mode the weekday (Mon – Fri) program can be copied into
9. When programming is complete and all of the times and
temperatures match your desired heating schedule,
press Run Schedule. The thermostat will now run your
program.
12

| General | Details |
|---|---|
| Name | COPELAND 1F95G-1235GC Humidity Universal Thermostat Instruction Manual |
| Make | Copeland |
| Language | English |
| Filetype | PDF (Download) |
| File size | 0.42 MB |
 (1 votes, average: 5.00 out of 5)
 Loading...

COPELAND ST55 Sensi Smart Thermostat Instruction Manual

COPELAND 1F76U-22WFB Series Sensi Lite Smart Thermostat Installation Guide

COPELAND 026-1739 Programmable Touchscreen Thermostat User Manual

COPELAND P-N 810-1600 Programmable Touchscreen Thermostat User Guide

COPELAND 1F86-0244 Blue 2 Inch Single Stage Thermostat Instruction Manual


Rayotec Coloursense Wi-Fi Thermostat Instruction Manual

sinope TH1400NP Non Programmable Low Voltage Thermostat Installation Guide

Beca BAC-003 Smart ZigBee Thermostat User Guide

ESI ESRTP6B WiFi Wireless Programmable Room Thermostat Instruction Manual

NT NetX X5 IP Ethernet Thermostat Instruction Manual

Honeywell Home T6 Pro Smart Programmable Thermostat User Guide

KeepRite TSTATIIEWF-01 Ion Gray Smart Thermostat Owner’s Manual

White Rodgers 1F95-1277 Big Blue Universal Thermostat Instruction Manual

Danfoss RET1001M – V2 Room Thermostat Installation Guide

WYZE WTMSRS 3-in-1 Digital Room Sensor for Smart Thermostat User Manual