
heatmiser Slimline-B V3 Programmable Room Thermostat Owner’s Manual


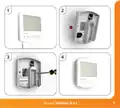
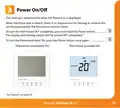
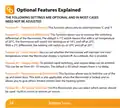

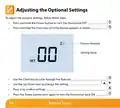
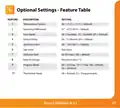



Installation Procedure
Do
Mount the thermostat at eye level.
Read the instructions fully so you get the best from our product.
Don’t
Do not install near to a direct heat source as this will affect functionality.
Do not push hard on the LCD screen as this may cause irreparable damage.
This battery thermostat is designed to be surface mounted.
Step 1
Carefully separate the front half of the thermostat from the back plate by placing a
small flat head terminal driver into the slots on the bottom face of the thermostat.
Step 2
Mark 2 hole positions on the wall using the back plate as a positioning template.
Drill the marked positions and insert a wall plug into each hole. Terminate the
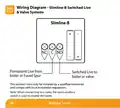
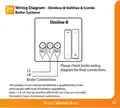
thermostat as shown in the diagrams on pages 30-31 of this booklet.
Step 3
Screw the thermostat back plate securely on the wall and fit the terminal cover.
Step 4
Clip the front of the thermostat back onto the thermostat back plate.
6
Battery Series

| General | Details |
|---|---|
| Name | heatmiser Slimline-B V3 Programmable Room Thermostat Owner’s Manual |
| Make | heatmiser |
| Language | English |
| Filetype | PDF (Download) |
| File size | 0.42 MB |
 (1 votes, average: 5.00 out of 5)
 Loading...

heatmiser neoStat Touch-e Touchscreen Electric Floor Heating Thermostat Owner’s Manual

heatmiser Slimline-RF V3 Programmable Wireless Thermostat Instructions

heatmiser DS1-V2 Thermostat Owner’s Manual

heatmiser neoStat-e Electric Floor Heating Thermostat Instructions

heatmiser neoStat-Pro Smart Thermostat Instruction Manual


LUX CAG1500 SERIES Smart Temp Electronic Thermostat Instruction Manual

Danfoss RET 230 Electronic Heat Cool Thermostat Instruction Manual

Danfoss RA 2000 Radiator Thermostat Installation Guide

Danfoss ECtemp 330 Electronic Thermostat Installation Guide

DEVI AN420938619179 Touch Electronic Intelligent Timer Thermostat Installation Guide

Honeywell Home TH8320R1003-Uv VisionPRO 8000 with RedLINK Multistage Thermostat Installation Guide

Danfoss TPOne-M Electronic Programmable Room Thermostat User Guide

JUMO exTHERM-AT Explosion-Protected Surface-Mounted Thermostat Instruction Manual

Danfoss RAS-C2 Radiator Thermostat Installation Guide

Roth Minishunt Plus Thermostat and Capillary Sensor Installation Guide