TIOEVO0003 TEVO Wireless Thermostat User Manual
| General | Details |
|---|---|
| Name | TIOEVO0003 TEVO Wireless Thermostat User Manual |
| Make | Tio |
| Language | English |
| Filetype | PDF (Download) |
| File size | 0.38 MB |

Tio 230v Thermostat User Manual

TX1000 Thermostat Instruction Manual

Tio TEVO Smart RF Wireless Thermostat User Manual

TIOEVO0003 TEVO Wireless Thermostat User Manual Overview
Summary of Contents
- Page 1: Page 1
- Page 2: Enabling complete home heating control with intelligent adaptations for underfloor heating, radiator circuits, and hot water timer control. The Tio TEVO wireless thermostat is only compatible with the Tio wireless wiring centre. A Tio multifunctional gateway is required to access the in-app smart features on this thermostat. Wireless wiring centre - TIOEVO0003 Gateway - TIOEVO0004
- Page 3: Your smart life journey begins now. You can operate your system wirelessly using the SMARTLIFE app.
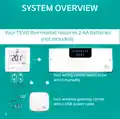
- Page 4: System overview Your TEVO thermostat requires 2 AA batteries. Your wiring centre needs to be wired manually. Your wireless gateway comes with a USB power cable.
- Page 5: Overview Wiring centre pairing Thermostat configuration Gateway pairing App configuration Important notes Voice control
- Page 6: Icon overview includes various indicators such as RF network signal, calling/demand, and WiFi connection status. Flashing indicates pairing, while stable indicates a connected state. Eco mode shows the set point selected. Setup mode is active when in dual mode. Actual room temperature and desired sensor temperature are displayed. Screen lock feature is available. Timed ON/OFF functionality can be utilized. Holiday mode can be selected. Low battery status is indicated. Programming mode is running defined programs.
- Page 7: Icon overview includes indicators for WiFi connection, RF network signal, screen lock, low battery, day, actual room temperature, program status, desired sensor temperature, external sensor temperature, and ECO mode. The device features AM/PM time display, holiday mode, manual program setup, timer mode, dual mode, and calling/demand functionality. It also supports timed ON/OFF functionality.
- Page 8: Configuration menu includes various setting options for the thermostat and timer. The operating mode can be set to either radiators or underfloor heating. Temperature calibration ranges from -9°C to 9°C, with a settable range of 1°C to 5°C. The dead band setting and lock screen options are available for user customization. Sensor selection can be internal, external, or dual. The maximum settable temperature is between 20°C and 45°C, with a default of 35°C. The minimum settable temperature ranges from 5°C to 20°C, with a default of 5°C. Over temperature cut-off settings are adjustable between 20°C and 70°C. Anti-frost settings can be turned on or off, with a frost protection temperature set at 16°C. Display mode options include room and set temperature or set temperature only.
- Page 9: Factory default programs are pre-programmed settings for the thermostat. It is important to familiarize yourself with these settings. The display shows the current time and set temperature in degrees Celsius. The morning program starts at 06:00 with a set temperature of 22°C. The leaving home program is set for 08:00 with a temperature of 16°C. The returning home program begins at 18:00 with a temperature of 22°C. The bedtime/overnight setting is at 22:00 with a temperature of 16°C.
- Page 10: Wireless wiring centre Only compatible with the TEVO series thermostats, the wireless wiring centre is a central control point for multi-purpose systems. Pairing your wiring centre: Power ON your wiring centre. Press and hold switch 2 until a red LED appears. Navigate to the zone you would like to pair your thermostat with using the same switch. Power OFF your thermostat and press both buttons for 7 seconds.
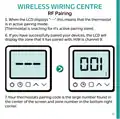
- Page 11: Wireless wiring centre RF pairing The LCD displays “--” when the thermostat is in active pairing mode. The thermostat is searching for its active pairing zone. If successfully paired, the LCD will display the zone it has paired with. H/W is channel 9. The thermostat's pairing code is the large number found in the center of the screen. The zone number is in the bottom right corner.
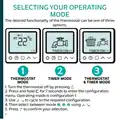
- Page 12: Selecting your operating mode involves choosing one of three options for the thermostat's functionality. To turn the thermostat off, press the designated button. To enter the configuration menu, press and hold for 7 seconds. Operating mode is configuration 1. Use the navigation button to cycle to the required configuration. Select between thermostat mode and timer mode. Press the confirmation button to finalize your selection.
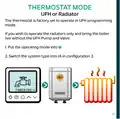
- Page 13: Thermostat mode can be set for either underfloor heating (UFH) or radiator operation. The thermostat is initially set to operate in UFH programming mode. To operate radiators only, adjustments are needed. Switch the operating mode accordingly. Change the system type to rA in configuration settings.
- Page 14: Thermostat mode allows for manual operation. To use manual mode, tap until the hand symbol appears. You can set your desired temperature using the thermostat. The thermostat activates when the desired temperature is higher than the room temperature. Activation is indicated by the flame symbol.
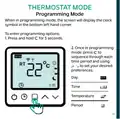
- Page 15: Thermostat mode allows for programming options. In programming mode, the screen displays the clock symbol in the bottom left corner. To enter programming options, press and hold for 5 seconds. Once in programming mode, press to sequence through each time period. Use to set your desired preferences for day, time, and temperature.
- Page 16: Timer operation allows for setting up to 4 time periods for heating demands. Hold mode enables setting a timer duration for hot water requirements, up to 99 hours and 59 minutes. The timer function symbol will display on the screen during timer operation. To set the function, press the appropriate button and use AUTO, HOLD, or OFF options as required. Press the confirmation button to finalize your selection.
- Page 17: Timer operation involves two main modes: program mode and hold mode. In program mode, selecting AUTO allows you to enter program settings. The programming sequence is Monday-Friday, followed by four periods, each with a time ON and time OFF setting. In hold mode, you can select HOLD and adjust your timer setting. You confirm your setting by tapping.
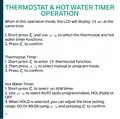
- Page 18: Thermostat & hot water timer operation involves selecting and confirming settings. Short press is used to access thermostat and hot water timer functions. The thermostat timer allows selection between manual or program mode. Hot water timer settings include options for auto programmable, hold, or off. Time settings can be adjusted within a range of 00:01-99:59. HOLD selection enables time adjustment for the hot water timer. Pressing buttons confirms selections throughout the operation. The LCD displays relevant information during operation. Users can navigate through functions with short presses. Confirmation of settings is essential for proper operation.
- Page 19: Thermostat & hot water timer operation involves selecting functions and settings through long and short presses. In program mode, a long press for 7 seconds is required to select the function and hot water timer setting. Short presses are used to confirm selections. After pairing the thermostat with the wiring center, the hot water will automatically pair as well. Holiday mode can be activated by long pressing for 7 seconds with the thermostat on. Users can set the day and temperature parameters needed in holiday mode. During holiday mode, the hot water timer is turned off. Exiting holiday mode requires a short press.
- Page 20: Sensor compatibility The TEVO thermostat can be connected with an external sensor.
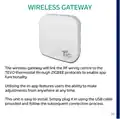
- Page 21: Wireless gateway links the RF wiring centre to the TEVO thermostat through ZIGBEE protocols. It enables app functionality for users to make adjustments from anywhere at any time. The unit is easy to install by plugging it in using the provided USB cable. Follow the subsequent connection process for setup.
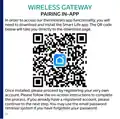
- Page 22: Wireless gateway Pairing in-app To access the thermostats app functionality, download and install the Smart Life app. The QR code will take you directly to the download page. Once installed, register your account by following the on-screen instructions. If you already have a registered account, continue to the next step. You may use the email password retrieval system if you have forgotten your password.
- Page 23: Wireless gateway Pairing in-app Power on your wireless gateway. Turn your device’s Bluetooth on. Long press until the blue light is stable and the red light is flashing. The app will now automatically find your device. If the app was unable to find your device, please manually select “Wireless Gateway (Zigbee) from the menu.
- Page 24: Wireless gateway Pairing in-app Follow the on-screen instructions to setup your device. The key benefit of pairing to the Smart Life app through the gateway is that your settings will be stored within the cloud. In the event of a power outage, your desired setting will remain in place.
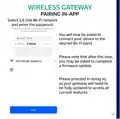
- Page 25: Wireless gateway Pairing in-app Select 2.4 GHz Wi-Fi network and enter the password. You will now be asked to connect your device to the desired Wi-Fi band. Please note that after this step, you may be asked to complete a firmware update. Please proceed in doing so, as your gateway will need to be fully updated to access all current features.
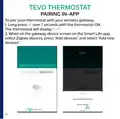
- Page 26: Tevo thermostat. To pair your thermostat with your wireless gateway, long press for over 7 seconds with the thermostat ON. The thermostat will display “- --”. When on the gateway device screen on the Smart Life app, select Zigbee devices, press “Add devices” and select “Add new devices.”
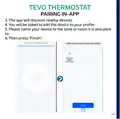
- Page 27: Tevo thermostat Pairing in-app The app will discover nearby devices. You will be asked to add the device to your profile. Please name your device to the zone or room it is allocated to. Then press “Finish.”
- Page 28: App configuration allows you to change the setting parameters as needed. If there is no connection between the thermostat and wiring center or the codes do not match, the screen will display “Please match code.” Once paired correctly, the message will disappear. Power can be turned ON/OFF. Mode selection includes Manual, ECO, or Program. Child lock feature allows you to lock or unlock the thermostat. Settings include temperature compensation adjustment, anti-freeze switch, and factory reset switch. System settings allow selection between Thermostat, H/W timer, or Thermostat & H/W timer control. Holiday mode lets you alter day and temperature selection for vacations. You can program your thermostat's heating and timer functions for each day over four time periods.
- Page 29: App configuration Your TEVO thermostat has multi-function capabilities. There are altering menu interfaces for you to familiarise yourself with in order to maximise its use. Thermostat function: Here you can select your thermostat's working hours and target temperature.
- Page 30: App configuration Timer function: Here you can activate your thermostat's timer functionality.
- Page 31: App configuration allows you to select your operating hours and the duration of heating.
- Page 32: App configuration Thermostat & H/W timer function This setting utilises both the thermostat functionality and the timer capabilities of your thermostat. Managing both the target temperature and duration of heating.
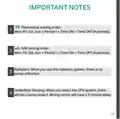
- Page 33: Important notes Thermostat setting order: Mon-Fri, Sat, Sun > Period 1 > Time ON > Time OFF (4 periods). H/W setting order: Mon-Fri, Sat, Sun > Period 1 > Time ON > Time OFF (4 periods). Radiators: When you use the radiators system, there is no pump utilisation. Underfloor heating: When you select the UFH system, there will be a pump output. Wiring centre will have a 3 minute delay.
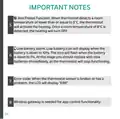
- Page 34: Important notes Anti freeze function: When the thermostat detects a room temperature of lower than or equal to 5°C, the thermostat will activate the heating. Once a room temperature of 8°C is detected, the heating will turn off. Low battery alarm: A low battery icon will display when the battery is down to 10%. The icon will flash when the battery is down to 1%. At this stage, you should replace with new batteries immediately, as the thermostat will stop functioning. Error code: When the thermostat sensor is broken or has a problem, the LCD will display ERR. Wireless gateway is needed for app control functionality.
- Page 35: Voice control allows access to settings menu. You can access both Alexa and Google Assistant under the Third-Party Control tab. Compatibility and connection between the Smart Life app and third-party voice control platforms is facilitated via Smart Life.
- Page 36: Page 36