SALUS ST898ZB Optima S Thermostat Installation Guide
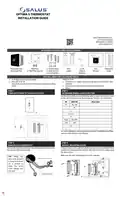


OPTIMA S THERMOSTAT
INSTALLATION GUIDE
SALUS North America, Inc.
2215 Cornell Avenue
Montgomery, IL 60538
IN THE BOX YOU WILL FIND THE FOLLOWING:
Thermostat with
Mounting Plate
Wall Plate
2 x Wall Plate Spacers
2 x Wood Screws
2 x Wall Anchors
2 x Locking Pins
Wire
Labels
2 x AA
Alkaline
Batteries
User
Manual
Installation
Guide
YOU WILL NEED THE FOLLOWING TOOLS:
Optional Tools
•
•
•
#1 Phillips or flathead screwdriver
Drill with 3/16” bit
(only if you cannot mount the thermostat using the existing
holes)
Smartphone or digital camera to take picture of wiring for later
reference
•
•
Screwdriver to disconnect wires from old thermostat
Pencil
STEP 1
STEP 2
TURN OFF POWER TO THE HVAC SYSTEM
DETERMINE WIRING CONFIGURATION
Use the Wire Labels and the following table to keep track of wire colors
on the old thermostat or on the heat pump / furnace / air conditioner.
HP
R
NON-HP
R or RH
RC
Wire Color
---
C
or
Y or Y1
Y2
AUX
O/B
W or W1
W2
G
L
---
For new installations, refer to Appendix A and the “Install Mounting Plate”
sections of the Optima S User Manual.
STEP 3
STEP 4
REMOVE OLD THERMOSTAT
INSTALL MOUNTING PLATE
Remove the old thermostat from the wall, taking care not to allow
the wiring to fall inside the wall.
If there is space on the wall that needs to be covered, insert the Wall Plate
between the Mounting Plate and the wall, and mount both plates using
the same screws.
Make sure the wires run through the center opening.
TIP: Wrap the
wire ends around
a long stick (such
as
a
pencil) to
keep the wires
from falling into
the wall.
or

| General | Details |
|---|---|
| Name | SALUS ST898ZB Optima S Thermostat Installation Guide |
| Make | SALUS |
| Language | English |
| Filetype | PDF (Download) |
| File size | 0.3 MB |


SALUS IT800 WIFI Smart Thermostat Installation Guide

SALUS 091FLRF Wireless Room Thermostat User Guide

SALUS Thermostat Sensor TS600 User Guide

SALUS Thermostat and Smart Plug Installation Guide

SALUS Programmable Wired Thermostat VS30W/VS30B Installation Guide

SALUS Wired Thermostat Installation Guide

SALUS Wired Digital Thermostat – Non-programmable HTRS230 User Manual

SALUS RT520 Radiator Thermostat User Guide

SALUS RT310 Thermostat User Manual

SALUS Thermostat RT520 User Manual

SALUS ST898ZB Optima S Thermostat Installation Guide Overview
Summary of Contents
- Page 1: Optima S thermostat installation guide. In the box you will find the thermostat, mounting plate, wall plate, wall plate spacers, wood screws, wall anchors, locking pins, wire labels, and batteries. You will need tools such as a screwdriver, drill, smartphone or digital camera, and a pencil. Step 1: Turn off power to the HVAC system. Step 2: Determine wiring configuration using wire labels and a provided table. For new installations, refer to Appendix A and the “Install Mounting Plate” sections of the Optima S User Manual. Step 3: Remove the old thermostat from the wall carefully. Step 4: Install the mounting plate, ensuring wires run through the center opening.
- Page 2: Attach wiring Connect the batteries Pull the battery tab from the back of the thermostat to activate the batteries. Using the labels, match the wires to the appropriate terminal. If the C wire is connected, the thermostat will draw power from the AC connection and use the batteries as backup. Battery-only operation typically lasts 18 months. Attach thermostat to mounting plate Turn power back on to the HVAC system After the initial configuration, the home screen will be displayed, and the thermostat is ready to be attached to the mounting plate. Settings that can be changed include compressor protection, fan delay, max heating set point, and cooling set point.

Honeywell CM921 Wireless Programmable Room Thermostat User Guide

ENGO CONTROLS FAN-24W 24V Fan Coil Thermostat User Guide

lae AC2-2 Two Stage Thermostat Instructions

Amber DT-two Programmable Thermostat User Guide

GENERAL LIFE FH10 Underfloor Heating Thermostat User Manual

Honeywell T6/T6R Smart Thermostat User Guide

EZAIoT 723 IPS Wired Smart Thermostat Instruction Manual

Danfoss MBC 8000 Heavy Duty Thermostat Installation Guide

Tio TEVO Smart RF Wireless Thermostat User Manual

seitron TM 00-M Electro Mechanical Room Thermostat Instructions