Home > MYSON > MYSON Unisenza Plus Thermostat Instruction Manual

MYSON Unisenza Plus Thermostat Instruction Manual

Installation  
Heating, cooling  
& hot water  
Smart, app  
connectivity  
and user manual  
Battery  
Geo location  
powered  
Unisenza Plus - Thermostat  
5 year  
guarantee  
EN  
GeneralDetails
NameMYSON Unisenza Plus Thermostat Instruction Manual
MakeMYSON
LanguageEnglish
FiletypePDF (Download)
File size4.39 MB
Download PDF
1 Star2 Stars3 Stars4 Stars5 Stars (1 votes, average: 5.00 out of 5)
Loading...
MYSON Unisenza Dial Thermostat User Manual
MYSON Unisenza Digital Thermostat User Manual
MYSON Unisenza WiFi Programmable Thermostat User Guide

MYSON Unisenza Plus Thermostat Instruction Manual
Get the free PDF manual for the MYSON Unisenza Plus Thermostat Instruction Manual and access setup steps, usage instructions, and troubleshooting tips. 👉 View online or download now to keep your thermostat running smoothly!

MYSON Unisenza Plus Thermostat Instruction Manual Overview

Summary of Contents

  • Page 1: Installation Heating, cooling & hot water Smart app connectivity and user manual Battery Geo location powered Unisenza Plus - Thermostat 5 year guarantee
  • Page 2: Unisenza Plus - Thermostat Installation and user manual First release August 20, 2023
  • Page 3: Unisenza Plus - Thermostat Installation and user manual Safety warnings Pictograms used in this manual Purpose of the manual Intended use Safety regulations Technical data Dimensions Pack contents Overview
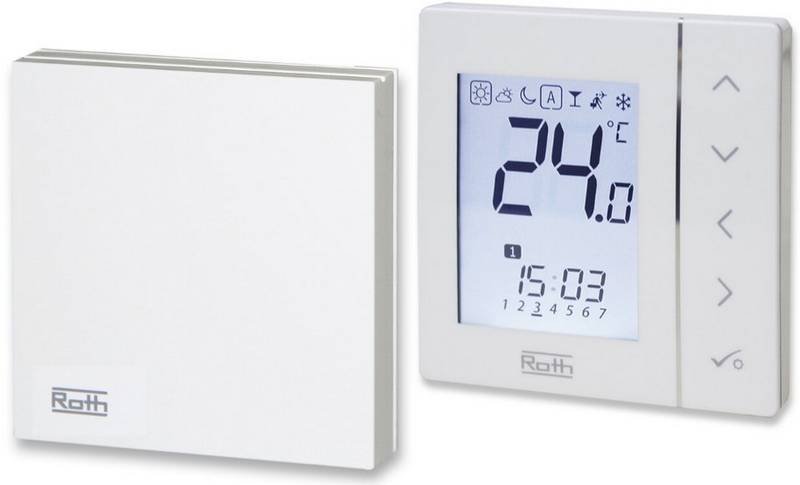
  • Page 4: Unisenza Plus - Thermostat Installation and user manual Safety warnings Pictograms used in this manual convey the meaning or importance of the information provided. Hazard signs indicate prescriptions relating to present or possible dangers. Prohibition signs indicate actions that must be avoided. Mandatory signs indicate information that is important to read and comply with. Purpose of the manual is to guide the qualified installer in the installation, maintenance, and proper and safe use of the equipment. It is mandatory for all personnel involved in the installation, maintenance, and use of the equipment to read this manual. The Unisenza Plus Thermostat is a wireless room thermostat with Zigbee 3.0. It offers two channels control outputs through Zigbee wireless communications. Features include a large LCD display with backlight and pairing features with compatible devices.
  • Page 5: Unisenza Plus - Thermostat Installation and user manual Operation modes include Schedule, Manual, Temporary override, Boost, Holiday and Off with frost protection. 7-day, 5/2-day or single-day programming options. Optimum start/stop control strategies for energy efficiency. Selectable TPI or Span control algorithm. Two time channels for independent control of Heating/Cooling and/or Hot Water. Zigbee and App controlled. Before proceeding with any installation or use, it is necessary to thoroughly inspect the product. Read this manual carefully before the installation, use and maintenance of the product. All installation, assembly, electrical connections to the mains and ordinary/extraordinary maintenance must be performed only by qualified personnel or technicians complying with the legal requirements.
  • Page 6: Unisenza Plus thermostat installation and user manual provides technical data. The temperature scale can be set in °C or °F. Temperature display range is from 0°C to 45°C. Temperature measurement accuracy is +/-0.5°C at 0-40°C. The device supports over-the-air firmware updates. It operates on Zigbee 3.0 at 2.4GHz with a maximum transmission power of 10 dbm. Power supply requires 2 x AA-sized alkaline batteries. Operating temperature ranges from 0°C to 50°C. The thermostat complies with CE and UKCA regulations. It adheres to RoHS compliance and relevant European directives.
  • Page 7: Unisenza Plus - Thermostat Installation and user manual Dimensions Contents Wall mount bracket Unisenza Plus Thermostat 2 x AA-sized alkaline batteries Plate fixing screw Fixing wall plug for plate fixing
  • Page 8: Unisenza Plus thermostat installation and user manual provides an overview of the device. The main components include the display, operation mode button, boost button, confirm button, and menu/back button. The button usage section details the functions of each button, including navigating menus and adjusting parameter values. The menu/back button allows users to access the menu and return to the main screen. The buttons for increasing and decreasing values also serve to navigate through the menu. Long pressing the up and down buttons can lock or unlock the thermostat. The confirm button is used to save settings and navigate to the next menu. The boost button activates or deactivates the boost function for heating. Users can switch between permanent hold and schedule modes using the operation mode button. The manual emphasizes the importance of understanding button functions for effective thermostat operation.
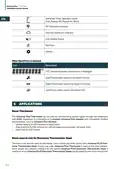
  • Page 9: Unisenza Plus - Thermostat Installation and user manual Display icons Icon Description Text Bar (9 digits) Room temperature/set point Demand Active (Heat / Cool) Schedule mode Temporary Override Permanent Hold Boost mode under schedule
  • Page 10: Unisenza Plus - Thermostat Installation and user manual Hot water timer operation mode: Auto, Always Off, Always On, Boost RF connection indicator Internet connection indicator Low battery status Set point When OpenTherm is detected The Unisenza Plus Thermostat can be used for various system types through integration with HVAC equipment or controllers on a wireless Unisenza Plus network. The device can also be used as the master room control unit when paired with Unisenza PLUS Electronic Thermostatic Head.
  • Page 11: Unisenza Plus Thermostat installation and user manual. The management of the Unisenza Plus Thermostat is also possible through a dedicated app. You need to connect to the store of your device to download the app. You can directly access the installation page using QR codes. At the rear of the Unisenza Plus Thermostat, there is a sticker indicating the device data. QR code availability for future feature.
  • Page 12: Unisenza Plus thermostat installation and user manual. Recommendations for a correct installation. BOOST and MENU functions are highlighted. Temperature settings range from 0°C to 50°C. The document includes various references to the Unisenza Plus thermostat. Installation guidelines are emphasized. Key features of the thermostat are mentioned. The layout suggests a focus on user interaction with the device. The document appears to be structured for ease of navigation. Visual elements may indicate specific functions or settings.
  • Page 13: Unisenza Plus - Thermostat Installation and user manual Fixing the bracket to the wall When fastening, be very careful not to use too much force when tightening the supplied screws. During assembly, if any problems arise, contact the Manufacturer and request assistance.
  • Page 14: Unisenza Plus Thermostat requires 2 AA alkaline batteries. Observe the correct polarity when installing the batteries. Reversing the polarity may damage the electronic regulator. Instructions are provided for inserting the batteries.
  • Page 15: Unisenza Plus - Thermostat Installation and user manual Fixing the thermostat to the bracket When fastening, be very careful not to use too much force when tightening the supplied screws. During assembly, if any problems arise, contact the Manufacturer and request assistance.
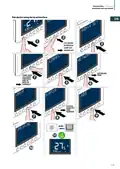
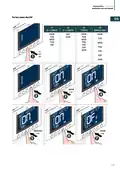
  • Page 16: Unisenza Plus - Thermostat Installation and user manual Main screen operation The LCD backlight is off during standby in normal operation. Press any key to turn on the LCD backlight before performing other user operations. The LCD backlight will be turned off automatically when no key press for 15 seconds. Power up The ignition of the Unisenza Plus Thermostat takes place by inserting the batteries in their housing. Display power up Select system type Unisenza Plus network
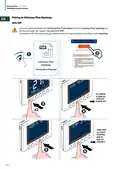
  • Page 17: Unisenza Plus - Thermostat Installation and user manual If YES was chosen at the CONNECT request, remember to activate the association mode in the Unisenza Plus Gateway. If NO has been chosen, it will be possible to pair the device at a later time by accessing the menu: ADMIN SETTING→ CONNECTION→ NETWORK→ JOIN. It is also possible to associate the thermostat from the APP using the ADD NEW DEVICE function. If YES was chosen at the PAIR request, remember to activate the association mode in the device we want to associate. If NO has been chosen, it will be possible to associate the device at a later time by accessing the menu: ADMIN SETTING→ CONNECT→ ASSOCIATION→ ADD. It is also possible to associate the thermostat from the APP by entering the thermostat settings menu.
  • Page 18: Unisenza Plus Thermostat installation and user manual. The association between the Unisenza Plus Thermostat and the Unisenza Plus Gateway can be done through the system management app. To proceed with the association, you need to have already installed and configured the Gateway. Unisenza Plus Gateway instruction manual. BOOST, SYS MODE, SCHEDULE, MENU, USER SET, ADMIN SET are key functions. Temperature display and control settings are included. VLV protection and minimum/maximum set points are available. Connection options are provided in the menu.
  • Page 19: Unisenza Plus Thermostat installation and user manual. If you want to associate a Unisenza Plus Thermostat that was previously associated with another Gateway, it is necessary to perform a reset to the factory settings of the electronic regulator before making the new association.
  • Page 20: Unisenza Plus Thermostat installation and user manual. The association between the Unisenza Plus Thermostat and the Unisenza Plus Gateway can also be made directly between the two devices. To proceed with the association you need to have already installed and configured the Gateway. Instruction manual includes various menu options such as boost, system mode, schedule, user set, and admin set. Temperature display settings include minimum and maximum set points. Control options are available for valve protection and connection settings.
  • Page 21: Unisenza Plus Thermostat installation and user manual. If you want to associate a Unisenza Plus Thermostat that was previously associated with another Gateway, it is necessary to perform a reset to the factory settings of the electronic regulator before making the new association.
  • Page 22: Unisenza Plus Thermostat installation and user manual provides guidance on pairing with other Unisenza Plus devices. After joining a Unisenza Plus network, the thermostat can be paired with a Unisenza Plus Receiver or Electronic Thermostatic Head. When paired with a receiver, the thermostat's heat demand will interlock the boiler or zone valve. The thermostat can control the Unisenza Plus Electronic Thermostatic Head, using its measured room temperature. The Electronic Thermostatic Head will display settings and follow the room thermostat's controls. A maximum of six Electronic Thermostatic Heads can be paired with one room thermostat. Up to sixteen Electronic Thermostatic Heads or thermostats can be paired with a Unisenza Plus Receiver. The document includes instructions for pairing devices using an app.
  • Page 23: Unisenza Plus - Thermostat Installation and user manual Pair device using the local interface BOOST MENU SYS MODE SCHEDULE USER SET ADMIN SET CONTROL
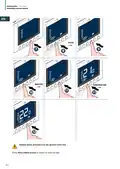
  • Page 24: Unisenza Plus - Thermostat Installation and user manual Change set point The icon flashes when Optimum Start/Stop is active or Valve Protection operates. Press Operation Mode button to switch between Schedule, Temporary override, and Permanent Hold mode. Permanent Hold mode keeps the set point constant regardless of the schedule. To modify the set point, use the + and - keys. The set point is the one established in the programming. Temporary scheduling mode overrides the scheduling set point temperature. The modified set point remains active until the next programming arrives. The temperature will revert to the established planning on the app after the next scheduling time slot.
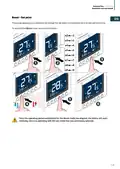
  • Page 25: Unisenza Plus - Thermostat Installation and user manual Boost - Set point This mode allows you to temporarily change the set point of a schedule for a certain period of time. To activate the Boost mode, proceed as follows: Once the operating period established for the Boost mode has elapsed, the device will automatically return to operating with the last mode that was previously selected.
  • Page 26: Unisenza Plus - Thermostat Installation and user manual Change system mode (Heating & Cooling) Cool mode is available only when SYS TYPE is HEAT+COOL. Press Menu/Back button to return to main screen. Change hot water operation mode (available only when SYS TYPE is HEAT+DHW). Hot water operation follows schedule. Hot water boost mode, select the boost from 1hr to 9hr (it returns to AUTO after boost). Hot water is turned On. Hot water is turned Off.
  • Page 27: Unisenza Plus - Thermostat Installation and user manual Schedule setting Schedule for different modes (heating, cooling, and hot water) can be defined separately. Three schedule programs are available (7 day / single / 5+2 day). When SYS MODE is heat, temperature set point is set for each time slot. When SYS MODE is cool, temperature set point is set for each time slot. Hot water On/Off is selected for each time slot. BOOST function is available. Different scheduling options include 5+2 days, 7 days, and single day. Days of the week can be selected for scheduling.
  • Page 28: Unisenza Plus - Thermostat Installation and user manual Repeat above procedure to set up to 6th time slot. Press Menu/Back button to return to main screen.
  • Page 29: Unisenza Plus - Thermostat Installation and user manual For hot water On/Off 5 + 2 days 7 days Single day Boost
  • Page 30: Unisenza Plus - Thermostat Installation and user manual Press Menu/Back button to return to main screen. Repeat above procedure to set up to 3rd time slot. Lock the keypad. Unlock the keypad. Keypad locked. Keypad unlocked.
  • Page 31: Unisenza Plus - Thermostat Installation and user manual User setting The editable settings are: Set hour and minute Set year, month and day Daylight saving time on or off Select temperature display unit in Celsius or Fahrenheit Temperature calibration (up to +/- 2.5 °C) Set optimum start On or Off Set optimum stop On or Off Define Frost Protection set point Reset user settings, SYS MODE and schedule back to default value.
  • Page 32: Unisenza Plus - Thermostat Installation and user manual Admin setting The editable settings are: Select temperature display interval at 0.5°C(1°F) or 0.1°C (0.2°F). Select valve protection mode On or Off. The thermostat will turn On the heating to move the actuators for less than 3 minutes time, to avoid the valve getting stuck or jamming. Algorithm designed for underfloor heating (for heating systems with high inertia). Algorithm designed for radiator heating. Algorithm for electric heating (for heating systems that heat up quickly and cool down quickly). Select which control algorithm mode is used for room temperature control. Set minimum HEATING set point (5°C to 35°C). Set maximum COOLING set point (5.5°C to 37°C).
  • Page 33: Unisenza Plus - Thermostat Installation and user manual Join the thermostat to the gateway. Disconnect the thermostat from the gateway. Identify which gateway is connected. Pair a Unisenza Plus device to the thermostat. Enable the PIN code, and then set a 4-digit PIN code. Display battery level in percentage. Display the value of RSSI (Received Signal Strength Indicator). Select one of the system types. Reset everything back to the status same as the thermostat firstly unboxed. Press Menu/Back button to return to main screen.
  • Page 34: Unisenza Plus - Thermostat Installation and user manual Language setting BOOST SYS MODE SCHEDULE USER SET ADMIN SET High temperature limiting If the room temperature exceeds 41°C, all heating outputs will be turned off. Temperature sensing error If there is any sensor error on room temperature measurement, the thermostat will notify all related output devices to turn off.
  • Page 35: Unisenza Plus - Thermostat Installation and user manual Error code display An error code will be displayed on the text bar when an error is detected. When a single error is detected, the error code is displayed directly on the text bar. When multiple errors are detected, the text bar displays XX ERRORS. Press the Confirm button to display the first error code. The error code description is as below. Lost link with the Unisenza Plus Gateway. Pair Unisenza Plus device fail. Lost link with the Xth paired Unisenza Plus device. OT Boiler Fault Code – Service request.
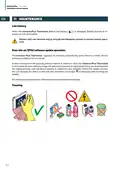
  • Page 36: Unisenza Plus Thermostat installation and user manual. When the Unisenza Plus Thermostat detects low battery, a warning is displayed. Battery should be replaced as soon as possible. Replace with new batteries and go through the adaptation process to resume normal operations. The Unisenza Plus Thermostat upgrades its software automatically when a newer version is available. A valid connection to the gateway and the Internet is needed for the thermostat to download the new software image. All device functionality is maintained during the download and update process. The LCD displays the status during the update process. All settings and paired devices information are retained after the update. Cleaning instructions are provided.
  • Page 37: Unisenza Plus - Thermostat Installation and user manual Due to the requirement for continuous improvement, we constantly update the user manuals of our systems. We invite you to periodically check whether the manual in your possession is always the latest written version. Pursuant to art. 13 of Decree-Law No. 49 of 2014 “Implementation of the WEEE Directive 2012/19/EU on waste electrical and electronic equipment.” The mark of the crossed-out bin specifies that the product must not be collected with other waste but must be disposed of separately. All the appliances are made of recyclable metal materials in a percentage greater than 90% by weight. Make the equipment unusable for disposal by removing the power cable and any compartment or cavity closing device. It is necessary to pay attention to the management of this product at the end of its life by reducing any negative impacts on the environment. In Italy, WEEE equipment must be delivered to collection centres or the dealer where you buy new equipment. The EU WEEE equipment directive has been adopted differently by each country.
  • Page 38: Unisenza Plus - Thermostat Installation and user manual
  • Page 39: Unisenza Plus - Thermostat Installation and user manual
  • Page 40: Every care has been taken in the creation of this document. No part of this document may be reproduced without the express written consent of Purmo Group. Purmo Group accepts no responsibility for any inaccuracies or consequences arising from the use or misuse of the information contained herein.