
HEATIT Z-TRM3 Thermostat User Guide

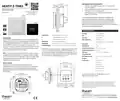


51,1mm
ADD/REMOVE
1. Press Center (confirm) for 10 seconds. The display will show OFF.
2. Press Right (down) 5 times till you see Con in the display.
3. Now start the add/remove device process in your home
automation software.
21,3mm 15,6mm
HEATIT Z-TRM3
Quick Guide
Ver 2020-A
Read the full manual at:
manuals.heatit.com
4. Start adding/removing mode by pressing Center (confirm)
for approximately 2 seconds.
Adding/removing mode is indicated in the display by rotating LED
segments in the display until the timeout occurs after 90 seconds,
or if the module has been added/removed in the network.
Confirmation will show Inc/EcL in the display. Leave programming
mode by choosing ESC in the menu. Your thermostat is now ready
for use with default settings.
TECHNICAL DATA
Protocol
Chip
Z-Wave - 868,4MHz
Z-Wave 500 chip
230V 50/60Hz
HEATING (N)
Heating cable connection (Neutral)
Power connection (Neutral) 230V
Power connection (Live) 230V
N
INTRODUCTION
Rated voltage
Max load
Heatit Z-TRM3 is an electronic thermostat for electrical floor
heating, designed to be mounted in a standard flush box. The
thermostat has a built-in Z-Wave chip that can be connected with
Home Automation systems. Heatit Z-TRM3 is equipped with a
single pole relay and fits into System 55 frames. The thermostat
can withstand a load of max 16A /3600W at 230V. The thermostat
may be used for water based heating if the thermostat is linked
with the Heatit Z-Water.
L
3600W (resistive load)
750W self-limiting heating cable
16A
HEATING (L)
FLOOR SENSOR
Heating cable connection
NTC type (10, 12, 15, 33 or 47kΩ). Standard 10kΩ.
Max current
EXTERNAL SENSOR NTC type (10, 12, 15, 33 or 47kΩ). Standard 10kΩ.
Power consumption
<2,0W
Ambient temperature 0°C to 40° (during operation)
Next, position the thermostat and fasten it onto the wall
mounting box using 2-4 screws. Position the frame, then position
and carefully press the front cover until it snaps in place. Check
that the front cover has snapped in place properly on both left
and right side. The front cover should now be firmly fixed on all
sides. To be able to to read the Power Metering, the load needs to
be connected to both heating L + N.
Temperature range
Hysteresis
5°C to 40°C
0,3°C to 3,0°C (default 0,5°C)
Compatible with NTC
sensors with values
IP Code
NB! If the sensor mode is changed to A or AF mode then a room
sensor compensation process will start, which limits maximum
power output to 75%. The thermostat adapts to the environment
within a few days. No internal sensor calibration should be
performed during the first few days.
10, 12, 15, 22, 33 og 47 kΩ @ 25°C
IP 21
Approvals
Z-Wave Plus, CE,
EN 60730-1
51,1mm
INSTALLATION
EN 60730-2-9
Use e.g. a small slotted screwdriver. Start by carefully removing the
front cover by pushing the release springs. The front cover and the
frame may now be removed. Connect the wires to the thermostat
terminals: Use 1,5mm2 or 2,5mm2 according to load.
EMC 2014/30/EU
RoHS 2011/65/EU
LVD 2014/35/EU
Release spring
49,5mm
Approved for use in bathrooms.
Heatit Controls AB can not be held liable for typographical errors, other errors or
omittances in our information. Product specifications may change without further notice.
All electrical installations must be carried out by a licensed electrician. The product must
be installed in accordance with national building codes and our installers manual.
1: Left 2: Center 3: Right
87mm
Heatit Controls AB
Phone: +47 61 18 77 77
l
Läkarvägen 4, 454 31 BRASTAD, SWEDEN
post@heatit.com – www.heatit.com
l


| General | Details |
|---|---|
| Name | HEATIT Z-TRM3 Thermostat User Guide |
| Make | HEATIT |
| Language | English |
| Filetype | PDF (Download) |
| File size | 0.22 MB |
 (1 votes, average: 5.00 out of 5)
 Loading...

heatit Z-TRM6 DC Z Wave Electronic Thermostat Instruction Manual

Heatit Z-TEMP2 Thermostat Installation Guide

heatit Z-TRM3 WiFi Thermostat Instruction Manual

HEATIT Z-Temp3 is a Battery Operated Thermostat Instruction Manual

4512673 Heatit ZM Thermostat 16A User Guide

HEATIT Z-TRM6 Matt Z-Wave Thermostat User Guide

HEATIT 54 304 59 DIN Smart Thermostat Installation Guide

HEATIT 54 305 41 WiFi6 Thermostat Installation Guide

HEATIT Z-TEMP3 Thermostat User Guide

heatit ET-7AW Touchscreen Programmable Thermostat User Manual

Heatit Z-TRM3 Manual: Questions and Answers
Heatit Z-TRM3 specifications
| Power supply | 230V 50/60Hz |
| Setpoint range | 5°C to 40°C |
| Differential | 0,3°C to 3,0°C (default 0,5°C) |
| IP rating | IP 21 |
| Communication | Z-Wave - 868,4MHz |
| Power consumption | <2,0W |
| Wire size | Use 1,5mm2 or 2,5mm2 according to load |
What do the rotating LED segments mean on Heatit Z-TRM3?
They show that the thermostat is in adding/removing mode, which lasts 90 seconds or until the device joins the network. User Guide, p. 1
Can I use Heatit Z-TRM3 with water-based heating systems?
Yes, if you link it with the Heatit Z-Water module. User Guide, p. 1
What's the difference between A mode and other sensor modes on Heatit Z-TRM3?
In A or AF mode, a room sensor compensation process starts and limits maximum power output to 75%, while the thermostat adapts over several days. User Guide, p. 1
Heatit Z-TRM3 compared with other Heatit thermostats
| Specification | Heatit Z-TRM3 | Heatit 54 304 DIN | Heatit Z-TRM6 DC Z Wave | Heatit Z-Temp3 is |
|---|---|---|---|---|
| Power supply | 230V 50/60Hz | 230VAC 50Hz | 230VAC 50Hz | 2.7VDC to 3.3VDC |
| Setpoint range | 5°C to 40°C | 2°C to 40°C | 5°C to 40°C | 5°C to 40°C |
| Differential | 0,3°C to 3,0°C (default 0,5°C) | 0.3°C to 3.0°C (default 0.5°C) | 0.3°C to 3.0°C (default 0.5°C) | 0.3°C to 3.0°C (Default 0.5°C) |
| IP rating | IP 21 | IP21 | IP21 | IP21 |
| Communication | Z-Wave - 868,4MHz | Z-Wave, 868.4MHz | Z-Wave, 868.4MHz | Z-Wave, 868.4MHz |
| Power consumption | <2,0W | <2W | <2W | <1W |
Other Heatit Z-TRM3 manuals
More Heatit thermostat manuals

EUROTRONIC Programmable Energy-Saving Radiator Thermostat User Manual

Honeywell Home T6 Pro Smart Programmable Thermostat User Guide

GENERAL LIFE HT500 SET Smart Room Thermostat User Manual

beok R6X Wireless Gas Boiler Thermostat Instruction Manual

KETOTEK KT3200 Plug In Thermostat Day Night Temperature Controller Instruction Manual

GENERAL SENNA 300S Smart Room Thermostat User Manual

BOSCH BTH-RM Room Thermostat II User Manual

Orbegozo FDR 65 Litres Adjustable Thermostat Instruction Manual

DAIKIN DKN510 Wireless VRV Communicating Thermostat Installation Guide

Honeywell FocusPRO P200 Series Programmable Thermostat Installation Guide