
Doit 474053 Low Voltage Thermostat Installation Guide



NOTE
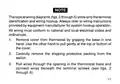
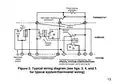
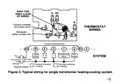
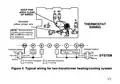
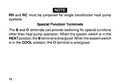
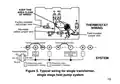
Thetypicalwiringdiagrams(figs.2through5)showonlytheterminal
identification and wiring hookup. Always refer to wiring instructions
provided by equipment manufacturer for system hookup operation.
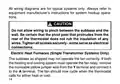
All wiring must conform to national and local electrical codes and
ordinances.
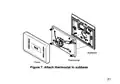
1. Remove cover from thermostat by gripping the base in one
hand. Use the other hand to pull gently at the top or bottom of
the cover.
2. Carefully remove the shipping protective packing from the
switch.
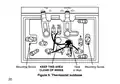
3. Pull wires through the opening in the thermostat base and
connect wires beneath the terminal screws (see figs. 2
through 6).
11

| General | Details |
|---|---|
| Name | Doit 474053 Low Voltage Thermostat Installation Guide |
| Make | DOIT |
| Language | English |
| Filetype | PDF (Download) |
| File size | 0.12 MB |
 (1 votes, average: 5.00 out of 5)
 Loading...


WHITE-RODGERS 1F86EZ-0251 Emerson Blue Easy Set Thermostat User Manual

GE APPLIANCES RAK150VF2 Digital Wall Thermostat Instruction Manual

Honeywell Programmable Thermostat T4 Pro Installation Guide

Danfoss RT 103 Thermostat Installation Guide

TOUPWELL TP808 WiFi Low Voltage Thermostat User Guide

Wengart TP808-3 7 Day Programmable Thermostat User Manual

Schneider Electric 2290B Programmable Room Thermostat Instruction Manual

technolysis HY703RF WIFI Thermostat User Manual

Honeywell Home DT4 Wired Room Thermostat Installation Guide

Honeywell RTH9590 Wi-Fi Color Touchscreen Programmable Thermostat User Guide