Home > COMPUTHERM > COMPUTHERM Q5RF Multi Zone Wireless Digital Room Thermostat Instruction Manual
COMPUTHERM Q5RF Multi Zone Wireless Digital Room Thermostat Instruction Manual


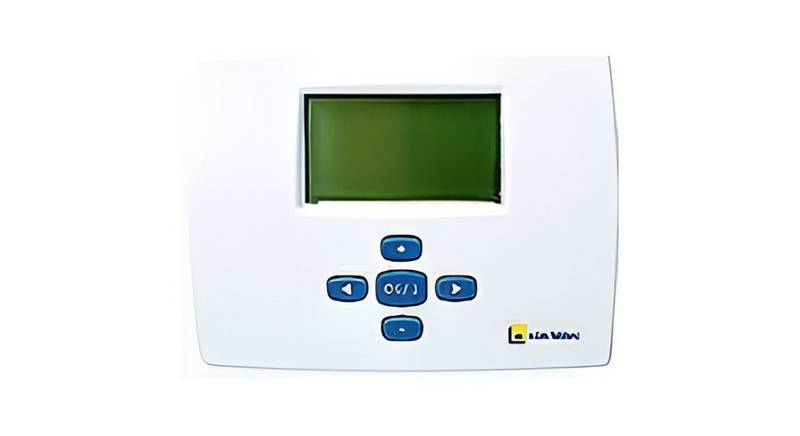
COMPUTHERM Q5RF (TX)
Multi-zone wireless (radio-frequency)
digital room thermostat
Operating Instructions
You can watch the most important aspects of the usage of this thermostat on our video

| General | Details |
|---|---|
| Name | COMPUTHERM Q5RF Multi Zone Wireless Digital Room Thermostat Instruction Manual |
| Make | COMPUTHERM |
| Language | English |
| Filetype | PDF (Download) |
| File size | 0.32 MB |


COMPUTHERM E800RF Multizone Wi-Fi Thermostat Instruction Manual

COMPUTHERM Q20 Programmable Digital Room Thermostat Instruction Manual
COMPUTHERM Q5RF Multi Zone Wireless Digital Room Thermostat Instruction Manual Overview
Summary of Contents
- Page 1: Computherm Q5RF (TX) Multi-zone wireless digital room thermostat Operating instructions You can watch the most important aspects of the usage of this thermostat on our video presentation.
- Page 2: General description of the thermostat The Computherm Q5RF (TX) type switched-mode room thermostat is suitable to regulate the overwhelming majority of boilers and air conditioners. It can be used together with the Computherm Q5RF or Q8RF multi-zone thermostats to increase the number of zones regulated. The thermostat can control the Computherm Q1RX wireless thermostat-controlled socket. There is a wireless connection between the Computherm Q5RF (TX) thermostat and the receiver unit of the Computherm Q5RF/Q8RF thermostat. No cable is required between the thermostat and the receiver or the socket. Temperature can be measured and set more precisely compared to simple, conventional thermostats. In heating mode, the thermostat switches the boiler or other appliances on and off according to the adjusted temperature.
- Page 3: The portability of the thermostat offers several advantages. There is no need to lay a cable, which is especially beneficial for modernizing old buildings. The optimal location of the device can be selected during operation. It is advantageous to locate the thermostat in different rooms throughout the day. The effective range of the transmitter in the thermostat is approximately 50 m in open terrain. This distance may be considerably shorter within a building. Obstacles such as metal structures, reinforced concrete, or adobe walls can affect radio wave transmission.
- Page 4: Important warning regarding radiator valves equipped with a thermostatic head. Adjust the thermostatic head to maximum temperature or replace it with a manual control knob where the room thermostat is located. The device must be installed and connected by a qualified professional. To put the thermostat into operation, detach the rear panel from the front panel by pressing the lock on the upper side. The battery compartment is located on the inner side of the front panel. Insert 2 AA alkaline batteries (LR6 type) according to the diagram in the battery compartment.
- Page 5: Warning: Good quality alkaline batteries may only be used for this appliance. Carbon-zinc batteries and chargeable accumulators are not suitable for operation. The display indicates low battery voltage and warns that batteries should be replaced only when good quality alkaline batteries are used. After inserting the batteries, the display flashes the measured room temperature. If this information fails to appear, press the RESET button on the main panel. Basic settings can be modified by relocating the jumpers and/or changing the position of the potentiometer on the main panel. The temperature(s) to be shown on the display can be selected and set by the left jumper.
- Page 6: With factory default settings, the jumper is located on the central and uppermost pins, showing the currently measured room temperature value. The notice ROOM appears in the bottom right corner of the display. The adjusted temperature is visible only during the adjustment process for approximately 6 seconds after the last button has been pushed. By relocating the plug onto the bottommost and central pins, the displayed temperature can be modified to alternate between the current room temperature and the adjusted temperature for 3-3 seconds. The notices ROOM and SET are alternately shown under the displayed temperature. The switching sensitivity of the thermostat can be selected or adjusted by the central jumper. This determines how much the thermostat switches the connected appliance on/off below/above the set temperature. With factory default settings, the jumper is located on the central and uppermost pins, resulting in a switching sensitivity of ±0.2 °C. It can be modified to ±0.1 °C by relocating the jumper.
- Page 7: Synchronising the thermostat and the receiver unit is essential for a safe and reliable wireless connection. Both units have their own safety codes. Synchronisation is done by pressing the LEARN button on the thermostat's main panel. Do not replace the rear panel of the thermostat before synchronisation. The synchronisation process is detailed in Section 7. After installation and basic settings, the thermostat is ready for operation and temperature adjustment can begin.
- Page 8: Below the temperature adjustment buttons, a switch is located. For both the economy and the comfort positions of the switch, a different temperature can be set between 5 °C and 40 °C, in steps of 0.5 °C. For energy efficiency, it is recommended that the comfort temperature is only used when the room or building is in use, as every 1 °C decrease of temperature saves approximately 6% energy during a heating season. The factory default temperature is 18 °C for the economy position and 20 °C for the comfort position. These default temperatures can be changed by moving the switch according to the temperature you would like to change. Press the button, after which the notice ROOM disappears, and the notice SET appears in the bottom right corner of the display. The temperature value shown on the display switches from room temperature to the default temperature or to the last set temperature. By pressing the buttons repeatedly or continuously, the change in values is accelerated.
- Page 9: The desired temperature can be set in steps of 0.5 °C. Approximately 6 seconds after setting the room temperature, the device switches to normal mode. The notice “SET” disappears, and the current room temperature and the notice “ROOM” are displayed. The previously set temperature can be changed anytime using the buttons. The thermostat controls the connected device based on the measured temperature and the currently set temperature. The switching sensitivity of the thermostat is set to a factory default of ±0.2 °C. In heating mode set to 22 °C, the connection points close below 21.8 °C and open above 22.2 °C. Heating is turned on when the temperature is below 21.8 °C. Heating is turned off when the temperature is above 22.2 °C. 230 V AC is displayed on the output for that zone when heating is turned on.
- Page 10: The status of the zone outputs is indicated by the “HEAT” or “A/C” icon in the lower left corner of the device's display. In cooling mode, the relay switches exactly the opposite way. After setting the economy and comfort temperatures, the temperature desired at the moment can be selected using the switch. In the left hand position of the switch, the thermostat provides the set economy temperature to be maintained. In the right hand position of the switch, the thermostat provides the set comfort temperature to be maintained.
- Page 11: Battery replacement is necessary when the low battery voltage icon appears on the display. The average lifetime of the batteries is one year. After replacing the batteries, the thermostat resets to factory default settings. The desired temperature must be adjusted again after battery replacement. Only good quality alkaline batteries should be used for this appliance. Carbon-zinc batteries and rechargeable accumulators are not suitable. The low battery voltage icon reliably indicates when batteries need replacement.
- Page 12: Use and synchronization of thermostat Computherm Q5RF (TX) and the receiver of Computherm Q5RF/Q8RF and/or Computherm Q1RX plug. If you would like to use the Computherm Q5RF (TX) thermostat to complement the Computherm Q5RF multi-zone thermostat, then follow the tuning steps described in Section 7.2 of the manual of the Computherm Q5RF thermostat. To complement the Computherm Q8RF multi-zone thermostat, follow the tuning steps described in Section 10.2 of the manual of the Computherm Q8RF thermostat. When you want to use thermostat Computherm Q5RF (TX) with one or more Computherm Q1RX plug(s) that can be controlled by an RF thermostat, carry out the synchronization of the two units in the following way. Press the “ON/OFF button of the Computherm Q1RX socket.
- Page 13: If the two parts of the device can only be placed on the edge of the wireless range or out of it, to guarantee the safe wireless connection, place a COMPUTHERM Q2RF wireless repeater between the two parts.
- Page 14: Frequently asked questions provide solutions for common appliance issues. Visit the website for a collection of frequently encountered problems and their solutions. Most problems can be resolved using hints available online without professional help. If a solution is not found, consult qualified service. The manufacturer does not assume responsibility for damages or loss of income during appliance use.
- Page 15: Product information data sheet Model identifier: Q5RF (TX) Temperature control class: I. class Contribution to the efficiency of seasonal space heating: 1% Modern temperature regulators and up-to-date regulation methods improve comfort and energy efficiency. Dividing the heating network into sections or zones allows for separate regulation, ensuring rooms are heated only when necessary. Information on establishing the heating network and necessary apparatuses can be found in the publication titled “Energy Savings and Comfort.” Using programmable thermostats allows for heating according to a preset timetable based on demands. Information on services provided by COMPUTHERM Q7, Q7RF, and Q8RF programmable room thermostats is available online.
- Page 16: Using modern modular heating devices equipped with an external temperature sensor can improve boiler efficiency. Low temperature heating networks, such as 60/40 °C, combined with condensing boilers can significantly enhance fuel efficiency by reducing the temperature of the flue gas leaving the boiler.

BEOK TDS75WIFI Room Thermostat Instruction Manual

EUROSTER 2026TXRX Air Conditioning Thermostat Instruction Manual

Honeywell Home S200 Series FocusPRO Smart Thermostat User Guide

HIVE Cheap Smart Thermostat User Guide

Beca BHT-6000 Series Round Thermostat User Guide

DAIKIN DKN510 Wireless VRV Communicating Thermostat Installation Guide

Danfoss 220V Electronic Intelligent Timer Thermostat Installation Guide

EPH CONTROLS CRT2 Room Thermostat Instruction Manual

Milesight WT201-868M Smart Thermostat User Guide
e l m leblanc TRL 7.26 RF Room Thermostat User Manual