
Home > COMPUTHERM > COMPUTHERM Q20 Programmable Digital Room Thermostat Instruction Manual
COMPUTHERM Q20 Programmable Digital Room Thermostat Instruction Manual
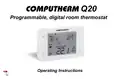






















COMPUTHERM Q20
Programmable, digital room thermostat
Operating Instructions


| General | Details |
|---|---|
| Name | COMPUTHERM Q20 Programmable Digital Room Thermostat Instruction Manual |
| Make | COMPUTHERM |
| Language | English |
| Filetype | PDF (Download) |
| File size | 1.2 MB |
 (1 votes, average: 5.00 out of 5)
 Loading...

COMPUTHERM E800RF Multizone Wi-Fi Thermostat Instruction Manual

COMPUTHERM Q5RF Multi Zone Wireless Digital Room Thermostat Instruction Manual

COMPUTHERM Q20 Programmable Digital Room Thermostat Instruction Manual Overview
Summary of Contents
- Page 1: Programmable, digital room thermostat Operating instructions
- Page 2: General description of the thermostat Important warnings and safety recommendations Information appearing on the display of the thermostat Location of the thermostat Putting the thermostat into operation, basic settings Connection of the thermostat Commissioning the thermostat Operation of the thermostat that has been put into operation Selecting the operating mode (FUNC) Restoring factory default setting (RESET)
- Page 3: A general description of the thermostat. The Computherm Q20 type switch mode room thermostat is suitable for regulating a large majority of boilers, air conditioners, humidifiers, and dehumidifiers in circulation. It can easily be connected to any gas boiler, air conditioner, humidifier, and dehumidifier with two-wire room thermostat connection point. It can also connect to other electrical devices, regardless of whether the device has a 24 V or 230 V control circuit.
- Page 4: The device can be programmed to heat/cool and humidify/dehumidify your space to the desired temperature or humidity at specific times. Separate independent daily programs can be created for each day of the week. For each day, one fixed switching time and ten freely adjustable switching times can be set. A different temperature and humidity can be assigned to every switching time. The simultaneous use of several room thermostats and a zone controller allows for additional control of a pump or zone valve. This setup enables the division of a heating/cooling system into zones. Each room's heating/cooling can be controlled separately, increasing comfort. Zoning the heating/cooling system contributes to the reduction of energy costs. Only the rooms that require heating/cooling will be adjusted at any time.
- Page 5: IMPORTANT WARNINGS AND SAFETY RECOMMENDATIONS Before starting to use the device, please study carefully the instructions for use and follow strictly the instructions therein. The thermostat is designed for business or household (non-industrial) use, it can be used to control any electrical device, the power of which does not exceed 1.84 kW. This device is designed for indoor use. Do not use in wet, chemically aggressive or dusty environments. The manufacturer will assume no responsibility for any possible direct or indirect damages or income losses incurring during the use of the device. The device does not work without power, but the thermostat can remember the settings. In the event of a possible power supply failure, it can continue to operate without any external intervention after the power supply is restored. Before starting the actual control of the device connected to the thermostat, make sure that the device works perfectly.
- Page 6: Location of the thermostat should be in a regularly used room, away from extreme conditions. The optimal height for installation is 0.75 - 1.5 m above floor level. If radiator valves have a thermostatic head, it should be set to maximum temperature or replaced with a manual control knob in the room with the thermostat. The thermostat must be installed and connected by a qualified professional. Ensure that neither the thermostat nor the controlled device is connected to the mains voltage before installation.
- Page 7: Modifying the thermostat can cause electric shock or product failure. Pressing the lock on the upper side of the housing of the thermostat, remove the back cover of the thermostat as shown in the figure. Fix the back of the device to the wall using the included screws and some tools. Remove the serial terminal cover from the inside of the back panel using a small screwdriver. The receiver unit controls the boiler or air conditioner through a potential-free alternating relay. Connection points are located on the inside of the back panel, under an inner cover. Connect the two connection points of the heating or cooling equipment to be controlled to the normally open terminals.
- Page 8: If you would like to operate an old boiler or any other device that has no connection points for thermostats, then the (NO) and (COM) connection points of the thermostat should be connected to the mains cable of the device, similarly as a switch would be connected. To avoid electric shocks, replace the inner cover removed to connect the wires after installation. Always consider the loadability of the receiver unit and follow the manufacturer’s instructions of the heating or cooling equipment. The device must be installed and connected by a qualified professional. The voltage appearing at terminals (NO) and (COM) depends only on the system being controlled. The dimensions of the wire are determined by the type of the device to be controlled. The length of the wire is of no significance.
- Page 9: Commissioning the thermostat involves inserting 2 AA alkaline batteries in the battery compartment. Only alkaline batteries should be used for this appliance; other types are not suitable. A low battery voltage icon will appear on the display to indicate when batteries need replacement. After inserting the batteries, the display will flash various information including day, time, program number, temperatures, humidity level, and operating mode. Once the batteries are in place, snap the front panel back onto the rear panel and touch the button to proceed. Touching the button stops the display from flashing and allows the user to start the setting process.
- Page 10: Operation of the thermostat that has been put into operation. The thermostat controls devices based on the measured humidity and temperature. Switching sensitivity is ±0.2 °C for temperature and ±1.0% for humidity according to factory default. In heating mode, the system switches on below 21.8 °C and off above 22.2 °C. In cooling mode, the relay switches conversely. In humidifying mode, the system switches on below 49% humidity and off above 51%. In dehumidifying mode, the relay switches conversely. The closed state of the output relay is indicated by specific icons on the device display. The operation modes include heating, cooling, humidifying, and dehumidifying. The thermostat can be operated manually or via programming.
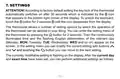
- Page 11: Settings According to factory default setting, the key lock of the thermostat automatically switches on after 30 seconds, indicated by an icon on the display. To unlock the keyboard, touch the button for 2 seconds until the icon disappears from the display. The thermostat allows a number of setting options to tailor its operation to your liking. You can enter the setting menu by pressing the button for 2 seconds. The continuously illuminated time and the flashing abbreviation of the relevant day appear on the screen. In the setting menu, you can modify the current setting with buttons and touch the button to move to the next setting. The currently modifiable setting is flashing on the display. After setting the current day and exact time, you can perform additional settings.
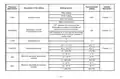
- Page 12: Factory default setting Displayed abbreviation Description of the setting Setting options Operating mode Switching on and off of programmed mode Temperature unit Minimum adjustable temperature/humidity Maximum adjustable temperature/humidity
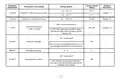
- Page 13: Factory default setting Detailed description Displayed abbreviation Description of the setting Setting options Calibration of the temperature sensor Calibration of the humidity sensor Setting humidity limit in case of cooling Automatic backlight Backlight brightness
- Page 14: Factory default setting Displayed abbreviation Description of the setting Setting options Acoustic signal when buttons are touched Automatic key lock Switching on and off of the pump Restoring factory default settings To exit the setting menu and save the settings Saving the settings and exiting the settings menu
- Page 15: Selecting the operating mode allows switching between heating, cooling, humidifying, and dehumidifying modes. The output relay of the receiver unit closes at specific temperature and humidity levels based on the selected mode. The thermostat can operate in both programmed and non-programmed modes. In programmed mode, the thermostat controls devices according to a pre-set program. Manual mode can be activated to control devices based on manually set temperature or humidity. Switching off the programmed mode allows setting two independent temperature or humidity levels. Comfort and economy levels can be easily adjusted when the programmed mode is off.
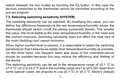
- Page 16: Switch between the two modes by touching the button. Devices connected to the thermostat cannot be controlled according to the pre-set program. The switching sensitivity can be adjusted. By modifying this value, you can define the difference below/above the set temperature/humidity where the thermostat should switch on/off the device. The smaller this value, the more stable is the inner temperature/humidity in the room. Switching sensitivity does not affect the heat loss of the room and vapour formation. When a higher comfort level is needed, select the switching sensitivity to ensure as stable inner temperature/humidity as possible. Frequent starts and stops of the controlled device should be avoided to reduce inefficiency and extend the device's lifetime. The switching sensitivity can be set in the temperature range of ±0.1 °C to ±1.0 °C / ±0.2 to ±2.0 °F and in the humidity range of ±1 to ±5% RH. It is proposed to use ±0.1 °C or ±0.2 °C as the factory default.
- Page 17: When a heating/cooling system should be controlled. For humidification/dehumidification, we recommend a switching sensitivity of ±1% or ±2%. The accuracy of the thermometer of the thermostat is ±0.5 °C. The temperature displayed by the thermostat can be modified by a maximum of ±3.0 °C / ±6.0 °F. The accuracy of the humidity sensor of the thermostat is ±3% RH. The relative humidity displayed by the thermostat can be modified by a maximum of ±10%. When a cooling system is controlled, it is important that the air in the room must not reach dew point. Condensation can occur if the dew point is reached, which can cause serious damages. For more information about switching sensitivity, please refer to Chapter 6. The humidity limit for cooling is crucial to prevent condensation.
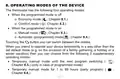
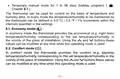
- Page 18: Operating modes of the device include four main options: economy mode, comfort mode, manual mode, and automatic mode. You can switch between the modes by touching the button. Temporary manual mode can be used until the next program switching. There is also a temporary manual mode available for 1 to 99 hours, referred to as the party program.
- Page 19: Temporary manual mode for 1 to 99 days (holiday program). The thermostat can be used for control on the basis of temperature and humidity alike. In every mode, the temperature/humidity to be maintained by the thermostat can be defined in 0.5 °C / 0.5 °F / 1% increments. Economy mode provides the economical temperature/humidity corresponding to the set temperature/humidity. Values can be modified at any time while economy mode is used. Comfort mode provides the comfort temperature/humidity corresponding to the set temperature/humidity. Values can be modified at any time while comfort mode is used.
- Page 20: Manual mode allows the thermostat to maintain the set temperature/humidity until the next intervention. In programmed mode, users can set switching times and select associated temperature/humidity levels. Devices can be programmed for a one-week period, with automatic operation that repeats every 7 days. One fixed switching time and 10 optional switching times can be set for each day. Different temperature/humidity values can be assigned to each switching time. Temperature/humidity levels set will remain valid until the next switching time. Values set for the fixed switching time will be maintained until the next optional switching time.
- Page 21: Switching will remain valid from the time of PROG switching to the time of next switching. The time of PROG switching is 00:00 and cannot be modified, only the temperature assigned can be changed. In default setting, the thermostat carries on only 1 switching every day, valid from 00:00 to 00:00 the following day. 1 switching a day only makes sense if you need uniform temperature all day. It is advisable to activate several switchings a day for comfort and energy-saving reasons. Activating comfort temperature only during periods when the room is used is recommended for energy savings. Lowering the room temperature by 1 °C will result in approximately 6 percent energy savings on average during a heating season. In default position, PROG switchings are inactive.
- Page 22: Time settings can be activated according to needs. The times of switchings are freely adjustable in 10-minute increments. The device enables settings of times only in ascending chronological order. There should be at least a 10-minute difference between switching times. The minimum 10-minute difference remains even when modifying previously set programs. The device pushes forward the respective times to maintain the minimum difference. If modifications move a switching time after the last adjustable daily switching time, it will become inactive automatically. To enter programming mode, touch the button for 2 seconds. During programming, the values being set flash on the display. Use the button to record the set value and move on.
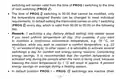
- Page 23: The set program can be saved by touching the button. A more detailed description of programming can be found in Chapter 8.4.2. If there are days of the week on which you intend to use the same program, it is sufficient to write this program only once because it can be easily adopted to an optional day with the help of the “COPY” function according to Chapter 8.4.3. If you want the same program for each day or intend to write programs to be used from Monday to Friday and from Saturday to Sundays which are different but are the same on a given day, you can program the device this way as described in Chapter 8.4.2. When you programmed several days similarly, you can modify their program only together. If you want a program that differs from the others even for a single day, you should program the days separately. Separate programs can be written for cooling, heating, humidifying and dehumidifying modes, and the thermostat will save them when switching between modes.
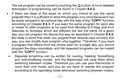
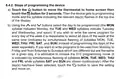
- Page 24: Steps of programming the device Touch the button to move the thermostat to home screen then touch the button for 2 seconds. The device gets to programming mode and the syllable indicating the relevant day(s) flashes in the top line of the display. Using the buttons select the day to be programmed. If you wish to write the same program for every day of the week it is reasonable to select all days of the week at the same time. If you want to write programs to be used from Monday to Friday and from Saturday to Sunday which are different but the same on a given day, it is advisable to choose the 5+2 programming mode. After the day(s) has/have been selected, touch the button to save the setting and move on.
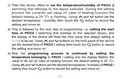
- Page 25: The device offers to set the temperature/humidity of PROG switching for the selected day(s). During the setting process, the currently set value flashes. The default setting for the heating function is 20 °C. The next step involves setting the start time of PROG switching for the selected day(s). The display will flash the time value to be set. The default setting for the time is provided. The programming process continues by setting the temperature for the PROG setting. The display flashes the value to be set, with the default for heating being 20 °C.
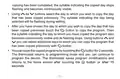
- Page 26: Then the device offers to set the time of PROG setting, and the display of the device will flash the time value. To set switchings PROG — PROG ꢀ, repeat steps “d” – “e”. If you do not intend to activate further switching options for the selected day(s), touch the button without resetting the start date. Then programming of the respective day(s) is completed and the device immediately offers selection of a new day. If you have set all switchings from PROG to PROG ꢀ for the selected day(s), programming is finished after setting the temperature/humidity. The device immediately offers selection of a new day and programming can be continued from step “b”. You can save and finish programming by touching the button. The device will automatically acknowledge settings even if no button is touched for 1 minute. Then the display of the device returns to the home screen.
- Page 27: If you would like to copy the program written for the day selected in section b to another day/other days you can easily do it by means of the COPY function as described in Chapter 8.4.3. The use of COPY function (copying the program of a day to another day or other days). Attention! The COPY function may only be used for programming the days of the week separately. Touch the button to enter the programming menu by touching the button for 2 seconds to activate the COPY function. The state of being ready for copying the program is indicated by the notice appearing in the place of hour characters and flashing of the syllable showing the day being programmed. Touch the button to copy the program of the selected day. After touching the buttons, select the day whose program you intend to copy.
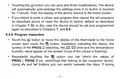
- Page 28: Copying has been completed, the syllable indicating the copied day stops flashing and becomes continuously visible. Using buttons select the day to which you wish to copy the day that has been copied previously. The syllable indicating the day being selected will be flashing during setting. After you have chosen the day to which you wish to copy the day that has been copied previously, touch the syllable indicating the day to which you have copied the program also becomes continuously visible and its flashing stops. Using buttons, you can select additional days to which you can copy the program that has been copied previously. You can save the copied programs by touching the button to copy the program. Then press the button for 2 seconds. The thermostat returns to programming mode and you can continue to program the device. The thermostat saves program modifications and returns to the home screen after touching the button or after 15 seconds.
- Page 29: You can perform further copying of programs according to your need by repeating the steps described above. Set values can be freely modified at any time by repeating the programming steps. You can increase the number of switchings activated previously as you like according to Chapter 8.4.2. You can cancel a switching activated beforehand so that during the modification of the time of switching with buttons the time set previously to factory default. Touch the button to cancel respective switching. If you cancelled an intermediary number the remaining switchings will be renumbered. If you want to finish modification of the switchings of the selected day then repeatedly touching the button step through the switchings of the respective day until the sign of the respective day start flashing on the screen. Now you can continue modifications by selecting the next day.
- Page 30: Touching the button you can save and finish modifications. The device will automatically acknowledge the settings even if no button is touched for 1 minute. Then the display of the device returns to the home screen. If you intend to write a whole new program then cancel the set programs or reset the device to factory default. In this case, the device should be set and programmed again as described in Chapters 7 and 8.4. To inspect the program, touch the screen then touch the symbol of the PROG switching. The humidity value will appear on the screen. Repeatedly touching the button allows you to check the values of PROG switchings that belong to the respective days. Using the buttons, you can switch between the days.
- Page 31: The programming process allows you to program every day of the week simultaneously. In 5+2 programming mode, you can inspect programming for the first five days or the last two days. You can switch between these options using designated buttons. After checking the program, you can return to the home screen by touching a specific button. If no button is touched for 15 seconds, the display will automatically return to the home screen. Temporary manual mode can only be used in programmed mode until the next program switching. To activate temporary manual mode, set the temperature/humidity according to programming. After setting, the program number disappears, and an icon appears on the display. This indicates that the thermostat will be operated by temporary manual control until the next program switching. The thermostat will maintain the modified settings during this period.
- Page 32: During the temporary manual mode, the temperature and humidity can be freely modified with buttons. The display alternately shows the exact time and the time remaining. After the manual control time, the icon disappears and the device returns to the set program. To return to the set program before the switching time, touch the button. The party program can be used in any default mode of the thermostat. For activation, touch the button for 2 seconds. The icon appears on the display to show the duration of the party program in hours. The number indicating the hours is flashing to show that the duration is adjustable. Using the buttons, the intended duration can be set between 1 and 99 hours. The set party program starts automatically and enters into effect after approximately 10 seconds.
- Page 33: Set the temperature to be maintained during the party program period. The device will maintain the temporary temperature/humidity that differ from the default mode. The segments indicating the hour on the display alternately show the exact time and the time remaining in temporary manual control. After the set time, the icon disappears and the device returns to operation according to the mode used before the party mode. Touch the button if you wish to return to the previously used mode before the set time expires. The holiday program can be used in any default mode of the thermostat. For activation, touch the button for 2 seconds. The icon appears on the display together with the notice to show the party program. Touch the button to switch to the holiday program.
- Page 34: The duration of the holiday program is adjustable between 1 and 99 days. One day is defined as 24 hours from the moment of setting. The holiday program starts automatically after approximately 10 seconds. The temperature can be set to be maintained during the holiday program period. The device will maintain a temporary temperature/humidity that differs from the default mode. The temporary settings can be modified during the holiday program period. The display alternates between the exact time and the number of days remaining. When the remaining time is below 24 hours, it displays the time in a specific format. After the remaining time expires, the device returns to its default mode.
- Page 35: Operation according to the mode used before the holiday mode. By factory default, the backlight of the thermostat automatically switches on for 15 seconds after touching any button. Touching the button can switch on/off the backlight. You can modify the automatic backlight of the thermostat, the backlight of the keys, and the backlight brightness as described in Chapter 7. You can switch off the control buttons of the thermostat to prevent the settings from accidental or unauthorized modifications. Touching the button for 2 seconds can lock and unlock the control buttons. The icon appearing/disappearing in the right bottom corner of the display indicates the locked/unlocked state of the control buttons.
- Page 36: By default, the thermostat automatically locks the control buttons 30 seconds after the last button has been touched. This setting can be switched off as described in Chapter 7. The average life span of the batteries is 1 year, but frequent use of backlight can shorten this period considerably. When the low voltage supply icon flashes on the display, the batteries should be replaced. The exact time should be set again after the batteries have been replaced, but the device saves the program and settings even without batteries. Only high-quality alkaline batteries may be used in the device. Durable or long-life zinc-carbon batteries are unsuitable for the operation of the devices. The low battery icon warns of the necessity of battery replacement reliably only when high-quality alkaline batteries are used.
- Page 37: Frequently asked questions provide solutions for common appliance issues. It is recommended to read the FAQ on the website for troubleshooting. Most problems can be resolved easily with the hints provided online. If a solution is not found, visiting a qualified service is advised.
- Page 38: Product information data sheet Trademark: Computherm; Model identifier: Q20 Temperature control class: I. class Contribution to the efficiency of seasonal space heating: 1% Modern temperature regulators and up-to-date regulation methods improve comfort and energy efficiency. Dividing the heating network into sections or zones ensures that every room is heated only when necessary. Programmable thermostats allow for heating according to a preset timetable. Modern modular heating devices with external temperature sensors operate at higher efficiency. Low temperature heating networks and condensing boilers improve fuel efficiency by reducing flue gas temperature.

COPELAND 1F86-0244 Blue 2 Inch Single Stage Thermostat Instruction Manual

GENERAL HT300S Wired Room Thermostat User Guide

EXPERT4HOUSE BAC-9000 Smart Knob Thermostat User Guide

nvent NUHEAT Signature Thermostat User Manual

micro-Air ASY-357-X02 EasyTouch 357 Touchscreen Thermostat User Manual

Danfoss RAS-C2 Radiator Thermostat Installation Guide

Honeywell T9 Smart Thermostat Installation Guide

Rayotec Coloursense Wi-Fi Thermostat Instruction Manual

HIVE 81351 Thermostat Mini for Heating Installation Guide

Honeywell Home CT50 Series Thermostat Owner’s Manual