
vtech T961NN50 Amana Wired Thermostat User Guide




PTAC Direct Sales, Inc.
185 S. Kimball Ave. Suite 130
Southlake, TX 76092
877.454.7822 (T)
Installing T961NN50 Wired Thermostat
Amana
PTAC or Heat Pump
©2024 VTech Communications, Inc. All rights reserved.


| General | Details |
|---|---|
| Name | vtech T961NN50 Amana Wired Thermostat User Guide |
| Make | vtech |
| Language | English |
| Filetype | PDF (Download) |
| File size | 1.65 MB |
 (1 votes, average: 5.00 out of 5)
 Loading...

vtech Installing E-Smart W960 Thermostat User Manual

Vtech E-Smart W960 Thermostat Instruction Manual

vtech W960 E-Smart Wireless Thermostat User Manual

vtech W960 Installing E-Smart Thermostat Instruction Manual

vtech T961NN50 Universal Wired Thermostat User Guide

vtech T961NN50 E-Smart Thermostat Installation Guide

vtech T961 Wired Thermostat Owner’s Manual

vtech T961NN50 Wired Thermostat User Guide

VTech T961NN50 Amana Manual: Questions and Answers
What do the VTech T961NN50 base plate terminals R, C, Y1, and Aux/W1 connect to?
| VTech Base Plate Terminal | Purpose |
|---|---|
| R | 24VAC Terminal L |
| C | 24VAC Terminal N (Neutral), Common |
| Y1 | Compressor |
| Aux / W1 | Electric Heat |
Where is the wall plate opening on the VTech T961NN50 Amana thermostat located?
At the center of the wall plate, where the wire bundle routes through during installation. User Guide, p. 3
What does the Start button do on the VTech T961NN50 Amana thermostat?
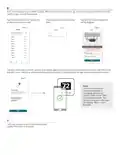
Tap Start to begin an NFC profile transfer from the EC Tool Pro app. User Guide, p. 6
Other VTech T961NN50 manuals
More VTech thermostat manuals

EONEBATW-B ZigBee Smart Thermostat User Guide

Honeywell RTH8500 Wi-Fi Series Thermostat User Guide

uponor D Plus RH T-247 BUS Smatrix Base Thermostat Instruction Manual

SIEMENS RDF660MB Flush Mount Room Thermostat Instruction Manual

EPH Controls CDT2-24 24V Room Thermostat Installation Guide

GLOBAL HY06RF-BW/WW/WE Thermostat User Manual

GENERAL LIFE ARUNA 302S Smart Room Thermostat User Manual

SALUS CONTROLS T105 Digital Programmable Thermostat User Guide

PRAXISDIENST DZ 003 Dry Block Thermostat User Manual

GENERAL Life FH255S Underfloor Heating Thermostat User Manual