Home > Skytech > SKYTECH 5320P Programmable Thermostat Fireplace Remote Control Instruction Manual

SKYTECH 5320P Programmable Thermostat Fireplace Remote Control Instruction Manual
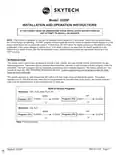
Model: 5320P  
INSTALLATION AND OPERATION INSTRUCTIONS  
IF YOU CANNOT READ OR UNDERSTAND THESE INSTALLATION INSTRUCTIONS DO  
NOT ATTEMPT TO INSTALL OR OPERATE  
NOTE: This product is designed or use with an attended hearth appliance or re eature. Adults must be present when  
the Control System is operating. DO NOT program or thermostatically set this Control to operate a hearth appliance or re  
eature when Adults are not physically present. Furthermore, DO NOT leave the hearth appliance or re eature burning  
unattended; it may cause damage or serious injury. Ian Adult is going to be away rom the hearth appliance or re  
feature for any length of time, then the handheld/wall mount, receiver/control module and application should be in the  
“OFF” position.  
INTRODUCTION  
This remote control system was developed to provide a safe, reliable, and user-friendly remote control system for gas  
heating appliances. The system can be operated thermostatically, manually or with the built-in factory program inside the  
transmitter. The built-in program has two segments, a weekdays and a weekend segment. The factory presets are time  
periods for each day. SEE PROGRAM SEQUENCE BELOW. Custom programming may be achieved after the initial  
setup has been performed.  
This system operates on radio frequencies (RF) within a 20-foot range using non-directional signals. The system  
operates one of 1,048,576 security codes that are programmed into the transmitter at the factory; the remote receiver’s  
code must be matched to that of the transmitter prior to initial use.  
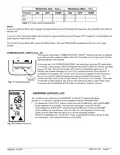
Built-in Factory Programs  
Weekdays - Mon. Tues. Wed.Thurs. Fri.  
DAY  
72°  
MORN  
Program 2 (P2)  
5:00AM  
4:00PM  
9:00AM  
Program 1 (P1)  
10:00PM  
72°  
Weekends - Sat. Sun.  
DAY  
72°  
MORN  
72°  
Program 2 (P2)  
6:00AM  
5:00PM  
10:00AM  
Program 1 (P1)  
10:00PM  
Table 1 Factory program.  
REV. 8-11-20 Page 1  
Skytech: 5320P  
GeneralDetails
NameSKYTECH 5320P Programmable Thermostat Fireplace Remote Control Instruction Manual
MakeSkytech
LanguageEnglish
FiletypePDF (Download)
File size0.49 MB
Download PDF
1 Star2 Stars3 Stars4 Stars5 Stars (1 votes, average: 5.00 out of 5)
Loading...

SKYTECH 5320P Programmable Thermostat Fireplace Remote Control Instruction Manual
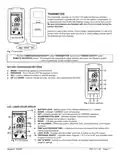
Get the free PDF manual for the SKYTECH 5320P Programmable Thermostat Fireplace Remote Control Instruction Manual and access setup steps, usage instructions, and troubleshooting tips. 👉 View online or download now to keep your thermostat running smoothly!
SKYTECH 5320P Programmable Thermostat Fireplace Remote Control Instruction Manual Overview
Summary of Contents

  • Page 1: Model: 5320P Installation and operation instructions If you cannot read or understand these installation instructions do not attempt to install or operate. This product is designed for use with an attended hearth appliance or fire feature. Adults must be present when the control system is operating. Do not program or thermostatically set this control to operate a hearth appliance or fire feature when adults are not physically present. This remote control system was developed to provide a safe, reliable, and user-friendly remote control system for gas heating appliances. The system can be operated thermostatically, manually or with the built-in factory program inside the transmitter. The system operates on radio frequencies (RF) within a 20-foot range using non-directional signals. The system operates one of 1,048,576 security codes that are programmed into the transmitter at the factory. Custom programming may be achieved after the initial setup has been performed. Built-in factory programs include weekdays and weekends with specific time periods for each day.
  • Page 2: The transmitter operates on 4 AAA 1.5V batteries that are included. It is recommended that alkaline batteries always be used for this product. When you start up the remote, if a low battery signal appears or if the LCD screen does not illuminate, check battery position and if the batteries are fully charged. Review communication safety under the transmitter section and thermo safety under the remote receiver section. These signal and temperature safety features shut down the fireplace system when a potentially unsafe condition exists. Mode switches the appliance on/thermo/off. Program turns on and off the program function. Set is used in different functions to confirm settings. Battery icon indicates battery power is low. Room indicates current room temperature.
  • Page 3: Basic transmitter functions and initial setup To select an operational mode, press the MODE button or touch the MODE section of the touch screen. ON turns the appliance manually ON; the flame icon will appear. THERMO sets the remote to thermostatic mode. OFF turns the appliance OFF; the flame icon will disappear. To change the temperature setting from ºF to ºC, press and hold the UP and DOWN touch buttons simultaneously. Press and hold the SET button for 5 seconds to set the clock. Use the UP and DOWN touch buttons to select the hour, minute, and AM/PM, then press SET. This remote control system can be thermostatically controlled when in THERMO mode. The highest set temperature is 99º F (32º C). The thermo feature operates the appliance whenever the room temperature varies a certain number of degrees from the set temperature.
  • Page 4: Program function includes two default segments: P1 for weekdays and P2 for weekends. To enter program mode, push the PROG button or touch the PROGRAM section of the touchscreen. P1 ON is set for 5:00 AM at 72ºF and P1 OFF at 9:00 AM on weekdays. For weekends, P1 ON is set for 6:00 AM at 72ºF and P1 OFF at 10:00 AM. Factory presets include P2 ON at 4:00 PM and P2 OFF at 10:00 PM. To turn off the program function, touch the PROGRAM section or press the PROG button. Editing program settings involves selecting either P1 or P2 segments. P1 can only be set from 12:00 AM to 12:00 PM, while P2 can only be set from 12:00 PM to 12:00 AM. To edit, press the PROG button or touch the Program section and hold for 5 seconds. Use the UP and DOWN buttons to select times and temperatures for both P1 and P2 segments.
  • Page 5: Weekends (Sat. - Sun.) and Weekdays (Mon. - Fri.) have ON, OFF, and TEMP settings. In Manual Mode, switching to Program Mode during Program Off segments will switch the transmitter to Manual Off. In Thermostat Mode, switching to Program Mode during Program Off segments will revert to Thermostat mode. To turn off Program Mode, press the PROG button. The remote control has a Communication-Safety function that sends an RF signal every 15 minutes to indicate the transmitter is within the normal operating range. If the receiver does not receive a signal every 15 minutes, it will start a 2-hour countdown. If no signal is received during this period, the receiver will shut down the controlled appliance and emit a series of beeps. The remote control features a Childproof Lock-Out that prevents operation from the transmitter. To activate the Lock-Out feature, press and hold the UP touch button and the SET button for 5 seconds. When in Lock-Out mode, programmed functions will continue, but manual functions are disabled.
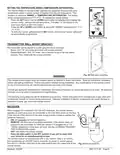
  • Page 6: Setting the temperature swing (temperature differential) The Thermo Mode on the transmitter operates the appliance whenever the room temperature varies a certain number of degrees from the set temperature. This variation is called the “swing” or temperature differential. The factory preset swing temperature is 2º F (1º C). To change the “swing setting,” press the SET button and the DOWN touch button simultaneously. Press the UP or DOWN touch button to adjust the “swing” temperature (1º- 3º F) (1º- 2º C). To store the “swing” setting press the SET button, and the new “swing” setting will be automatically programmed. Transmitter wall mount bracket The transmitter can be placed on a wall using the mount provided. Follow instructions carefully during installation. Any modifications of this remote control or any of its components will void the warranty and may pose a fire hazard. Receiver When plugged into a standard 110-120 VAC receptacle, the remote receiver operates on commands from the transmitter. The remote receiver is manufactured with a “dry contact” relay in its circuitry that operates like an ON/OFF switch.
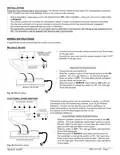
  • Page 7: Installation Protection from extreme heat is very important. The remote receiver should be kept away from temperatures exceeding 130ºF. Extreme heat can cause damage, which is not covered under warranty. Before installation, make sure you turn the slide switch to OFF. After installation, make sure you turn the slide switch to REMOTE. The remote receiver can be placed on the fireplace hearth or under the fireplace behind the control access panel. Use the wires attached to the remote receiver to connect to the gas valve or the electric module. Be sure that the connectors do not touch each other or other bare metal surfaces; this will cause the appliance to turn ON. A qualified electrician should install the remote control system. Millivolt valves Connect one wire from the remote receiver to the TH terminal on the gas valve. Ensure that the pilot flame is lit. Slide the 3-position button on the remote receiver to the ON position. The main gas flame should ignite. The remote control receiver can be connected, in series, to a 24VAC transformer to the TR terminal on the electronic module.
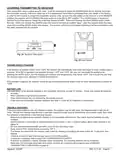
  • Page 8: Learning transmitter to receiver Each transmitter uses a unique security code. Press the LEARN button on the receiver to accept the transmitter security code. Ensure the slide button on the receiver is in the REMOTE position for learning. The LEARN button is located on the front face of the receiver. Press and release the black LEARN button inside the hole. The receiver will emit an audible beep when the LEARN button is released. Press the transmitter MODE button after the beep to complete the learning process. Thermo safety feature: the receiver shuts down at 130ºF and beeps every 2 seconds. Life expectancy of the alkaline batteries in the transmitter should be at least 12 months. Check and replace batteries annually or when operating range is reduced.
  • Page 9: FCC requirements outline the manufacturer's responsibility regarding radio or TV interference caused by unauthorized modifications. The equipment complies with Class B digital device limits as per FCC rules, designed to protect against harmful interference in residential installations. Users are advised that the equipment may cause interference if not installed correctly. If interference occurs, users can try various corrective measures, such as reorienting the antenna or increasing separation from the receiver. The device also complies with Industry Canada standards, requiring it not to cause interference and to accept any interference it may receive. It meets the requirements of Canadian interference-causing equipment regulations.
  • Page 10: Limited warranty. Skytech II, Inc. warrants that each new Skytech Control System shall be free of defects in materials and workmanship under normal use. System sold as is. Each System is sold subject to the Warranty and additional terms found on Skytech’s website. Installation and use of system. Improper installation or maintenance can cause property damage, personal injury, or loss of life. Adults must be present when the Control System is operating. Repair or replacement of system or parts. Skytech shall repair or replace defective Systems or parts, subject to compliance with warranty terms. Warranty claims; Skytech service. To submit a valid claim, a Customer must obtain a Return Material Authorization number from Skytech. Provide written notice to Skytech or an Authorized Dealer, including customer details and description of the defect. Provide notice within thirty days of discovering the defect. Securely pack and ship the defective product to Skytech. Skytech may refuse shipments that do not meet valid claim requirements. Compliance with these requirements is a condition to coverage under the Limited Warranty. Upon receipt of a valid claim, Skytech shall either repair, replace the System, or provide a refund to the Customer.
  • Page 11: Warranty information outlines the terms and conditions for repairs or replacements by Skytech. Skytech will ship repaired or replacement systems at their cost. The warranty extends to all repaired or replacement hardware, components, or parts. Skytech will not issue a refund until the defective item is received. Skytech reserves the right to inspect returned items. Some states may not allow limitations on warranties or damages. This warranty provides specific rights, and additional rights may vary by location. Skytech limits liability to the express terms of the warranty and disclaims implied warranties. Customers must provide proof of purchase with the warranty form. Date codes indicate the month and year the remote was produced.