Home > Network Thermostat > network thermostat NetX X Series Thermostat Instruction Manual
network thermostat NetX X Series Thermostat Instruction Manual


7. Reconnect power to the HVAC equipment. You are now
ready to configure your thermostat for operation.
Adjust Clock-12Hr or 24Hr Clock
Select between AM/PM or 24H time display. 12 Hr is the default.
°F or °C Temperature Display
Select between °F (Fahrenheit) or °C (Celsius) temperature
display. °F (Fahrenheit) is the default.
Minimum Off Time
High Balance Point
Select between 41˚F-118˚F (5˚C-48˚C). The value is displayed
in the main display. This will lock out the auxiliary heat at the
selected outdoor temperature. The default value is 118˚F (48˚C).
Select between 2 to 5 Minutes. The value is displayed in the
main display. 2 Minutes is the default. The system will allow
equipment recovery for 2 to 5 minutes before turning on again.
This is also known as short cycle protection.
TOUCHSCREEN TEMPERATURE OVERRIDE
Temperature Override Range (During Lockout)
On the Basic Configuration page, this setting adjusts the
temperature variance allowed from the scheduled setpoint
when the faceplate locked. The range is from ±2˚F (1˚C) to ±8˚F
(4˚C). The default is ±3˚F (1.5˚C).
Adaptive Recovery
TOUCHSCREEN INSTALLER MENU SETTINGS
Select On (default) or Off. When this is enabled, the thermostat
will anticipate when to turn on the heating or cooling system
prior to the start of a schedule in order to achieve the desired
setpoint temperature by the beginning of the schedule.
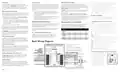
Press and hold the Menu Button
on the lower left of the
D
thermostat touchscreen for 5 seconds to access. Installer
Menu will briefly display in the Dot Matrix Area followed by
Conventional/HP. To save a setting and advance to the next
Fan Purge
menu item, press the Checkmark Button
(Right Arrow). To
M
Temporary Override (Up to 24 hours)
Select between Off, 30, 60, 90, 120 Seconds. Off is the default.
return to the previous menu item, press the Back Button
L
1
2
3
Change the temperature setting temporarily without affecting
(Left Arrow).
1st Stage Differential
the schedules, both occupied and unoccupied. Use the Up
J
Select between 1-6˚F (0.5-3˚C). The value is displayed in the
main display. 1˚F (0˚C) is the default. The 1st Stage Differential is
the temperature degree change required before the thermostat
responds.
Conventional/ Heat Pump
Select between Conventional or Heat Pump operation.
Conventional is the default.
and Down
Buttons to adjust the temperature within the
K
WARNING: Your thermostat is NOT ready to use. You
C
minimum and maximum range. This temperature will be
must complete the Thermostat Setup section before using
the thermostat. Failure to do this can result in damage to your
equipment.
maintained for the duration set by the Override Timer. To
cancel, simply press the Cancel Button.
I
NOTE: If Conventional is Selected Proceed to Stages Cool.
If Heat Pump is selected, proceed to # of Compressors.
2nd Stage Differential
Temporary Override During Lockout (Up to 24 hours)
THERMOSTAT SETUP
The Dot Matrix Display will provide feedback on the
User Menu or Installer Menu configuration and selected
Select between 1-6˚F (0.5-3˚C). The value is displayed in the
Change the temperature setting temporarily without affecting
Stages Cool
main display. 1˚F (0˚C) is the default.
the schedules, even though the keypad is locked. Use the Up
and Down
Buttons to adjust the temperature limited to
Select between 1 or 2 Stages Cool. The value is displayed in
the main display. The default is 1.
J
K
options. The Up Button
and Down Button
are used to
2nd Stage Delay
Select between 5-40 Minutes. The value is displayed in the
main display. 20 Minutes is the default.
J
K
the Temperature Override Range setting. This temperature
select parameters while the LEFT ARROW (Back Button) and
RIGHT ARROW (Accept button) are used to accept settings
and navigate through the menu. At any time you can use the
CANCEL BUTTON to leave the User or Installer Menu.
will be maintained for the duration set by the Override Timer.
To cancel, simply press the Cancel Button.
Stages Heat
I
Select between 1 or 2 Stages Heat. The value is displayed in
the Main Display. The default is 1.
A NOTE: If running an OCCUPIED schedule, the current
occupied setpoint will be shown, and if running an
UNOCCUPIED schedule the thermostat will revert to the most
previous OCCUPIED schedule setpoints.
NOTE: The following options only apply to multi-stage heat
pump configuration.
TOUCHSCREEN USER MENU SETTINGS
Gas or Electric Heat
Aux Heat Diff
Select between 1-6˚F (0.5-3˚C). The value is displayed in the
main display. 1˚F (0˚C) is the default.
Tap the Menu Button
on the lower left of the thermostat
D
Select between Gas or Electric operation. Gas heat is the default.
touchscreen to access the User Menu. The Dot Matrix Area
will guide you through the User settings. To save a setting
and navigate to the next menu item, press the Checkmark
ADDITIONAL SETTINGS AND FEATURES
NOTE: If you selected Conventional Heat, proceed to
Minimum On Time.
In addition to the User Menu and Installer Menu The X-Series
thermostat has additional options that can be set using the
built-in web pages or via our cloud interface. Please refer to
this online guide for setting these additional parameters.
Unless otherwise noted, these additional settings are available
under the Configuration menu tab of the built-in web pages.
Aux Heat Delay
Select between 5-40 Minutes. The value is displayed in the
main display. 20 Minutes is the default.
Button
(Right Arrow). To return to the previous menu item,
M
# of Compressors
Select between 1 or 2 Stage Compressor. The value is
displayed in the main display. The default is 1.
press the Back Button
(Left Arrow). Use the Up
and
L
J
Down
Buttons to select from the available options for each
K
setting.
High & Low Balance Point Configuration
Enable Aux/EHeat
Select between Aux/EHeat Mode On (default) or Aux/EHeat
Mode Off.
Brightness - Screen Brightness
Select brightness of the touchscreen display.
Options: Auto (default), High, Medium, Low
If the thermostat is being used as a Heat Pump thermostat and
current weather conditions are enabled or an outdoor sensor is
connected to the remote sensor terminals, the thermostat can
be configured to disable the use of auxiliary heat during warmer
weather and to lock out the compressor during colder weather.
If the weather conditions are enabled the high and low balance
point settings are available in the installer menu.
Override Timer
On the Basic Configuration page, you will be able to adjust
the length of a temporary override condition from 0 minutes to
24 hours, in 10 minute increments. The default override time is 8
hours.
NOTE: If the Aux/EHeat ON is selected, proceed to Heat Pump
Option. Otherwise, proceed to the Minimum On Time option.
Color - Display color
Select the color of your display. The default is Cyan.
Options: Cyan, Purple, Yellow, White, Red, Green, and Blue.
Heat Pump Option
Select between HP Regular (default) or HP Dual Fuel.
Temperature Calibration Offset
TIP: Refer to the manufacturer’s heat pump equipment
B
The thermostat is pre-calibrated at the factory, but in some
installations, lack of airflow at the sensor or proximity to other
warming or cooling sources may cause the temperature to be
off by a few degrees. The X-Series thermostat includes a
temperature calibration offset with a range of ±6˚F (3˚C) in 0.2˚F
(0.1˚C) increments. The Temperature Calibration Offset is on
the HVAC Settings web page of the thermostat.
manual for temperature cut-offs on the equipment.
Display Complexity
There are three different resting display options.
Options:
If needed, the thermostat will perform the function of a fossil
fuel kit. When HP Dual Fuel is selected the thermostat will turn
off the compressor with a call for AUX heat. The HP Regular
option will allow the compressor and AUX heat to run
simultaneously.
Low Balance Point
Select between -54˚F to 39˚F (-48˚C to 4˚C). The value is displayed
in the main display. This will lock out the heat pump at the
selected outdoor temperature. The default value is -54˚F (-48˚C).
● Full: (default) Shows entire screen all the time
● Minimal: if nothing is noticed by the sensor for 5 seconds
only room temperature shows.
● Dark: if nothing is noticed by the sensor for 5 seconds the
whole screen goes blank.
Minimum On Time
Select between 0-5 Minutes. The value is displayed in the main
display. 0 Minutes is the default. The system will operate for a
minimum of 0 minutes to 5 minutes depending on your setting.
Page 2
| General | Details |
|---|---|
| Name | network thermostat NetX X Series Thermostat Instruction Manual |
| Make | Network Thermostat |
| Language | English |
| Filetype | PDF (Download) |
| File size | 0.28 MB |


Network Thermostat X7-Series Thermostat Installation Guide

Network Thermostat X7C-WIFI Smart Touchscreen Thermostat Instruction Manual

Network Thermostat X5-WIFI Smart Touchscreen Thermostat Instruction Manual

Network Thermostat NetXTM X-Series Thermostat Installation Guide

network thermostat NetX X5-CFA Universal Setback Thermostat Instruction Manual

network thermostat NetX X-Series Ethernet Thermostat Owner’s Manual

network thermostat X-Series Ethernet Thermostat Instruction Manual

Network Thermostat NetX X7 Series Thermostat Instruction Manual

network thermostat X X7-WIFI Smart Touchscreen Thermostat Instructions


autani SMT-131 Wireless Digital Thermostat Installation Guide

HAVACO HTS Electronic Room Thermostat User Manual

SALUS RT510 Thermostat Instruction Manual

stelpro STZW402 ELECTRONIC THERMOSTAT SMART HOME User Guide

HYSEN HY02DB-WIFI Wifi Plug In Thermostat User Manual

meross MTS200HK Smart Wi-Fi Thermostat User Manual

Thermafloor HT1 Thermostat White App Electric Mat Thermostat User Guide

Netatmo NTH01-AMZ Energy Saving Smart and Connected Thermostat Instruction Manual

Danfoss ECtemp 132 Electronic Thermostat Installation Guide

DEVIreg Electronic Intelligent Timer Thermostat Installation Guide