
Home > HVAC Controls > HVAC Controls UT32 Titan Touchscreen Thermostat User Manual
HVAC Controls UT32 Titan Touchscreen Thermostat User Manual






HVAC Controls
UT32 Titan Touchscreen Thermostat
User Manual


| General | Details |
|---|---|
| Name | HVAC Controls UT32 Titan Touchscreen Thermostat User Manual |
| Make | HVAC Controls |
| Language | English |
| Filetype | PDF (Download) |
| File size | 0.2 MB |
 (1 votes, average: 5.00 out of 5)
 Loading...

HVAC Controls UT32 Titan Touchscreen Thermostat User Manual Overview
Summary of Contents
- Page 1: HVAC controls UT32 Titan touchscreen thermostat User manual
- Page 2: Introduction Using the touchscreen display Typical display Setting the day, time and calendar Basic functions Mode configurations Conventional heating and cooling equipment (gas/electric) Heat pump and dual fuel equipment Mode selection Fan selection
- Page 3: Overrides Temporary temperature override Permanent hold Other options and features Adaptive recovery option Clean screen Compressor time delay Low battery indication Outdoor temperature display Changing the batteries
- Page 4: Your new UT32 is a feature-rich touchscreen thermostat manufactured using high-quality components. When properly installed and configured by a professional, the UT32 will provide years of dependable operation. The UT32 is designed to be an attractive, highly reliable, and easy-to-use thermostat. Reading and understanding this User Manual allows you to take advantage of the many features offered. iO HVAC Controls takes no responsibility for errors or omissions contained in this manual. It is the responsibility of the installer to ensure safe and efficient operation of the thermostat and connected equipment. iO HVAC Controls reserves the right to change the specifications of the UT32 without notice. All rights reserved. Intellectual rights apply.
- Page 5: Using the UT32 touchscreen display simplifies use by only showing relevant information for the current mode of operation. When adjustments are needed, the thermostat displays additional information or functional icons. Some information and icons may not be displayed based on the thermostat configuration. The display includes outside air temperature, set temperature, and time of day. Daylight savings time is indicated when active, and the display shows the days of the week. A clean screen feature allows for 30 seconds to clean the screen while maintaining thermostat functions. The lock icon indicates when a function cannot be accessed or is locked. Low battery is indicated by a flashing warning and an audible beep. The program feature is used to set events in programmable mode. The operation mode allows selection between heat, cool, auto, off, or emergency heat.
- Page 6: Typical display during normal operation includes the day of the week, time of day, calendar, space temperature, fan selection, program period (in programmable mode), mode of operation, set temperature, and a flash indicator for compressor time delay.
- Page 7: Setting the day, time, and calendar involves touching the display until the backlight comes on. To change the hour, touch and hold the clock until it beeps and the hour flashes. Use the UP or DOWN arrow to adjust the hour, ensuring AM or PM is correct. After adjusting the hour, touch the clock again to change the minutes, which will also flash. Continue by changing the month, day of the month, and year using the UP or DOWN arrows. The thermostat will return to its operating mode after a few moments, displaying the correct day of the week. The thermostat automatically compensates for Daylight Saving Time, indicated by DST below the AM/PM symbol. In areas where Daylight Saving Time is not observed, this option can be disabled by the installing contractor.
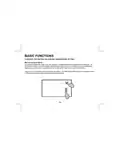
- Page 8: Basic functions Your contractor can configure the thermostat with different mode selections based on user preference and/or equipment type. Mode configurations can be as follows: Conventional heating and cooling equipment (gas/electric) Manual changeover (Heat/Cool/Off) Auto changeover (Heat/Cool/Auto/Off) Heat only (Heat/Off) Cool only (Cool/Off) Heat pump and dual fuel equipment Manual changeover (Heat/Cool/*E.Heat/Off) Auto changeover (Heat/Cool/Auto/*E.Heat/Off) Heat only (Heat/*E.Heat/Off) Cool only (Cool/Off) When the thermostat is placed in the E.Heat (Emergency Heat) mode, only the auxiliary heat source is used and the heat pump is locked out.
- Page 9: Basic functions Mode selection To select a mode of operation, touch the display until the back light comes on. Touch the mode box repeatedly on the screen to select the mode of operation. Off - Thermostat will not call for heating or cooling. Thermostat will only call for heating. Thermostat will only call for cooling. Heat - Thermostat will call for heating. Cool - Thermostat will call for cooling. Auto - Thermostat will call for either heating or cooling. E.Heat - Thermostat only controls emergency heat when configured for heat pump or dual fuel equipment.
- Page 10: Basic functions include fan selection options. Touch the display until the backlight comes on. Select between automatic or always on fan mode. In automatic mode, the fan operates with a heating or cooling call. If set to always on, the fan will run continuously. The fan continues to run until placed in automatic mode if the thermostat is turned off. Programmable fan option allows changing the fan mode for each scheduled program event. You might set always on for the morning schedule and automatic for the day schedule. The selected fan mode will automatically be implemented with each schedule change. Refer to page 18 for further details on programmable fan settings.
- Page 11: Basic functions Changing the heating or cooling temperature setting In manual changeover mode, only the heating or cooling temperature setting will be displayed. To change the setting, touch the display until the back light comes on and then touch the temperature displayed on the screen. Depending on the mode, either Heat Set or Cool Set will flash. Touch the UP or DOWN arrow to change the setting. The thermostat will return to its operating mode in 10 seconds and the new temperature will be displayed.
- Page 12: Basic functions Changing the heating or cooling temperature setting In auto changeover mode, the heating and cooling temperature setting alternate on the screen. To change the settings, touch the display until the back light comes on and then touch the temperature displayed on the screen. Cool Set will flash three times and then Heat Set will flash three times. To change the cooling setting, touch the UP or DOWN arrow to change the setting when Cool Set is flashing. To change the heating setting, touch the UP or DOWN arrow to change the setting when Heat Set is flashing. The thermostat will return to its operating mode in 10 seconds and the new heating and cooling temperatures will alternately be displayed.
- Page 13: Your contractor can configure the UT32 with two programming options for 7-day scheduling. You can elect to have 4 daily events (Morning, Day, Evening, Night) or 2 daily events (Day, Night) for each day of the week. You can program both heating and cooling temperatures for each scheduled event when the thermostat is in the Auto or manual changeover mode. The thermostat cannot be programmed in the Off mode. If the thermostat is configured for heat only or cool only, then only that mode can be programmed.
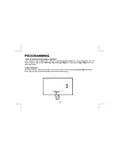
- Page 14: Programming options for 7-day scheduling are available. You can choose between 4 daily events or 2 daily events for each day of the week. The 4 daily events are Morning, Day, Evening, and Night. To access the programming, touch the display until the backlight comes on and then touch and hold Program. The screen will display Mon (Monday) along with the UP and DOWN arrows.
- Page 15: Programming allows you to set the morning start time. The hour and AM or PM will flash for adjustment. The factory default morning start time is 6:00 AM. Minutes can be adjusted in 10-minute increments. Touch the UP or DOWN arrow to change the hour. Touch Program again to adjust the minutes. The morning start time settings are crucial for scheduling. Ensure to confirm the changes after adjustments. The interface provides a simple way to set the desired time. Adjustments can be made easily with the touch controls.
- Page 16: Touch Program again and the Morning Cool Set temperature will be displayed and flash. Touch the UP or DOWN arrow to change the cooling temperature. The factory default is 75° F for the morning schedule. Touch Program again and the Morning Heat Set temperature will be displayed and flash. Touch the UP or DOWN arrow to change the heating temperature. The factory default is 70° F.
- Page 17: Programming allows you to set the start times and temperatures for different times of the day. The day start time defaults to 8:00 AM, with a cool set of 78°F and a heat set of 62°F. The evening start time defaults to 6:00 PM, with a cool set of 75°F and a heat set of 70°F. The night start time defaults to 10:00 PM, with a cool set of 78°F and a heat set of 62°F. You can copy the Monday schedule to consecutive days by selecting the days you want to copy to. Each selected day will flash to confirm your selection. Touching Program will confirm that the schedule is being copied to the selected days. If you prefer different schedules for each day, simply touch Program when the copy option appears. The thermostat will automatically advance to the next day after setting the schedule. Follow the same steps for each time period to set your desired temperatures.
- Page 18: Programming allows for different schedules for each day of the week. Touch Program to advance to the next day. Seven day scheduling for two daily events follows the same steps as four daily events. You only need to program Day and Night. Once programming is completed, the thermostat will resume normal operation in 10 seconds.
- Page 19: Programmable fan option allows selection between automatic or always on fan modes during programming events. The programmable fan option appears at the end of each programming event. Touch the UP arrow to change from automatic to always on fan mode. Touch Program to maintain automatic fan operation for the program period. Fan mode can be changed by touching Fan. The program event will flash to confirm the programmable fan mode is in override. To resume normal operation, touch Program. Hold will appear when resuming programmed operation. Automatic fan mode runs the equipment fan during heating or cooling calls. Always on fan mode allows continuous fan operation regardless of heating or cooling calls.
- Page 20: Overrides are available when the UT32 is configured for programmable operation. Temporary temperature override allows adjustment of heating or cooling temperature without affecting programmed temperatures. To change the heating temperature, touch the displayed setting until the backlight comes on. When Heat Set flashes, use the UP or DOWN arrows to adjust the setting. The thermostat will resume normal operation in 10 seconds and display the new heating temperature. The program period will flash continuously to confirm that the temperature has been changed.
- Page 21: Overrides allow for a new heating temperature to remain active until the next scheduled event. To manually cancel a temporary override, touch the display until the backlight comes on, then touch Program until Hold appears, and then touch Hold. The thermostat will resume normal programmed operation after canceling the override. Permanent hold may be required during vacations or holidays. To place the thermostat in permanent hold, touch the display until the backlight comes on, then touch Program until Hold appears. Adjust the permanent hold temperature by touching the UP or DOWN arrow while Set Heat or Set Cool are flashing. To resume normal programmed operation from permanent hold, touch the display until the backlight comes on and then touch Hold. Program will reappear, and the thermostat will return to programmed operation.
- Page 22: Other options and features Adaptive Recovery Option If your thermostat has been configured for programmable operation, your contractor can add the Adaptive Recovery Option. Adaptive Recovery compares the space temperature deviation from the set temperature for the next scheduled event. Example: If you program a heating temperature to be 70 degrees at 6:00 PM, Adaptive Recovery will calculate when to bring the equipment on. The program period will flash during the Adaptive Recovery process. If the thermostat is placed in temporary temperature override, Adaptive Recovery is cancelled for the next scheduled event. Clean screen It is recommended that the touch screen be cleaned periodically. Use a slightly moistened clean, non-abrasive cloth. Touch the screen until the back light comes on. Touch the Clean Screen window. The thermostat will count down from 30 seconds while you clean the screen.
- Page 23: Compressor time delay prevents short cycling of the air conditioner or heat pump. The thermostat has a built-in 4-minute time delay. The word Mode will flash on the display during the time delay. The thermostat uses two AA batteries for the time-of-day clock. Low battery icon indicates the need for immediate battery replacement. Battery power may control heating and air conditioning equipment. If battery power drops, the backlight will be disabled. All heating and cooling functions will be disabled when battery power is low. An audible beep will sound every 10 minutes when battery is low. The display will only show the battery icon when power is critically low.
- Page 24: Outdoor temperature display shows readings from 1 degree Fahrenheit to 130 degrees Fahrenheit. If the temperature falls below 1 degree F, the display shows LO. If the temperature rises above 130 degrees F, the display shows HI. To change the batteries, press in on the battery access compartment and slide the drawer out. Install two AA batteries matching the positive and negative orientation. Push the battery compartment in until it clicks shut. The touchscreen display will resume normal operation with no loss of programming or current time.
- Page 25: Timed ventilation is designed to improve residential indoor air quality by introducing fresh, outside air through a motorized intake damper controlled by the thermostat. The thermostat automatically controls the amount of fresh air required each hour based on ASHRAE 62.2 - 2013 Ventilation and Indoor Air Quality Standard. If your thermostat has been setup for timed ventilation, it will automatically open the outside air damper and turn on the system fan for a specific period of time each hour. Whenever timed ventilation is active, the word FAN on the thermostat will flash. If an optional outdoor temperature sensor is wired to the thermostat, timed ventilation can be overridden by setting high and/or low outdoor temperature limits. If the outdoor temperature exceeds these limits, the words Outdoor Air Temperature will flash. The outside air damper will remain closed and the system fan will not come on if the outdoor temperature exceeds the set limits.
- Page 26: Page 26

EPH CONTROLS HRT Battery Operated Non Programmable Thermostat Installation Guide

SECURE H3747 Smart Programmable Thermostat Installation Guide

QC Manufacturing Inc IT-30003 Attic Fan Adjustable Thermostat User Manual

GENERAL LIFE HT250S Smart Room Thermostat User Manual

Hotwire HWTH Horizontal Thermostat Instructions

ecobee M5A Smart Wi-Fi Thermostat User Guide

Moes ZigBee 002 Series Thermostat User Manual

DAIKIN ONE+ Smart Thermostat User Manual

sygonix 2997033 Wi-Fi Radiator Thermostat Instruction Manual

JUMO exTHERM-AT Explosion-Protected Surface-Mounted Thermostat Instruction Manual