Home > Honeywell Home > Honeywell Home RTH Series T5 Smart Thermostat Installation Guide
×
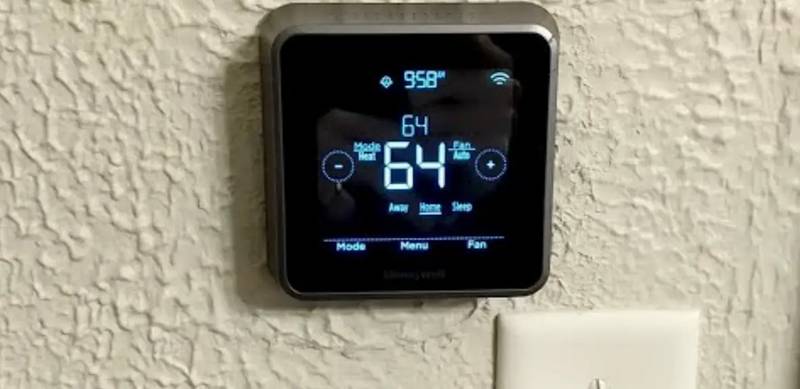
- 1. T5 Smart Thermostat (Following Schedule → Programmable Thermostat Mode → Heat → Fan → Auto → Quick Install Guide)
- 2. Included In Your Box: (Quick Install Guide → Uwp Mounting System (uwp) → T5 Smart Thermostat)
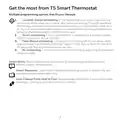
- 3. Get The Most From T5 Smart Thermostat (Multiple Programming Options That Fit Your Lifestyle: → Location-based Scheduling → Smart Scheduling → Time-based Scheduling → Smart Alerts → Smart Response → Auto Change From Heat To Cool)
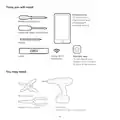
- 4. Tools You Will Need (To Install Your Thermostat And Photograph Existing Wiring → To Configure Your System And Connect To Your Smartphone → You May Need)
- 5. Caution: Electrical Hazard (Caution: Equipment Damage Hazard → Caution: Mercury Notice → Required: 24 Vac Power ('c' Wire) → Caution: Electronic Waste Notice → Compatibility)
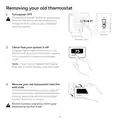
- 6. Removing Your Old Thermostat (Turn Power Off → Check That Your System Is Off → Remove Your Old Thermostat From The Wall Plate)
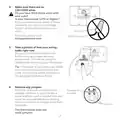
- 7. Make Sure There Are No 120/240v Wires (Take A Picture Of How Your Wiring Looks Right Now → Remove Any Jumpers)
- 8. Record If You Have Wires In The Following Terminals (Write Down The Color Of The Wires → Check All That Apply (not All Will Apply): → Required → S And U Terminals Are Not Supported With This Thermostat. → If There Are Wires In Terminals That Are Not Listed, You Will Need Additional Wiring Support.)
- 9. Disconnect The Wires And Remove The Old Wall Plate (Use A Screwdriver To Release Wires From Terminals → Tip: To Prevent Wires From Falling Back Into The Wall, Wrap The Wires Around A Pencil)
- 10. Installing Your T5 Smart Thermostat (Mounting → System → T5 Smart Thermostat)
- 11. Bundle And Insert Wires Through The Uwp (Insert The Wall Anchors)
- 12. Set The R-switch (Insert Wires Into The Inner Holes → If You Have 1 R-wire → If You Have 2 R-wires)
- 13. Connect Remaining Wires From Step 8 (Mount The Uwp And Close The Door)
- 14. Attach Your Thermostat (Turn Your Power On → Return To The Thermostat)
- 15. Setup With Resideo App (Start Setup With The App → Select To Setup With The App → Your Thermostat Is Now Ready To Be Configured Using The Resideo App)
- 16. How To Use Your Resideo App (Access The Menu → Thermostat → Schedule Your Home Comfort)
- 17. How To Use Your T5 Smart Thermostat (Mode → Fan)
- 18. Manual Setup (Start Manual Setup → Select Manual Setup → Navigate And Edit Setup Options)
- 19. Finish Setup (Setup Wi-fi → Set Time And Date)
- 20. Equipment Setup Options (System Type → Equipment Type → Reversing Valve)
- 21. Equipment Setup Options (Cool Stages/compressor Stages → Heat Stages/aux/e Stages)
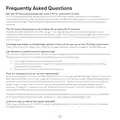
- 22. Frequently Asked Questions (Will The T5 Smart Thermostat Still Work If Wi-fi Connection Is Lost? → The T5 Smart Thermostat Is Not Finding The In Home Wi-fi Network. → Can There Be Multiple Users For Geofencing? → How Are Multiple Users Set Up With Thermostat? → Is There A Way To Extend The Signal Strength?)
- 23. Thermostat (Following Schedule → Intelligent T5 → Programmable → Mode → Guide)
- 24. Inclus Dans Cette Boîte :
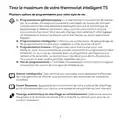
- 25. Tirez Le Maximum De Votre Thermostat Intelligent T5 (Plusieurs Options De Programmation Pour Votre Style De Vie → Programmation Géodépendante → Programmation Intelligente → Programmation Horaire → Pas De Programmation → Alertes Intelligentes)
- 26. Outils Requis (Application Resideo → Téléphone Intelligent → Mot De Passe Wi-fi De La Résidence → Dénuder De Fils)
- 27. Mise En Garde : Risque De Choc Électrique (Mise En Garde : Risque De Dommages De Léquipement → Mise En Garde : Avis Relatif Au Mercure → Requis : Alimentation De 24 V C.a. (fil C) → Mise En Garde : Avis De Déchets Électroniques → Compatibilité)
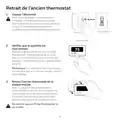
- 28. Retrait De Lancien Thermostat (Coupez Lélectricité → Vérifiez Que Le Système Est Hors Tension → Retirez Lancien Thermostat De La Plaque Murale)
- 29. Assurez-vous Quaucun Fil De 120/240 V Nest Présent (Prenez Une Photo Du Câblage Existant → Retirez Tout Cavalier)
- 30. Notez La Présence De Fils Dans Les Bornes Suivantes (Notez La Couleur Des Fils → Cochez Les Fils Connectés À Des Bornes → Les Bornes S Et U Ne Sont Pas Prises En Charge Par Ce Thermostat)
- 31. Débranchez Les Fils Et Retirez Lancienne Plaque Murale (Utilisez Un Tournevis Pour Dégager Les Fils Des Bornes. → Conseil : Pour Éviter Que Les Fils Ne Tombent Derrière Le Mur, Enroulez-les Autour Dun Crayon.)
- 32. Installation De Votre Thermostat Intelligent T5 (Système De → Thermostat → Intelligent T5 → Vis → Montage → Uwp)
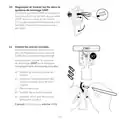
- 33. Regroupez Et Insérez Les Fils Dans Le Système De Montage Uwp (Insérez Les Ancres Murales)
- 34. Réglez La Position Du Contacteur R (Insérez Le Ou Les Fils R → Placez Le Contacteur R En Position Haute Ou Basse → Insérez Les Fils Dans Les Trous Internes Des Bornes Du Système Uwp → Si Vous Avez Un Fil R (r, Rh, Ou Rc) → Si Vous Avez Deux Fils R (r Ou Rh, Et Rc))
- 35. Connectez Les Fils Restants De Létape 8 (Montez Le Système Uwp Et Fermez La Porte)
- 36. Attachez Le Thermostat (Rétablissez Lalimentation → Revenez Au Thermostat)
- 37. Configuration Avec Lapplication Resideo (Commencez La Configuration → Votre Thermostat Est Prêt À Être Configuré Avec Lapplication Resideo)
- 38. Utilisation De Votre Application Resideo (Accéder Au Menu → Régler La Température Désirée → Sélectionnez Le Mode → Programmer Votre Confort)
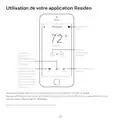
- 39. Utilisation De Votre Thermostat Intelligent T5 (Température Désirée → Réglage De La Température → Mode → Fan → Menu)
- 40. Configuration Manuelle (Commencez La Configuration Manuelle → Sélectionnez La Configuration Manuelle → Pour Modifier La Valeur Dune Option)
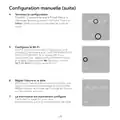
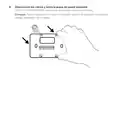
- 41. Terminez La Configuration (Configurez Le Wi-fi → Réglez Lheure Et La Date → Le Thermostat Est Maintenant Configuré)
- 42. Options De Configuration De Léquipement (Type De Programme → Type De Système → Type Déquipement → Vanne Dinversion)
- 43. Options De Configuration De Léquipement (Étages De Refroidissement / Étages Du Compresseur → Étages De Chauffage / Heat Stages)
- 44. Foire Aux Questions (Fonctionnement Du Thermostat Intelligent T5 → Géorepérage Et Utilisateurs Multiples → Configuration Des Utilisateurs Avec Le Thermostat → Accroître La Force Du Signal)
- 45. Termostato Inteligente T5 (Termostato Programable → Guía De Instalación Rápida → Modo → Fan → Wake → Sleep)
- 46. Esta Caja Incluye: Guía De Instalación Rápida, Tornillos Y Tarugos, Sistema De Montaje Con Uwp, Termostato Inteligente T5.
- 47. Aproveche Al Máximo El Termostato Inteligente T5 (Múltiples Opciones De Programación Que Se Adaptan A Su Estilo De Vida: → Programación Según La Ubicación → Programación Inteligente → Programación Temporal → Sin Programación → Alertas Inteligentes → Smart Response → Cambio Automático De Calefacción A Refrigeración)
- 48. Herramientas Que Necesitará (Para Instalar → Aplicación Resideo → Es Posible Que Necesite)
- 49. Precaución: Peligro De Descarga Eléctrica (Precaución: Riesgos De Daños Al Equipo → Precaución: Aviso Sobre El Mercurio → Necesario: Alimentación De 24 V Ca (cable 'c') → Precaución: Aviso De Desperdicio Electrónico → Compatibilidad)
- 50. Extracción Del Termostato Existente (Desconecte El Suministro De Energía Eléctrica → Verifique Que Su Sistema Esté Desconectado → Retire El Termostato Viejo De La Placa De Pared)
- 51. Asegúrese De Que No Haya Cables De 120/240 V (Tome Una Fotografía Del Cableado Ahora → Quite Todos Los Puentes)
- 52. Registre Si Tiene Cables En Las Siguientes Terminales (Escriba El Color De Las Cables → Marque Todo Lo Que Corresponda → Este Termostato No Admite Terminales S Ni U)
- 53. Desconecte Los Cables Y Retire La Placa De Pared Existente (Utilice Un Destornillador Para Sacar Los Cables De Los Terminales → Consejo: Para Evitar Que Los Cables Se Caigan Dentro De La Pared, Enrolle Los Cables Alrededor De Un Lápiz.)
- 54. Instalación De Su Termostato Inteligente T5 (Sistema De → Termostato Inteligente T5 → Tornillos Montaje Con Uwp → Tarugos Pared)
- 55. Agrupe E Inserte Los Cables A Través De La Uwp (Inserte Los Tarugos De Pared)
- 56. Establezca La Posición Del Interruptor R (Inserte Los Cables En Los Agujeros Internos De Los Terminales → Coloque El Interruptor R En La Posición Hacia Arriba → Si Tiene 1 Cable R → Si Tiene 2 Cables R)
- 57. Conecte Los Cables Restantes Del Paso 8 (Monte La Uwp Y Cierre La Puerta)
- 58. Instale El Termostato (Conecte La Energía Eléctrica → Regrese Al Termostato)
- 59. Configurar Usando La Aplicación Resideo (El Termostato Está Listo Para Configurar Usando La Aplicación Resideo → La Aplicación Resideo Lo Guiará Durante El Resto Del Proceso De Configuración)
- 60. Cómo Usar La Aplicación Resideo (Acceso Al Menú → Configurar La Temperatura Deseada → Modo Del Ventilador → Modo Del Sistema → Programar La Comodidad De Su Hogar)
- 61. Cómo Usar El Termostato Inteligente T5 (Temperatura Deseada → Ajuste De La Temperatura → Mode → Menu → Fan Mode → Características)
- 62. Configuración Manual (Inicie El Modo De Configuración Manual → Seleccione El Modo De Configuración Manual → Navegue Y Edite Las Opciones De Configuración)
- 63. Configuración Manual (continuación) (Finalice La Configuración → Configure El Wifi → Configure La Hora Y La Fecha → Su Termostato Ahora Está Configurado)
- 64. Opciones De Configuración Del Equipo (Tipo De Sistema → Tipo De Equipo → Válvula De Inversión)
- 65. Opciones De Configuración Del Equipo (Etapas De Refrigeración/etapas Del Compresor → Etapas De Calefacción/aux/emer)
- 66. Preguntas Frecuentes (El Termostato Inteligente T5 Sigue Funcionando Si Se Pierde La Conexión Wifi? → Puede Haber Múltiples Usuarios Para Geofencing? → Cómo Se Configuran Usuarios Múltiples Con El Termostato? → Hay Alguna Forma De Ampliar La Potencia De La Señal?)
×
Honeywell Home RTH Series T5 Smart Thermostat Installation Guide
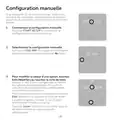
Configuración manual
Si su red WiFi no está funcionando, como alternati-
va, puede configurar su termostato manualmente y
conectar su teléfono más tarde.
1
Inicie el modo de configuración manual
Toque START SETUP (INICIAR
CONFIGURACIÓN) para comenzar.
2
Seleccione el modo de configuración manual
En la pantalla USE APP (configurar la
aplicación), toque No.
No
Yes
3
Navegue y edite las opciones de configuración
Use
o
para navegar por las opciones de
configuración. Para ver una lista de todas las
opciones de configuración, consulte las páginas
20 y 21.
Para editar un valor de opción, toque Edit (edi-
tar) o toque el área con texto.
El valor comienza a parpadear. Use
seleccionar el valor correcto.
o
para
Edit
Toque Done (terminado) o el área con texto una
vez que haya seleccionado el valor correcto.
| General | Details |
|---|---|
| Name | Honeywell Home RTH Series T5 Smart Thermostat Installation Guide |
| Make | Honeywell Home |
| Language | English |
| Filetype | PDF (Download) |
| File size | 1.89 MB |

Honeywell Home TH8320R1003-Uv VisionPRO 8000 with RedLINK Multistage Thermostat Installation Guide

Honeywell Home TH2110DH 1 Cool Programmable Digital Thermostat Installation Guide

Honeywell Home DT4R Wireless Room Thermostat User Guide

Honeywell Home N100 Series Non Programmable Thermostat User Guide

Honeywell Home X1N Non Programmable Thermostat Installation Guide

Honeywell Home DT4M Wired Room Thermostat User Manual

Honeywell Home T834 Series Thermostat Owner’s Manual

Honeywell Home M38794 T10 and T10 plus Pro Smart Thermostat with RedLINK Installation Guide

Honeywell Home DT4 Channel Wired Room Thermostat Instruction Manual

Honeywell Home T10 Smart Home Thermostat Instructions


Total Home TTHWD Wired Digital Room Thermostat User Guide

Honeywell TH4110U Thermostat Installation Guide

INKBIRD C216T-C226T Plug In Timer Thermostat User Manual

neptronic TMA54-EXT1 Thermostat Instruction Manual

Danfoss RAE Radiator Thermostat Installation Guide
ENGO CONTROLS EASY-24W 24V Wired Thermostat User Guide

Honeywell Home N100 Series Non Programmable Thermostat User Guide

COLDBUSTER MCD5 Programmable Thermostat User Manual

TCS SZ1051 Communicating Thermostat User Guide

BAXI uSense 2 Wired Smart Thermostat Gateway Installation Guide
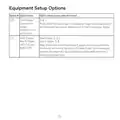
Table of Contents
- 1. T5 Smart Thermostat - Following Schedule →
- 2. Included In Your Box: - Quick Install Guide →
- 3. Get The Most From T5 Smart Thermostat - Multiple Programming... →
- 4. Tools You Will Need - To Install Your Thermostat And Photogr... →
- 5. Caution: Electrical Hazard - Caution: Equipment Damage Hazar... →
- 6. Removing Your Old Thermostat - Turn Power Off →
- 7. Make Sure There Are No 120/240v Wires - Take A Picture Of Ho... →
- 8. Record If You Have Wires In The Following Terminals - Write ... →
- 9. Disconnect The Wires And Remove The Old Wall Plate - Use A S... →
- 10. Installing Your T5 Smart Thermostat - Mounting →
- 11. Bundle And Insert Wires Through The Uwp - Insert The Wall An... →
- 12. Set The R-switch - Insert Wires Into The Inner Holes →
- 13. Connect Remaining Wires From Step 8 - Mount The Uwp And Clos... →
- 14. Attach Your Thermostat - Turn Your Power On →
- 15. Setup With Resideo App - Start Setup With The App →
- 16. How To Use Your Resideo App - Access The Menu →
- 17. How To Use Your T5 Smart Thermostat - Mode →
- 18. Manual Setup - Start Manual Setup →
- 19. Finish Setup - Setup Wi-fi →
- 20. Equipment Setup Options - System Type →
- 21. Equipment Setup Options - Cool Stages/compressor Stages →
- 22. Frequently Asked Questions - Will The T5 Smart Thermostat St... →
- 23. Thermostat - Following Schedule →
- 24. Inclus Dans Cette Boîte : →
- 25. Tirez Le Maximum De Votre Thermostat Intelligent T5 - Plusie... →
- 26. Outils Requis - Application Resideo →
- 27. Mise En Garde : Risque De Choc Électrique - Mise En Garde : ... →
- 28. Retrait De Lancien Thermostat - Coupez Lélectricité →
- 29. Assurez-vous Quaucun Fil De 120/240 V Nest Présent - Prenez ... →
- 30. Notez La Présence De Fils Dans Les Bornes Suivantes - Notez ... →
- 31. Débranchez Les Fils Et Retirez Lancienne Plaque Murale - Uti... →
- 32. Installation De Votre Thermostat Intelligent T5 - Système De →
- 33. Regroupez Et Insérez Les Fils Dans Le Système De Montage Uwp... →
- 34. Réglez La Position Du Contacteur R - Insérez Le Ou Les Fils ... →
- 35. Connectez Les Fils Restants De Létape 8 - Montez Le Système ... →
- 36. Attachez Le Thermostat - Rétablissez Lalimentation →
- 37. Configuration Avec Lapplication Resideo - Commencez La Confi... →
- 38. Utilisation De Votre Application Resideo - Accéder Au Menu →
- 39. Utilisation De Votre Thermostat Intelligent T5 - Température... →
- 40. Configuration Manuelle - Commencez La Configuration Manuelle →
- 41. Terminez La Configuration - Configurez Le Wi-fi →
- 42. Options De Configuration De Léquipement - Type De Programme →
- 43. Options De Configuration De Léquipement - Étages De Refroidi... →
- 44. Foire Aux Questions - Fonctionnement Du Thermostat Intellige... →
- 45. Termostato Inteligente T5 - Termostato Programable →
- 46. Esta Caja Incluye: Guía De Instalación Rápida, Tornillos Y T... →
- 47. Aproveche Al Máximo El Termostato Inteligente T5 - Múltiples... →
- 48. Herramientas Que Necesitará - Para Instalar →
- 49. Precaución: Peligro De Descarga Eléctrica - Precaución: Ries... →
- 50. Extracción Del Termostato Existente - Desconecte El Suminist... →
- 51. Asegúrese De Que No Haya Cables De 120/240 V - Tome Una Foto... →
- 52. Registre Si Tiene Cables En Las Siguientes Terminales - Escr... →
- 53. Desconecte Los Cables Y Retire La Placa De Pared Existente -... →
- 54. Instalación De Su Termostato Inteligente T5 - Sistema De →
- 55. Agrupe E Inserte Los Cables A Través De La Uwp - Inserte Los... →
- 56. Establezca La Posición Del Interruptor R - Inserte Los Cable... →
- 57. Conecte Los Cables Restantes Del Paso 8 - Monte La Uwp Y Cie... →
- 58. Instale El Termostato - Conecte La Energía Eléctrica →
- 59. Configurar Usando La Aplicación Resideo - El Termostato Está... →
- 60. Cómo Usar La Aplicación Resideo - Acceso Al Menú →
- 61. Cómo Usar El Termostato Inteligente T5 - Temperatura Deseada →
- 62. Configuración Manual - Inicie El Modo De Configuración Manua... →
- 63. Configuración Manual (continuación) - Finalice La Configurac... →
- 64. Opciones De Configuración Del Equipo - Tipo De Sistema →
- 65. Opciones De Configuración Del Equipo - Etapas De Refrigeraci... →
- 66. Preguntas Frecuentes - El Termostato Inteligente T5 Sigue Fu... →