
Home > Emerson > EMERSON 1D56-310 White-Rodgers Low Voltage Horizontal Mounting Thermostat Instruction Manual
EMERSON 1D56-310 White-Rodgers Low Voltage Horizontal Mounting Thermostat Instruction Manual


Factory-Installed Jumper
RH
W
B
O
Y
G
RC
A
SET HEAT ANTICIPATOR
5
Heat
Relay
Compressor
Relay
Fan
Relay
Hot
Set anticipator to match the setting of your old thermostat you noted in Step 3, or, the
anticipatorshouldbesettomatchthecurrentratingstampedonyourmainheatingcontrol.
Theheatanticipatorisadjustablefrom0.15to1.2amps.Adjusttheanticipatorbyrotating
thecontactarm(seefig.5).Theanticipatorsettingisindicatedbythenumbersonthebase
that the pointer points to. If you are unsure where to set the anticipator contact the heater
24 VAC
120 VAC
Neutral
TRANSFORMER
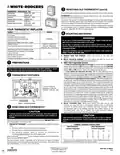
Figure 2. Typical wiring for single transformer heating/cooling system
manufacturer for a recommended setting.
Rotate contact arm
to adjust heat anticipator
RH
W
B
A
O
Y
G
RC
Move the pointer counterclockwise to
TRANSFORMER
Hot
TRANSFORMER
Hot
Heat
Relay
Compressor
Relay
Fan
Relay
lengthen heating system cycles; move
clockwise to shorten heating cycles.
Adjustments should not be greater than
1/2 marking at a time.
24 VAC
24 VAC
120 VAC
Neutral
120 VAC
Neutral
Figure 3. Typical wiring for two-transformer heating/cooling system
Snap on Cover: Carefully align the cover
Factory-Installed Jumper
Field-Installed Jumper
with the base and snap the cover onto
Arrow points to the
current rating of
the primary control
RC
G
RH
O
W
Y
B
A
the base.
TRANSFORMER
Hot
Fan
Relay
Compressor
Relay
*
* *
24 VAC
120 VAC
Neutral
Figure 5. Anticipator adjustment
Terminal energized
in cooling
Terminal energized
in heating
*
* *
NEWTHERMOSTATOPERATION
6
Figure 4. Typical wiring for single transformer, single stage heat pump system
This thermostat is easy to operate. After power is turned on, use the system switch to
select either heating or cooling, or to turn the heating/cooling system off. Use the fan
switch to control fan operation. When the fan switch is in the AUTO position, the fan will
cycle with the heating or cooling system (the fan will not run if the system switch is in the
OFF position and the fan switch is in the AUTO position). When the fan switch is in the
ON position, the fan will run continuously, regardless of system switch position (even if
the system switch is set to OFF, the fan will run if the fan switch is in the ON position).
SPECIFICATIONS
7
ELECTRICAL DATA
Switch Rating...................................... 24 VAC (30 VAC max.)
Heating ................................................. 0.15 to 1.2 Amps
Cooling ................................................. 0 to 1.5 Amps
Anticipator Rating:
Heating ................................................. Adjustable from 0.15 to 1.2 Amps
Cooling ................................................. Fixed
THERMAL DATA:
Temperature Range ............................ 50°F to 90°F (10°C to 32°C)
Operating Humidity Range ................ 0 – 90% noncondensing
TROUBLESHOOTING
8
Symptom
Possible Cause
Corrective Action
No Heat/No Cool/No Fan
(common problems)
1. Blown fuse or tripped circuit breaker.
2. Furnace power switch to OFF.
Replace fuse or reset breaker.
Turn switch to ON.
3. Furnace blower compartment door or
panel loose or not properly installed.
Replace door panel in proper position to engage
safety interlock or door switch.
No Heat
1. Pilot light not lit.
Re-light pilot.
2. Broken or melted anticipator wire.
Excessive current or dead short in system. Have a qualified service person check the system before
replacing thermostat.
3. Loose connection to thermostat or system.
Verify thermostat and system wires are securely attached.
4. Thermostat or heating system requires
replacement or service.
Your furnace manufacturer or service person can describe how to test the heating system to verify it is
operating correctly. If the heating system is capable of operation and the no heat condition persists,
replace the thermostat.
5. System Switch not set to Heat.
1. Furnace Lock-Out Condition
Set System Switch to Heat and raise temp above room temp.
Intermittent Heat
No Cool
Many furnaces have safety devices that shut the system down when a lock-out condition occurs. If the heat works
intermittently contact the furnace manufacturer or local service person for assistance.
1. Loose connection to thermostat or system.
Verify thermostat and system wires are securely attached.
2. Thermostat or cooling system requires
replacement or service.
Your cooling system manufacturer or service person can describe how to test the cooling system to verify it
is operating correctly. If the cooling system is capable of operation and the no cooling condition persists,
replace the thermostat.
3. System Switch not set to Cool.
Set System Switch to Cool and lower temp below room temp.
Heat, Cool or Fan Runs
Constantly.
1. Possible short in wiring.
Check each wire connection to the thermostat to verify it is neatly looped under the terminals. No extra
wire should stick out from under the terminals.
2. Possible short in thermostat.
3. Possible short in heat/cool/fan system.
Furnace Cycles Too Fast
or Too Slow Narrow or
wide temperature swing
See Step 5, Adjusting the Anticipator.
The anticipation setting is the only adjustment that effects the heating cycle rate. If an acceptable cycle rate
is not achieved using the anticipator contact a local service person for additional suggestions. The location of
the thermostat, size of the Heat/Cool System and current draw can influence the cycle rate.
Cooling Cycles Too Fast
or Too Slow (narrow or
wide temperature swing)
1. Poor thermostat location for sensing room
temperature.
The cycle rate for cooling can not be adjusted. The location of the thermostat, size of the Cool system and
current draw can influence the cycle rate. Contact a local service person for suggestions.
2. Cooling system over or undersized.
3. Excessive Current draw influencing thermostat.
Thermostat Setting and
Thermostat Thermometer
Disagree
1. Thermostat thermometer setting requires
adjustment.
The thermometer can be adjusted by using a standard slotted screwdriver. Turn the thermometer pointer
screw located inside the front cover to change the setting. For calibrating the setting lever contact a local
heating and cooling service person.
2. Thermostat setting lever requires calibration.
Adjusting Thermometer
1. Thermostat thermometer disagrees with
other room thermometers.
The thermometer on the thermostat is accurately calibrated at our factory but you can adjust it by using a
standard slotted screwdriver. Turn the thermometer pointer screw located inside the front cover to change
the setting.
The Emerson logo is a
trademark and service mark
of Emerson Electric Co.

| General | Details |
|---|---|
| Name | EMERSON 1D56-310 White-Rodgers Low Voltage Horizontal Mounting Thermostat Instruction Manual |
| Make | Emerson |
| Language | English |
| Filetype | PDF (Download) |
| File size | 0.1 MB |
 (1 votes, average: 5.00 out of 5)
 Loading...

EMERSON ST75W Sensi Touch Wi-Fi Smart Thermostat Installation Guide

EMERSON Thermostat Common Wire Kit SA11 Instruction Manual

EMERSON 1F75H-21PR Programmable Heat Pump Thermostat Instruction Manual

EMERSON 1F75C-11PR Programmable Thermostat Installation Guide

EMERSON Programmable Touchscreen Thermostat Setup in E2 and Site Supervisor User Guide

EMERSON 1F76U-22WFB Series Sensi Lite Smart Thermostat Installation Guide

EMERSON 1F87U-42WF Sensi Smart Thermostat User Guide

EMERSON 1F83C-11NP Single Stage Thermostat Owner’s Manual

EMERSON 1F75P-21PR Display Thermostat Instruction Manual

EMERSON 1F75H-21NP Non Programmable Heat Pump Thermostat Instruction Manual


TRANE XR102 Non-Programmable Thermostat User Guide

HITACHI ATW-RTU-11 Wireless Thermostat Instruction Manual

GENERAL LIFE MITRA 230S Digital Room Thermostat User Manual

Danfoss AN527449268065en-000101 Thermostat Instruction Manual

DAEMA ELECTRONIC DFZ-1310SL 130L Freezer with Adjustable Thermostat Owner’s Manual

alza WT410 Thermostat User Manual

EUROTRONIC COMET Programmable Energy Saving Radiator Thermostat User Manual

Pfannenberg DTS 3041 Thermostat Instructions

Danfoss TPOne-RF Electronic Programmable Room Thermostat Installation Guide

Smartica HY607B 3A Zig Bee Thermostat User Manual