Home > Danfoss > Danfoss RET1000 Series Electronic Thermostat User Guide

Danfoss RET1000 Series Electronic Thermostat User Guide
RET1000 B/M/MS  
Electronic dial setting thermostat  
User Guide  
Danfoss Heating  
GeneralDetails
NameDanfoss RET1000 Series Electronic Thermostat User Guide
MakeDanfoss
LanguageEnglish
FiletypePDF (Download)
File size0.42 MB
Download PDF
1 Star2 Stars3 Stars4 Stars5 Stars (1 votes, average: 5.00 out of 5)
Loading...
Danfoss RET-MD Electronic Intelligent Dial Setting Thermostat Installation Guide
Danfoss VICUQ24M Icon Programmable II Room Thermostat Installation Guide
Danfoss MBC 8000, MBC 8100 Heavy Duty Thermostat Installation Guide
Danfoss UT 72-UT 73 Universal Thermostat Installation Guide
Danfoss ECtemp 530 Electronic Thermostat Installation Guide
Danfoss 014G0251 Eco Radiator Thermostat User Guide
Danfoss 014G0013 Z Wave Radiator Thermostat Installation Guide
Danfoss RET230P Electronic Thermostat Instruction Manual
Danfoss TP7000 Range Electronic 7 Day Programmable Room Thermostat Installation Guide
Danfoss CET B-RF Wireless Electronic Hot Water Cylinder Thermostat Installation Guide

Danfoss RET1000 Series Electronic Thermostat User Guide

Get the free PDF manual for the Danfoss RET1000 Series Electronic Thermostat User Guide and access setup steps, usage instructions, and troubleshooting tips. 👉 View online or download now to keep your thermostat running smoothly!
Danfoss RET1000 Series Electronic Thermostat User Guide Overview
Summary of Contents

  • Page 1: Electronic dial setting thermostat User guide
  • Page 2: For a large print version of these instructions, please call Marketing. Danfoss can accept no responsibility for possible errors in catalogues, brochures, and other printed material. All trademarks in this material are property of the respective companies. Danfoss and the Danfoss logotype are trademarks of Danfoss A/S. All rights reserved.
  • Page 3: Thank you for buying a Danfoss product. Vielen Dank für den Kauf eines Produkts von Danfoss. Tak, fordi du valgte et produkt fra Danfoss. Le agradecemos que haya comprado un producto de Danfoss. Merci d’avoir choisi un produit Danfoss. Hartelijk dank voor de aanschaf van een Danfoss-product. Благодарим вас за приобретение продукции Danfoss. Bir Danfoss ürünü satın aldığınız için teşekkür ederiz. Danfoss Heating.
  • Page 4: What is a room thermostat? A room thermostat simply switches the heating system on and off as necessary. It works by sensing the air temperature, switching on the heating when the air temperature falls below the thermostat setting, and switching it off once this set temperature has been reached. Turning a room thermostat to a higher setting will not make the room heat up any faster. How quickly the room heats up depends on the design of the heating system, for example, the size of boiler and radiators. Neither does the setting affect how quickly the room cools down. Turning a room thermostat to a lower setting will result in the room being controlled at a lower temperature, and saves energy.
  • Page 5: The heating system will not work if a timeswitch or programmer has switched it off. The way to set and use your room thermostat is to find the lowest temperature setting that you are comfortable with, and then leave it alone to do its job. The best way to do this is to set the room thermostat to a low temperature – say 18°C – and then turn it up by one degree each day until you are comfortable with the temperature. Any adjustment above this setting will waste energy and cost you more money. If your heating system is a boiler with radiators, there will usually be only one room thermostat to control the whole house. You can have different temperatures in individual rooms by installing thermostatic radiator valves (TRVs) on individual radiators. If you don’t have TRVs, you should choose a temperature that is reasonable for the whole house. Room thermostats need a free flow of air to sense the temperature, so they must not be covered by curtains or blocked by furniture. Nearby electric fires, televisions, wall or table lamps may prevent the thermostat from working properly.
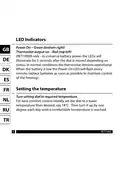
  • Page 6: LED indicators show the status of the device. Power on is indicated by a green light. Thermostat output on is indicated by a red light. To conserve battery power, the LEDs will illuminate for 5 seconds after the dial is moved. When the battery is low, the power on LED will flash every minute. Replace batteries as soon as possible to maintain control of the heating. To set the temperature, turn the setting dial to the required temperature. For best comfort control, initially set the dial to a lower temperature, such as 18°C. Increase the temperature by one degree each day until a comfortable level is reached.
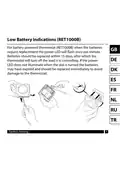
  • Page 7: Low battery indications for the RET1000B thermostat are important to note. When the batteries require replacement, the power LED will flash once per minute. Batteries should be replaced within 15 days to prevent the thermostat from turning off the load it controls. If the power LED does not illuminate when the dial is turned, the batteries may have expired and should be replaced immediately to avoid damage to the thermostat.
  • Page 8: LED displays Power on – Green (bottom right) Thermostat output on – Red (top left) For RET1000B, the LED lights up for 5 seconds after changing the setting, depending on the status. In normal operation, the thermostat remains functional. When the batteries are low, the power on LED blinks once per minute. Replace the batteries as soon as possible to avoid affecting the heating system control. Setting the temperature Turn the dial to the desired temperature. For optimal comfort, it is recommended to set the temperature initially to a lower level, e.g., 18 °C. Increase it by one degree per day until the rooms reach a comfortable temperature.
  • Page 9: Anzeige Batterieladezustand niedrig (RET1000B) Bei einem batteriebetriebenen Thermostat blinkt die Power On LED-Anzeige einmal pro Minute auf, wenn die Batterien ersetzt werden müssen. Die Batterien sollten innerhalb von 15 Tagen ersetzt werden, danach stellt der Thermostat die von ihm geregelten Einstellungen ab. Wenn die Power On LED beim Drehen des Reglers nicht aufleuchtet, sind die Batterien möglicherweise leer und müssen umgehend ersetzt werden, um Schäden am Thermostat zu vermeiden.
  • Page 10: LED-indikatorer On - grøn lampe (nederst til højre) Termostatudgang til - rød lampe (øverst til venstre) For at bevare strømmen på batteriet lyser LED’erne op i 5 minutter, når drejehjulet er flyttet, afhængigt af status. Under normale forhold forbliver termostaten i driftstilstand. Hvis batteriet er lavt, blinker LED-lampen for tændt hvert minut. Udskift batterierne hurtigst muligt for at bevare kontrollen med varmen. Drej indstillingshjulet til den påkrævede temperatur. For at opnå den bedste komfort indstilles drejehjulet først til en lavere temperatur end den ønskede, eksempelvis 18 °C. Herefter hæves temperaturen med en enkelt grad hver dag, indtil man finder det optimale niveau.
  • Page 11: Indikatorer for lav batteristand (RET1000B) For batteridrevne termostater blinker LED-indikatoren for batteriniveau en gang i minuttet, når batterierne skal udskiftes. Batterierne skal udskiftes inden for 15 dage, hvorefter termostaten slukker for den enhed, som den styrer. Hvis LED-indikatoren for batteriniveau ikke lyser, når hjulet drejes, kan batterierne være flade, og de skal udskiftes straks for at undgå at beskadige termostaten.
  • Page 12: Indicadores LED Encendido: verde (abajo a la derecha) Demanda de calefacción: rojo (arriba a la izquierda) Para conservar la carga de las pilas, los LED se iluminan durante 5 segundos después de que se mueva el dial. Cuando la carga de las pilas es baja, el LED de encendido parpadea una vez por minuto. Cambie las pilas lo antes posible para mantener el control de la calefacción. Ajuste de la temperatura Gire el dial a la temperatura deseada. Para un mejor control del confort, ajuste el dial a una temperatura inferior a la deseada. Auméntela en un grado cada día hasta alcanzar una temperatura agradable.
  • Page 13: Indicación de batería baja (RET1000B) El LED de encendido parpadeará una vez por minuto para indicar que es necesario sustituir las pilas. Las pilas deben sustituirse en un plazo de 15 días. De lo contrario, el termostato desactivará la carga que controla. Si el LED de encendido no se enciende al girar el dial, es posible que las pilas se hayan agotado. Es necesario sustituirlas de inmediato para evitar dañar el termostato.
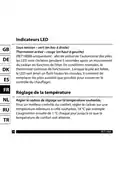
  • Page 14: Indicateurs LED Sous tension – vert (en bas à droite) Thermostat activé – rouge (en haut à gauche) Les LED vont s’éclairer pendant 5 secondes après un mouvement du cadran en fonction de l’état. Lorsque la pile est faible, le LED vert émet un flash toutes les minutes. Il convient de remplacer les piles aussitôt que possible pour conserver le contrôle du chauffage. Réglage de la température Régler le cadran de réglage sur la température souhaitée. Pour un meilleur contrôle du confort, régler le cadran sur une température inférieure à celle souhaitée. L’augmenter ensuite de 1 °C chaque jour jusqu’à ce que la température de confort soit atteinte.
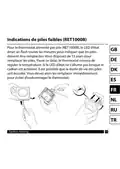
  • Page 15: Indications de piles faibles pour le thermostat RET1000B. Le LED d’état émet un flash toutes les minutes pour indiquer que les piles doivent être remplacées. Vous disposez de 15 jours pour remplacer les piles. Passé ce délai, le thermostat cessera de réguler la température. Si le LED d’état ne s’allume pas lorsque le cadran est actionné, il est possible que la durée de vie des piles soit écoulée. Vous devez alors les remplacer immédiatement pour éviter d’endommager le thermostat.
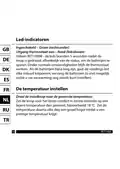
  • Page 16: Led-indicatoren Ingeschakeld – Groen (rechtsonder) Uitgang thermostaat aan – Rood (linksboven) Alleen RET1000B - de leds branden 5 seconden nadat de knop is gedraaid, afhankelijk van de status, om de batterijen te sparen. Als de batterijen bijna leeg zijn, gaat de voedings-led elke minuut knipperen; vervang de batterijen zo snel mogelijk. De temperatuur instellen Draai de instelknop naar de gewenste temperatuur. Zet de knop voor het beste comfort in eerste instantie op een lagere temperatuur dan gewenst, bijvoorbeeld 18 °C. Zet de temperatuur daarna elke dag een graad hoger totdat u een prettige temperatuur krijgt.
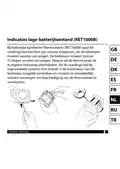
  • Page 17: Indicaties lage-batterijtoestand (RET1000B) Bij batterijaangedreven thermostaten (RET1000B) gaat de voedings-led een keer per minuut knipperen, als de batterijen moeten worden vervangen. De batterijen moeten binnen 15 dagen worden vervangen. Daarna zal de thermostaat de te regelen belasting uitschakelen. Als de voedings-led bij ingeschakeld systeem niet brandt, is de levensduur van de batterijen mogelijk verstreken. De batterijen moeten onmiddellijk worden vervangen om beschadiging van de thermostaat te voorkomen.
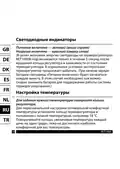
  • Page 18: Светодиодные индикаторы Питание включено — зеленый (внизу справа) Нагрузка включена — красный (сверху слева) В целях экономии энергии светодиоды на терморегуляторах RET1000B подсвечиваются только в течение 5 секунд после вращения кольца регулятора. При низком заряде батареи светодиод «Питание включено» будет загораться каждую минуту. Необходимо как можно скорее заменить батареи для поддержания работы системы терморегулирования. Настройка температуры Для задания нужной температуры поверните кольцо регулятора. Для первоначальной настройки оптимальной комфортной температуры установите кольцо терморегулятора в положение с низкой температурой, например 18 °C. Поворачивайте кольцо, увеличивая температуру каждый день на один градус, пока не достигнете наиболее комфортной для вас температуры.
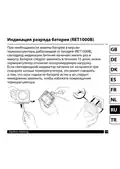
  • Page 19: Индикация разряда батареи (RET1000B) Светодиод индикации питания начинает мигать раз в минуту при необходимости замены батарей. Батареи следует заменить в течение 15 дней, иначе терморегулятор отключит контролируемую нагрузку. Если светодиодный индикатор питания не загорается, это может говорить о том, что срок годности батарей истек. Необходимо немедленно заменить батареи, чтобы избежать повреждения терморегулятора.
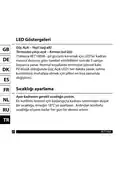
  • Page 20: LED göstergeler Güç açık – Yeşil (sağ alt) Termostat çıkışı açık – Kırmızı (sol üst) Pil gücünü korumak için LED’ler mevcut duruma göre hareket ettirildiğinden sonraki 5 saniye boyunca yanar. Normal koşullarda termostat işlevsel kalır. Pil düşük olduğunda güç açık LED’i her dakikada yanar. Isıtma kontrolünü muhafaza etmek için pilleri en kısa zamanda değiştirin. Sıcaklığı ayarlama Ayar kadranını gerekli sıcaklığa çevirin. En konforlu kontrol için başlangıçta kadranı istenenden düşük bir sıcaklığa ayarlayın. Ardından konforlu sıcaklığa erişene kadar her gün bir derece artırın.
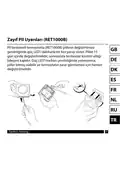
  • Page 21: Zayıf pil uyarıları (RET1000B) Pil beslemeli termostatta pillerin değiştirilmesi gerektiğinde güç LED’i dakikada bir kez yanıp söner. Piller 15 gün içinde değiştirilmelidir, sonrasında termostat kontrol ettiği bileşeni kapatır. Güç LED’i kadran çevrildiğinde yanmıyorsa, piller bitmiş olabilir ve termostatın zarar görmemesi için hemen değiştirilmelidir.
  • Page 22: Page 22
  • Page 23: Page 23
  • Page 24: Page 24