
Danfoss 014G0013 Z Wave Radiator Thermostat Installation Guide


MAKING MODERN LIVING POSSIBLE
UK
DK
Preparation
Z-wave info
Indledende trin
living connect® Z is an electronic radiator thermostat, in-
tended for use with water based room radiators. It can
be controlled by a Z-Wave certified controller, which
supports the appropriate command classes.
living connect® Z er en elektronisk radiatortermostat
beregnet til brug med vandbaserede radiatorer. Den kan
styres af en Z-Wave-certificeret styreenhed, der under-
støtter de relevante kommandoklasser.
Device type
SDK
Slave
4.55
1.01
4
Software version
ProduktID
Explorer frames
YES
Z-Wave
controller
Z-Wave controller
Implemented Z-Wave device classes
Z-Wave
Device Class
Device Classes
Implemented
Generic device
Specific device
GENERIC_TYPE_THERMOSTAT
SPECIFIC_TYPE_SETPOINT_THERMOSTAT
living connect® Z sensor
living connect® Z
sensor
Supported and controlled
Z-Wave command classes
living connect® Z leveres med adaptere til Danfoss RA-
ventiler og ventiler med M30 x 1,5 (K)-tilslutninger, 2 stk.
AA alkaline batterier og en 2 mm unbrakonøgle.
living connect® Z is supplied with adapters for Danfoss
RA valves and valves with M30 x 1.5 (K) connections,
two alkaline AA batteries and a 2 mm Allen key.
living connect® Z
Installation Guide
Z-Wave Command
Classes Supported
Description
Danfoss Heating Solutions
Get current battery status of
living connect®.
COMMAND_CLASS_BATTERY
Isætning af batterier
Fjern batteridækslet, og sæt to AA bat-
terier i. Sørg for, at batterierne vender
rigtigt.
Control a temperature
offset to the thermostat
COMMAND_CLASS_CLIMATE_ setpoint of living connect®.
Inserting the batteries
Remove the battery cover and insert two
AA batteries. Make sure the batteries are
correctly oriented.
Implementerede Z-Wave-enhedsklasser
CONTROL_SCHEDULE
The temperature offset is
defined by schedules and
schedule overrides.
Der må ikke anvendes genopladelige
batterier.
Z-Wave
Enhedsklasse
Implementeret
GENERIC_TYPE_THERMOSTAT
SPECIFIC_TYPE_SETPOINT_THERMOSTAT
Enhedsklasser
Generisk enhed
Specifik enhed
Rechargeable batteries must not be
used.
Ved udskiftning af batterierne bevares programindstil-
lingerne, men efter to minutter nulstilles indstillingerne
for tid og dato.
Set or get the current living
connect® clock.
COMMAND_CLASS_CLOCK
When replacing batteries the programme settings will
be preserved, but after two minutes the settings for
time and date are reset.
COMMAND_CLASS_
MANUFACTURER_SPECIFIC
Get manufacturer ID of
system.
Understøttede og styrede
Z-Wave-kommandoklasser
A special Z-Wave command
used by living connect® to
encapsulate multiple com-
mands in one command
and thereby conserve
battery life.
Montering af living connect® Z
M skal blinke på displayet, før montering kan foretages.
RA
1. Start med at montere den
COMMAND_CLASS_MUL-
TI_CMD
Z-Wave-kommando
Understøttede klasser
Beskrivelse
K
Installing living connect® Z
M must be flashing on the display prior to installing.
RA
1. Start by mounting the ap-
korrekte adapter.
COMMAND_CLASS_
BATTERY
Se den aktuelle batteristatus for
living connect®.
K
Set or get living connect®
local protection mode.
Possible local protection
values are:
0 = no protection
2 = fully locked (tamper-
proof)
Indstiller et temperatur-offset til
termostatsætpunktet for living
connect®. Dette temperatur-
offset defineres af tidsplaner og
tilsidesættelser af tidsplaner.
2. Spænd RA-adapteren med
unbrakonøglen. Spænd
K-adapteren med hånden
(maks. 5 Nm).
propriate adapter.
COMMAND_CLASS_
CLIMATE_CONTROL_
SCHEDULE
COMMAND_CLASS_PROTEC-
TION
2. Tighten RA adapter using
the Allen key, hand-tighten
the K adapter (max. 5 Nm).
3. Skru termostaten på
adapteren, og spænd med
hånden (maks. 5 Nm).
Indstil eller hent det aktuelle
living connect®-ur.
COMMAND_CLASS_CLOCK
Set or get current thermo-
stat setpoint of living con-
nect®. Heating setpoint is
the only supported setpoint
type.
COMMAND_CLASS_
MANUFACTURER_SPECIFIC
3. Screw the thermostat onto
the adapter and tighten by
hand (max. 5 Nm).
Hent systemets producent-id.
COMMAND_CLASS_THERMO-
STAT_SETPOINT
En særlig Z-Wave-kommando,
der bruges af living connect®
til at sammenfatte flere kom-
mandoer i én kommando for at
reducere batteriforbruget.
4. Et stort M blinker, tryk på
for at fastgøre termo-
staten.
COMMAND_CLASS_
MULTI_CMD
Get version of product and
command classes.
4. A large M flashes, press
to fix the thermostat.
COMMAND_CLASS_VERSION
COMMAND_CLASS_WAKE_UP
Tilmelding af termostaten til et netværk
A special Z-Wave command
used by living connect® to
synchronize communica-
tion with its controller.
Indstil eller hent lokal beskyt-
telsestilstand (børnesikring) for
living connect®. Mulige værdier
for lokal beskyttelse er:
Including the device to a network
COMMAND_CLASS_
PROTECTION
0 = ingen beskyttelse
2 = fastlåst (kan ikke manipuleres)
Indstil eller hent det aktuelle
termostatsætpunkt for living
connect®. Opvarmningssætpunkt
er den eneste understøttede
sætpunktstype.
Technical requirements and info
• After a succesful inclusion the controller must send
a WAKE_UP_INTERVAL_SET command to living con-
nect® Z in order to specify where and when living
connect® Z should communicate wirelessly. If not, the
thermostat cannot perform wake ups and the alarm
and antenna symbols will flash.
• The nodeID set in the WAKE_UP_INTERVAL_SET com-
mand must be for a permanently listening device
which reponds to the commands sent from living
connect® Z. This means PC’s with USB sticks will only
work if the PC is never turned off.
• If living connect® Z does not get correct and timely
replies (e.g. if the controller is turned of) it will auto-
matically switch to 30 minutes wake up intervals. If
at next wake up the controller replies as expected,
living connect® Z will switch back to the original wake
up interval.
• After sending the WAKE_UP_INTERVAL_SET com-
mand, the controller must assign return routes, so
living connect® Z can reach its destination, i.e. the no-
deID set in the WAKE_UP_INTERVAL_SET command.
• living connect® Z will not commence its periodic com-
munications if it is in “Mounting mode”. “Mounting
mode”is for physical installation and should not be
confused with “Inclusion”. Please see section “Install-
ing living connect® Z, item 4”for instructions on how
to leave “Mounting mode”.
COMMAND_CLASS_
THERMOSTAT_SETPOINT
Z-wave
controller
Z-wave
controller
COMMAND_CLASS_
VERSION
Hent produktversion og version
for kommandoklasser.
• Sørg for, at living connect® Z er nulstillet til fabriksstan-
darden.
• Aktivér “Tilmelding”på Z-Wave-styreenheden.
living connect® Z.
• Processens status vises på både styreenheden og living
En særlig Z-Wave-kommando,
der bruges af living connect® til
at synkronisere kommunikation
med dens styreenhed.
COMMAND_CLASS_
WAKE_UP
• Ensure living connect® Z is factory reset.
• Activate “Inclusion”on the Z-Wave controller.
• Quickly press and release
• Observe both controller and living connect® Z for
• Tryk kortvarigt på
on living connect® Z.
connect® Z.
status of the process.
Tekniske krav og oplysninger
Test af forbindelse
• Efter en vellykket tilmelding skal styreenheden sende
en WAKE_UP_INTERVAL_SET-kommando til living con-
nect® Z for at angive, hvor og hvornår living connect® Z
skal kommunikere trådløst. Hvis ikke, kan termostaten
ikke udføre aktiveringer, og alarmsymbolet og
antennesymbolet blinker.
• Node-id’et indstillet i WAKE_UP_INTERVAL_SET-
kommandoen skal være til en permanent lytteenhed,
der reagerer på kommandoer sendt fra living connect®
Z. Det betyder, at pc’er med USB-stik kun fungerer, hvis
pc’en aldrig slukkes.
• Hvis living connect® Z ikke får korrekte og rettidige
svar (f.eks. hvis styreenheden er slukket), skifter den
automatisk til 30 minutters aktiveringsintervaller. Hvis
styreenheden ved næste aktivering svarer som forven-
tet, skifter living connect® Z tilbage til det oprindelige
aktiveringsinterval.
• Efter afsendelse af kommandoen WAKE_UP_INTER-
VAL_SET skal styreenheden tildele returruter, så living
connect® Z kan nå sin destination, dvs. det- node-id, der
er angivet i kommandoen WAKE_UP_INTERVAL_SET.
• living connect® Z påbegynder ikke regelmæssig kom-
munikation, hvis den er i “Monteringstilstand”. “Monte-
ringstilstand”bruges ved fysisk installation og må ikke
forveksles med “Tilmelding”. Se afsnittet “Montering
af living connect® Z, punkt 4”for vejledning i, hvordan
man forlader “Monteringstilstand”.
Tryk på
M vises.
i mindst 3 sekunder, indtil
Testing the connection
Press
is displayed.
for at least 3 seconds until M
Tryk på , indtil LI vises.
Tryk på
for at teste forbindelsen.
Press until LI is displayed.
LI forsvinder, når forbindelsen er
oprettet.
Press
to test the connection.
Hvis forbindelsen ikke oprettes, blinker
alarmsymbolet og antennesymbolet
.
LI disappears when the connection is
made.
If no connection can be made, the
alarm symbol and the antenna
symbol flashes.
• Although living connect® Z supports single com-
mands, multi commands must always be used to
ensure two years battery lifetime.
• If multiple thermostats are installed in the same
room, it is important that the controller ensures they
all have the same schedule and the same setpoint.
Display og knapper
Batterisymbol
Den indstillede temperatur
Netværksforbindelse
Børnesikring
Display and buttons
Battery symbol
The set temperature
Network connection
Lock
Technical specifications
• Selvom living connect® Z understøtter enkeltkomman-
doer, skal der altid bruges multikommandoer for at
sikre to års batteritid.
• Monteres der flere termostater i samme rum, er det
vigtigt, at styreenheden sikrer, at de alle har den
samme tidsplan og det samme sætpunkt.
Programmable electronic radia-
tor valve controller
Alarm
Thermostat type
Brug
til at navigere på displayet og i menuerne og
til at indstille temperaturen. Brug
bekræfte.
Recommended use
Actuator
Residential (pollution degree 2)
Electro-mechanical
Grey with back-light
A
til at vælge og
Alarm
Display
Use
to navigate the display and the menus and to
to select and confirm.
Software classification
Control
Temperaturstyring og -justering
Temperaturen styres sædvanligvis
set the temperature, and use
PID
Tekniske specifikationer
Transmission frequency
Transmission range
Power supply
868.42 MHz
Programmerbar elektronisk radia-
via styreenheden, men den kan når
som helst ændres ved hjælp af ter-
mostatens knapper.
Hvis dette gøres, sender termosta-
ten besked til styreenheden, som
derefter synkroniserer de øvrige
termostater i rummet.
18
19
20
21
Termostattype
tortermostat
up to 30 m
Temperature control and adjustment
The temperature is usually con-
Anbefalet brug
Aktuator
Bolig (forureningsgrad 2)
2 x 1.5V AA alkaline, class III
26
25
24
23
Elektromekanisk
3 µW in standby,
1.2 W when active
trolled via the controller, but may
be changed at any time using the
thermostat’s buttons.
If this is done, the thermostat sends
a message to the controller, which
then syncronises other thermo-
stats in the same room.
18
19
20
21
Power consumption
Battery life
Skærm
Grå med baggrundsbelysning
Softwareklasse
Styring
A
2 years
Tryk på
for at
26
25
24
23
PID
Battery icon will flash in display.
If battery level is critical, the
display will flash.
ændre temperaturen
Sendefrekvens
Sendeområde
Strømforsyning
Strømforbrug
Batteriets levetid
868,42 MHz
Low battery signal
op til 30 m
Frakobling af enheden fra netværket
• Aktivér “Frakobling”på Z-Wave-styreenheden.
living connect® Z.
• Processens status vises på både styreenheden og living
Press
to change
2 x 1,5 V AA alkalisk, klasse III
3 µW i standby, 1,2 W hvis aktiv
2 år
Ambient temperature
0 to 40 °C
-20 to 65 °C
90 °C
the temperature.
Transportation tempera-
ture
• Tryk kortvarigt på
Batteriikon blinker i displayet. Hvis
batteriniveauet er kritisk, blinker
displayet.
Max. water temperature
connect® Z.
Signal ved lavt batteri
Excluding the device from the network
• Activate “Exclusion”on the Z-Wave controller.
• Quickly press and release
• Observe both controller and living connect® Z for
Temperature setting range 4 to 28 °C
Measures temperature every
minute
Omgivelsestemperatur 0 til 40 °C
Measurement interval
Clock accuracy
Genmonteringstilstand
on living connect® Z.
Transporttemperatur
Maks. vandtemperatur
-20 til 65 °C
90 °C
Hvis termostaten har været ꢀernet
fra radiatoren og skal genmonteres
(efter at have været brugt), skal man
aktivere genmonteringstilstand for at
forhindre skader på termostaten.
+/- 10 min./year
status of the process.
Linear, up to 4.5 mm, max. 2 mm
on valve (1 mm/s)
Temperaturindstillings- 4 til 28 °C
område
Spindle movement
Måleinterval
Måler temperatur hvert minut
Noise level
Safety classification
Weight
<30 dBA
Re-installation mode
Urets nøjagtighed
+/- 10 min./år
Type 1
If the thermostat has been removed
from the radiator and needs to be
reinstalled (after being used), it is
necessary to activate installation
mode to prevent damage to the
thermostat.
Lineær, op til 4,5 mm, maks. 2 mm
på ventil (1 mm/s)
Sådan skifter du til genmonteringstilstand:
177 g incl. RA adapter
20
Spindelvandring
• Tryk på
• Tryk på
, indtil M vises.
for at køre spindlen tilbage. M blinker.
• Genmonter termostaten på ventilen.
IP class*
Støjniveau
Sikkerhedsklasse
Vægt
<30 dBA
Tested for safety and EMC requirements as specified in EN 60730-1,
EN 60730-2-9 and EN 60730-2-14.
Type 1
177 g inkl. RA-adapter
20
• Tryk på
i ca. 3 sekunder for at fastgøre termostaten.
IP-klasse*
Hvis termostaten flyttes til et andet rum, skal man huske
at justere styreenheden.
To enter installation mode:
Testet for sikkerhed og EMC-krav i henhold til EN 60730-1, EN
60730-2-9 og EN 60730-2-14.
Troubleshooting
• Press
• Press
until M is displayed.
to withdraw the spindle. M flashes.
Error code
Action
Nulstilling til fabriksstandard
Fjern batteridækslet, og tag det ene batteri ud. Tryk på
• Reinstall the thermostat on the valve.
E1, E2, E3, E4 Contact your local Service Technician.
Fejlfinding
• Press
for approx. 3 seconds to fix the thermostat.
The thermostat is not receiving the
expected replies from the control
system. Check that you have a Z-wave
og hold
inde i ca. 5 sekunder, og sæt samtidig batte-
Fejlkode
Udførte forbedringer
If the thermostat is moved to another room, make sure
to make the necessary changes in the controller.
riet i igen. living connect® Z er nu nulstillet til fabriksstan-
darden og i monteringstilstand.
E1, E2, E3, E4 Kontakt din lokale servicetekniker.
E5
certified controller running and it
has the necessary functionality to
control the thermostat (see“Technical
requirements”).
Termostaten modtager ikke de forven-
tede svar fra styresystemet. Kontrol-
lér, at du har en Z-wave-certificeret
styreenhed kørende, og at den har de
nødvendige funktioner til styring af
termostaten (se “Tekniske krav”).
Factory reset
Remove the battery cover and take out one battery.
Aktivering
E5
En styreenhed kan kun kommunikere med living con-
nect® Z, når enheden er aktiveret. De intervaller, hvor
termostaten er aktiveret, kan indstilles ved hjælp af
“aktiveringskommandoklassen”.
Press and hold
for approx. 5 seconds, while re-
inserting the battery. living connect® Z is now factory
reset and in mounting mode.
Safety precautions
Tryk på
for at aktivere enheden manuelt. Den vil
The thermostat is not intended for children and
must not be used as a toy.
Do not leave packaging materials where children
may be tempted to play with them, as this is ex-
tremely dangerous.
Do not attempt to dismantle the thermostat as it
contains no user-serviceable parts. If error code E1,
E2 etc. is shown in the display or other defects ap-
pear, please return the thermostat to the distributor.
være aktiveret i 10 sekunder og udsender en nodeop-
lysning.
Sikkerhedsregler
Termostaten er ikke beregnet til børn og må ikke
bruges som legetøj.
Efterlad ikke emballagen, hvor børn kan blive fristet
til at lege med den, da det er særdeles farligt.
Forsøg ikke at skille termostaten ad. Den indeholder
ikke dele, som en bruger kan reparere. Hvis fejlkode
E1, E2 osv. vises på displayet, eller hvis der opstår
andre defekter, bedes du returnere termostaten til
forhandleren.
Wake up
A controller can only communicate with living connect®
Z, when the device is awake. The intervals when the
thermostat is awake can be set using the “wake up
command class”.
Z-wave-oplysninger
Enhedstype
SDK
Slave
4,55
1.01
4
Press
to manually wake up the device. It will stay
Softwareversion
Produkt-id
awake for 10 seconds and send out a node info.
Explorer-rammer
JA


| General | Details |
|---|---|
| Name | Danfoss 014G0013 Z Wave Radiator Thermostat Installation Guide |
| Make | Danfoss |
| Language | English |
| Filetype | PDF (Download) |
| File size | 1.86 MB |
 (1 votes, average: 5.00 out of 5)
 Loading...

Danfoss RET-MD Electronic Intelligent Dial Setting Thermostat Installation Guide

Danfoss VICUQ24M Icon Programmable II Room Thermostat Installation Guide

Danfoss MBC 8000, MBC 8100 Heavy Duty Thermostat Installation Guide

Danfoss UT 72-UT 73 Universal Thermostat Installation Guide

Danfoss ECtemp 530 Electronic Thermostat Installation Guide

Danfoss 014G0251 Eco Radiator Thermostat User Guide

Danfoss RET230P Electronic Thermostat Instruction Manual

Danfoss TP7000 Range Electronic 7 Day Programmable Room Thermostat Installation Guide

Danfoss RET1000 Series Electronic Thermostat User Guide

Danfoss CET B-RF Wireless Electronic Hot Water Cylinder Thermostat Installation Guide

Danfoss 014G0013 Z Wave Manual: Questions and Answers
Danfoss 014G0013 Z Wave specifications
| Power supply | 2 x 1.5V AA alkaline, class III |
| Battery life | 2 years |
| Operating temperature | 0 to 40 °C |
| Radio frequency | 868.42 MHz |
| Wireless range | up to 30 m |
What do the M, LI, and alarm symbols mean on Danfoss 014G0013 Z Wave display?
M flashes during mounting mode and installation. LI indicates network connection status. The alarm symbol flashes when the thermostat cannot reach the controller or battery is low. Installation Guide, p. 1
How do I connect Danfoss 014G0013 Z Wave to my Z-Wave controller for the first time?
Ensure the thermostat is factory reset. Activate inclusion on the controller. Quickly press and release the button on the thermostat. Observe both devices for status confirmation.
- Ensure living connect® Z is factory reset.
- Activate Inclusion on the Z-Wave controller.
- Quickly press and release the button on living connect® Z.
- Observe both controller and thermostat for status. Installation Guide, p. 1
Can I reinstall Danfoss 014G0013 on a radiator after removing it?
Yes, but you must activate installation mode first to prevent damage. Press until M is displayed, press to withdraw the spindle, reinstall on the valve, then press for 3 seconds to fix it. Installation Guide, p. 1
Danfoss 014G0013 Z Wave compared with other Danfoss thermostats
| Specification | Danfoss 014G0013 Z Wave | Danfoss ECtemp |
|---|---|---|
| Power supply | 2 x 1.5V AA alkaline, class III | 220-240 V~, 50/60 Hz |
| Operating temperature | 0 to 40 °C | 0 ° to +30 °C |
| Radio frequency | 868.42 MHz | 2,4 - 2,483.5 GHz |
More Danfoss thermostat manuals

LUX PSP511A Series Programmable 5-2 Thermostat Instruction Manual

ENGO EASYBATB Wired Battery Thermostat User Guide

heatit WiFi TRM3 Intelligent Smart Home Thermostat User Guide
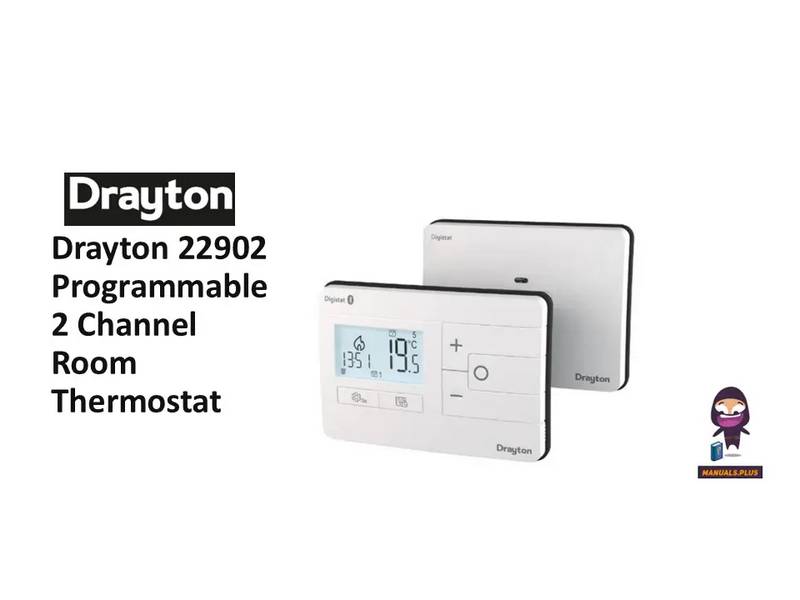
Drayton 22902 Programmable 2 Channel Room Thermostat Installation Guide

HONEYWELL RTH5160 Series Non-Programmable Thermostat Installation Guide

BEOK CONTROLS TDS72 Digital Screen Thermostat Instruction Manual

ESi Controls ESRTP4TOUCH Programmable Room Thermostat Instruction Manual
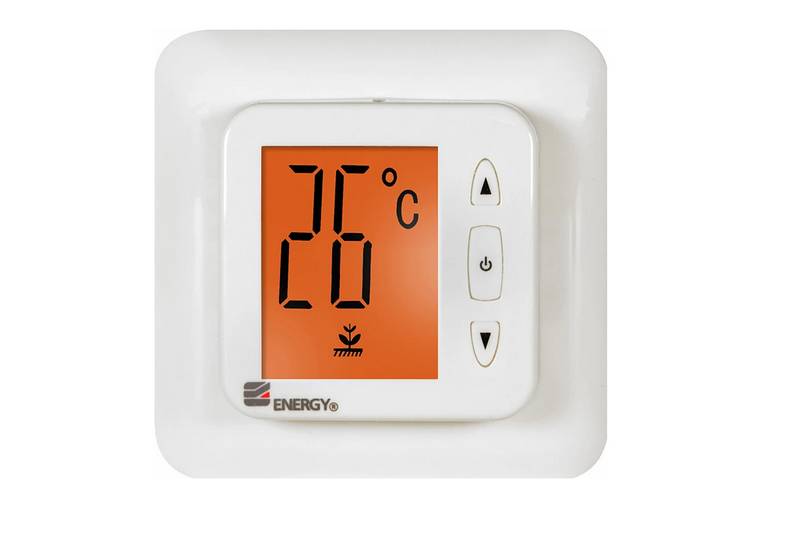
ENERGY TK02 Electronic Thermostat for Warm Floor User Manual

Coplax PH1001T Portable Electric Space Heater with Thermostat Instruction Manual

GENERAL LIFE ARUNA 302S Digital Room Thermostat User Manual