
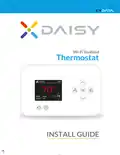
CYDATA DAISY Wi-Fi Enabled Thermostat Installation Guide


INSTALLING THERMOSTAT
Note: Wiring will be specific to each
application and may be different than
wiring shown below.
7.1 Wiring for heat pump system only.
Note: You must have a C Wire or equivalent.
a Start with the C wire and continue to match the rest of
the tags on the wires to the terminal labels.
b Loosen the screw. Insert wire on inside edge of terminal,
then tighten screw.
c Give wire a gentle tug to confirm wire is secured.
d Repeat steps a-c for remaining wires.
e Excess wire should be pushed back into opening of wall.
f
Continue to step 8 on page 5.
Note: If the old thermostat has separate
wires on AUX and E, place both wires into the
AUX/E terminal. No jumper is required.
1
Y2
W2
R
RH
Y
Y1
C
G
F
RC
W
W1
7.2
Alternate Wiring for conventional system.
R
X
4
V
Note: You must have a C Wire or equivalent.
B
C1
M
H
1 Remove metal jumper if the old thermostat had
both R and RH wires.
2 Only remove metal jumper connecting R
and RC if you must connect both R and RC.
2
DAISY Wi-Fi Programmable Thermostat / INSTALL GUIDE
4

| General | Details |
|---|---|
| Name | CYDATA DAISY Wi-Fi Enabled Thermostat Installation Guide |
| Make | CYDATA |
| Language | English |
| Filetype | PDF (Download) |
| File size | 0.37 MB |
 (1 votes, average: 5.00 out of 5)
 Loading...

CYDATA CY917B Daisy Wi-Fi Thermostat User Guide


GLOBAL CEG Series Convector with Thermostat Instruction Manual

ENGO CONTROLS E901RF Series Programmable Thermostat User Guide

STELPRO ST252NPFF Non-Programmable Electronic Thermostat Owner’s Manual

COOKING PERFORMANCE GROUP 351030208 Retrofit Thermostat Instructions

WYZE WTMSRS 3-in-1 Digital Room Sensor for Smart Thermostat User Manual

Garza 400616B Digital Thermostat User Guide
DAIKIN TRC-11 One Lite Connected Thermostat Instruction Manual

GENERAL LIFE HT330S Digital Room Thermostat User Manual

Danfoss UT 72 Thermostat Installation Guide

EMERSON Programmable Touchscreen Thermostat Setup in E2 and Site Supervisor User Guide